Aruba S2500 Series Mobility Access Switch | Installation Guide Installation | 25
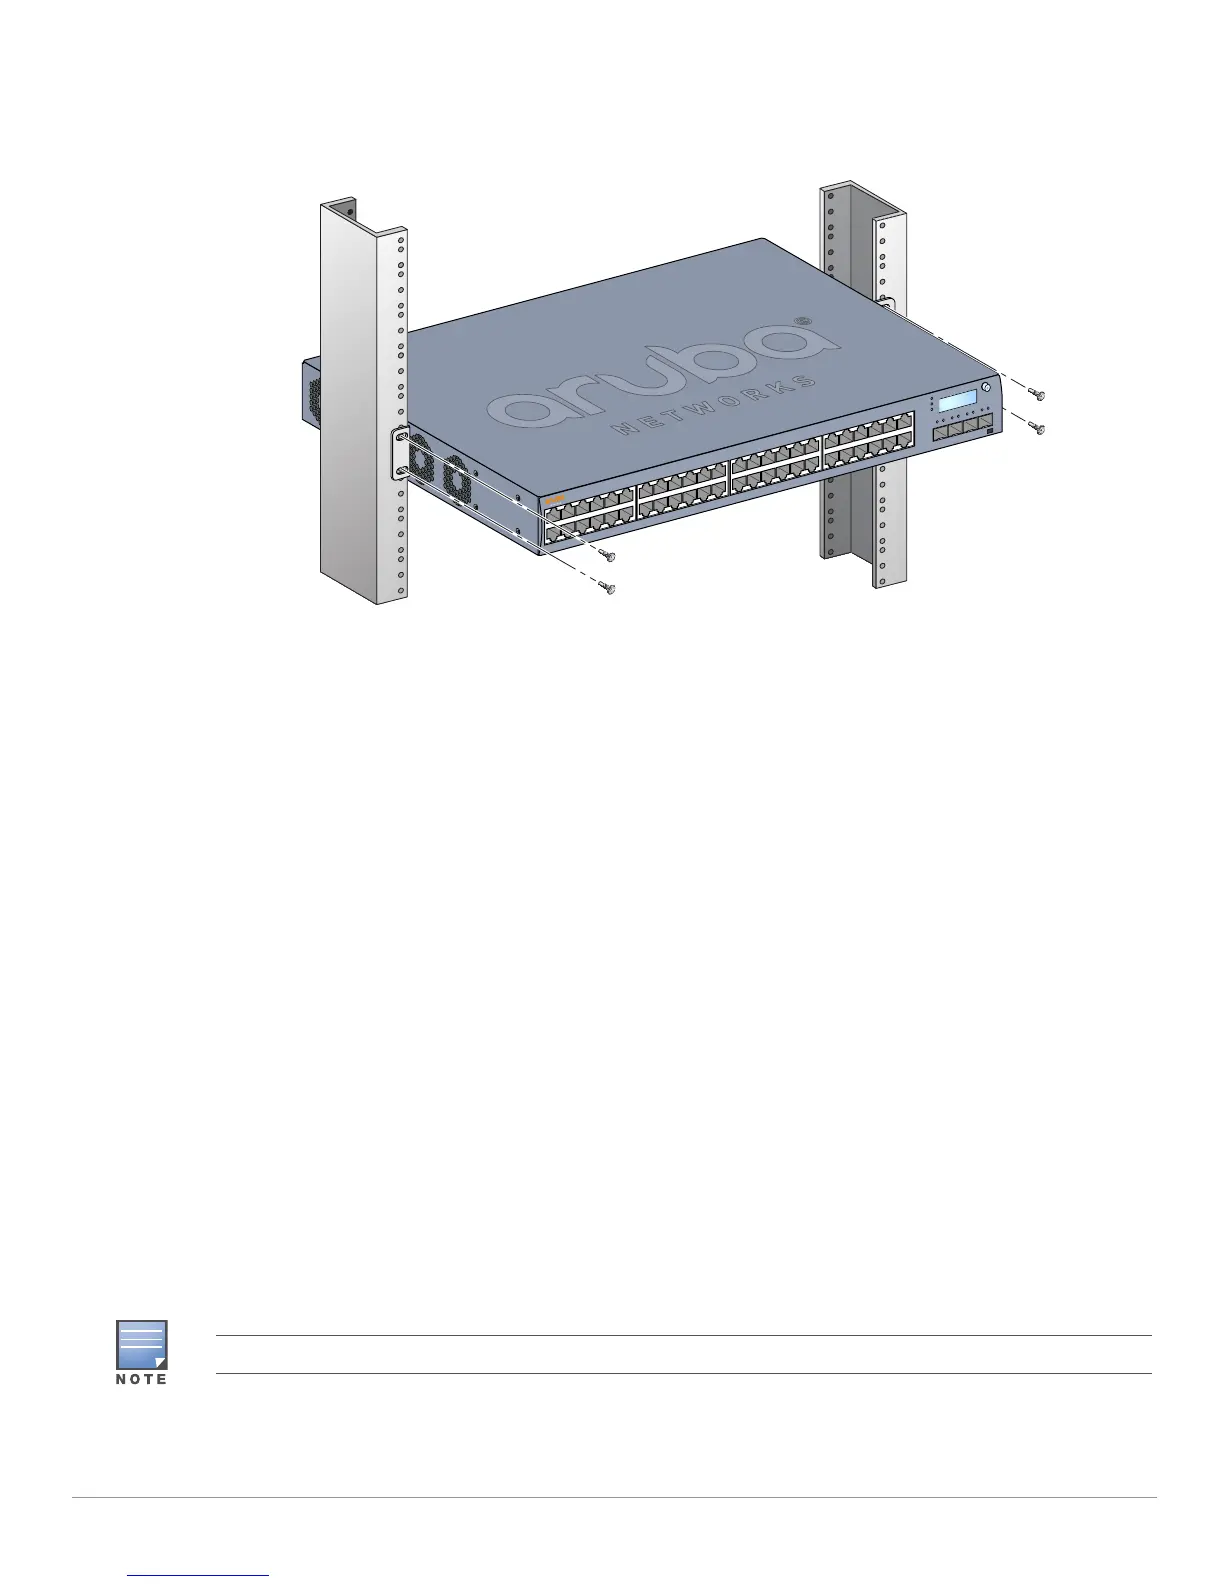
4. Mount the mobility access switch within your organization’s rack system using four (two per bracket)
M6 x 15mm phillips pan head screws and suitable screwdriver (see Figure 12).
Figure 12 Rack Installation
5. Leave a minimum of four inches (10cm) of space on the left and right side of the unit for proper air flow
and ventilation.
Leave additional space in front and back of the unit to access power cords, network cables, LCD panel, and
LED status indicators
Wall Mount Installation
An optional accessory kit is available that allows you to mount your S2500 to a wall. For more information
about the S2500 Wall Mounting Kit, contact your Aruba sales representative.
Required Tools and Equipment
Installation of an S2500 on a wall requires the following items:
2x Wall Mount Brackets (included in kit)
8x M4 x 8mm Phillips Flat Head Screws (included in kit)
Suitable Screwdrivers for the included screws and wall mounting screws (not included)
Wall Anchors (optional, not included)
Wall Mounting Screws (not included, the type of screw depends on your installation surface)
Installation Steps
To install an Aruba S2500 Mobility Access Switch on a wall:
The Ethernet ports must be facing down when installing your S2500 on a wall.


 To Next Page