TD 92679GB
12 April 2011 Ver. D
Installation Guide
Elise3
22
8 When Elise3 has been restarted, enter the URL xxx.xxx.xxx.xxx/admin in your
browser (xxx.xxx.xxx.xxx is the IP address that was given to Elise3 during network
setup) to see that it has started up correctly.
4.6.3 Change Secured Settings
To be able to activate some security settings it is required that someone physically confirms
the changes on the module. This is a security feature due to the remote access (LAN or
VPN) ability on the Elise3 module. An Elise3 module is often locked in some kind of
secured area that only approved users have access to (such as the server room).
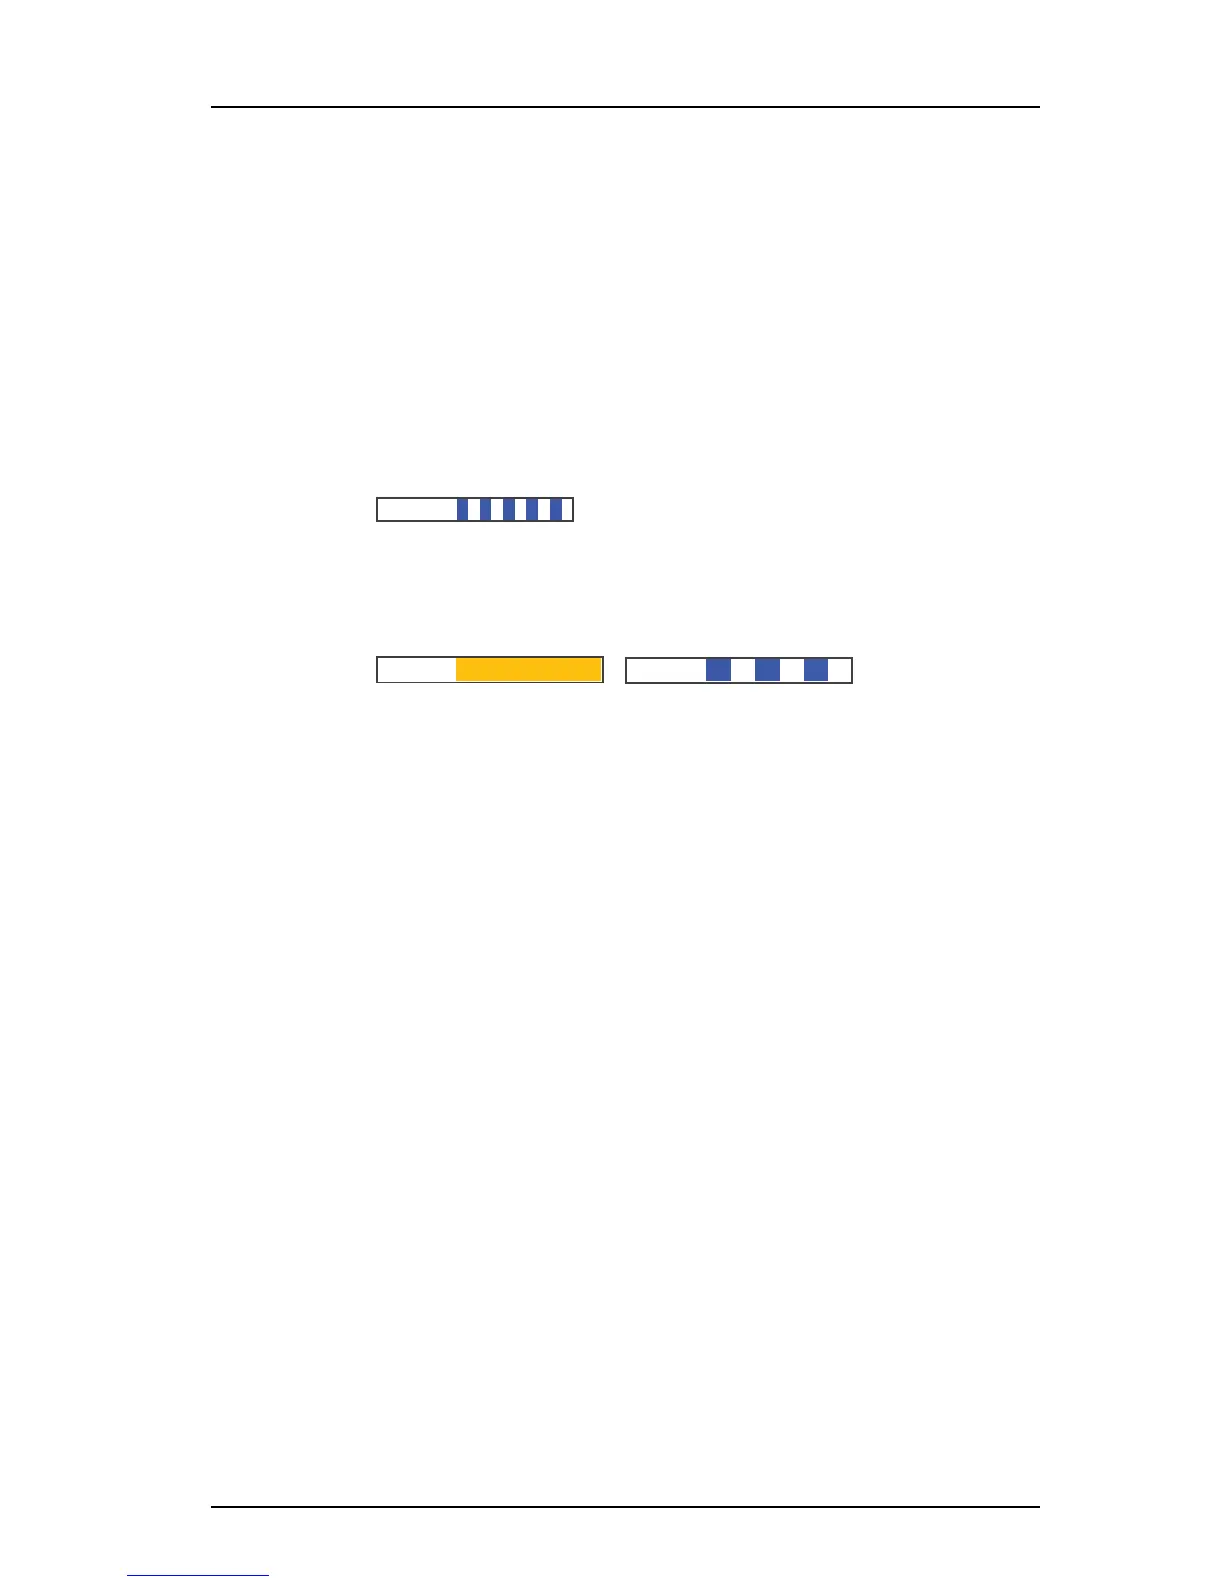
• When clicking the “Activate” button for a secured setting the web user interface will
prompt the user to confirm the secured change by pressing the Mode button on the
module. The module’s Mode button LED indicates that a confirmation is needed with a
quick flashing blue light.
Figure 17. Confirmation is required
1 Push the Mode button. The Mode button LED stops flashing and indicates that
confirmation has been done with fixed yellow light on the status LED and slow
flashing blue light on the mode button.
Figure 18. Confirmation is done and secured setting(s) can be saved
2 Click the “Activate” button to save the secured setting.
The possibility to save secured settings is open for 10 minutes after the Mode
button has been pressed or until the user manually exits the mode by clicking the
Mode button once more.
4.6.4 Clock Synchronization and Time Settings
The clock in different Elise3 modules can be set from the web browser, A-bus (i.e. Central
Unit in System 900) or a time server. To be able to synchronize the clocks in different Elise3
modules a time server has to be used. Depending on software application and license, an
Elise3 can be used as time server. An external time server supporting the Network Time
Protocol (NTP) can also be used. Normally the Elise3 used as time server synchronizes with
an external time server and then all other Elise3 modules use that Elise3 as the time server.
To select time source do as follows:
1 Open the administration pages of the Elise3 by entering “xxx.xxx.xxx.xxx/admin” in
the address field in the web browser.
2 Select “Settings” in the left menu.
3 Select time source; Web browser, A-bus or Time server.
Note: Not all system’s Central Unit can provide the time.
Independent of time source the Elise3 can handle different time zones and adjust the clock
according to daylight saving time.
The date and time format controls the appearance of date and time in log views and
application specific pages. The administration pages that are common to all Elise3 will
display date and time in the following format: YYYY-MM-DD, HH:MM:SS (for example
2000-01-31 13:30:00). This format for date and time will also be used in exported log
files.
Mode LED
Status LED
Mode LED