Installing the MERLIN Identifier System
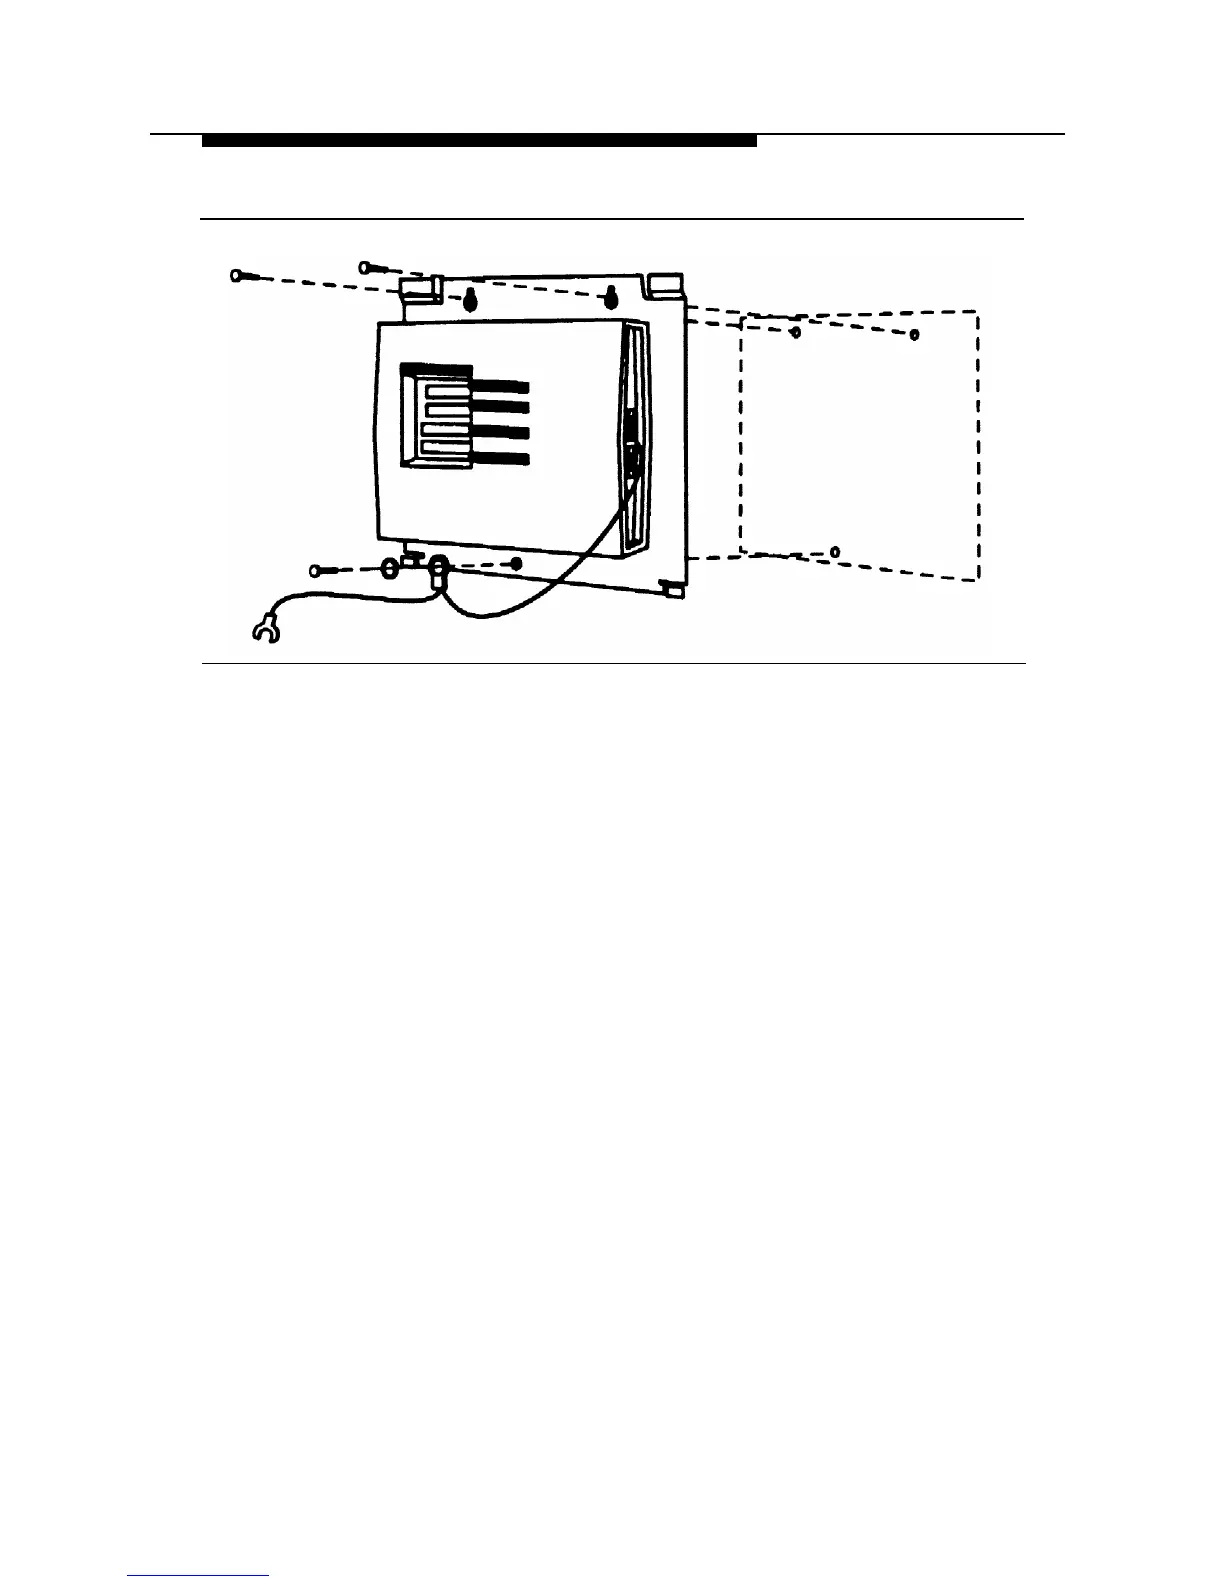
Figure 2.
Mounting the MERLIN Identifier Control Unit
2.
3.
4.
5.
■
■
Remove the MERLIN Identifier Control Unit and drill pilot
holes in the mounting surface for the #6 x 1/2-inch self-
tapping screws (supplied) or for the wall fasteners you
have selected.
Do one of the following:
If you are mounting to plywood, align the mounting
holes in the MERLIN Identifier Control Unit base with
the pilot holes and drive #6 x 1/2-inch screws
through the top two mounting holes.
If you are mounting directly to the wall, first install the
wall fasteners, then align the mounting holes in the
MERLIN Identifier Control Unit base with the pilot
holes and drive the screws or bolts through the top
two mounting holes.
Drive a screw or bolt through the lockwasher, grounding wire
eyelet terminal, and bottom mounting hole.
Attach the grounding wire spade terminal to an approved
ground.
12
STEP 2:
Mount the MERLIN Identifier Control Unit
 Loading...