Atomos Ninja-2 – User Manual Edition 1: November 2012 15
Connect to input
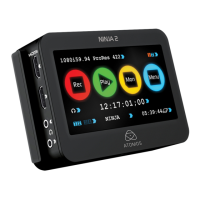
As soon as you connect a supported input to the Ninja-2’s HDMI input:
•
5HF and 0RQ icons will go solid and colourful
• The input format will be shown in the top left corner
• Audio inputs will show levels in bottom left corner
READY-TO-RECORD
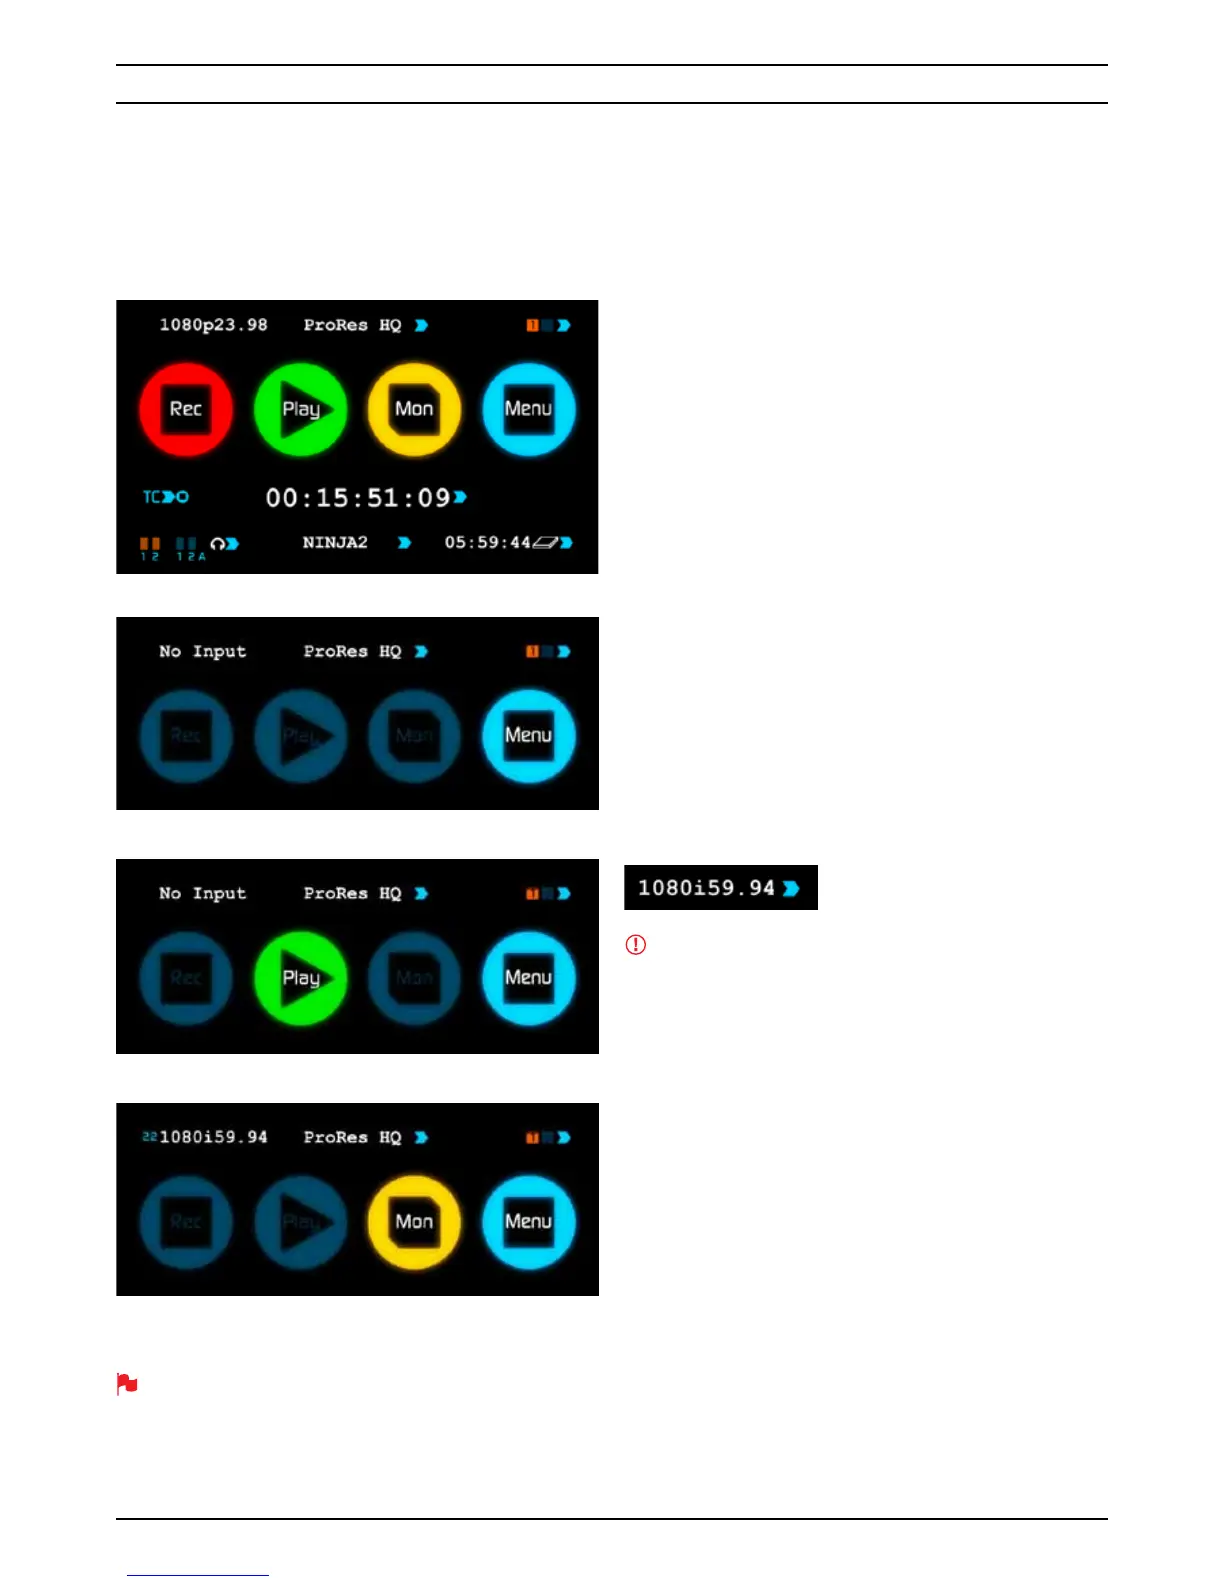
NO INPUT / NO DISK
NO INPUT / DISK PRESENT
INPUT PRESENT / NO DISK
Before recording
• Check there is a valid signal by looking at the main screen, ensuring it
looks like the ‘ready-to-record’ screen
• Check the input signal is set to what you would like:
- Progressive with 2:2 or 3:2 pulldown or
- Interlaced
• If you see
1R ,QSXW for any reason please check your camera
settings match a supported format for Ninja-2. See technical
specifications on page 33.
• Connect headphones and monitor the Audio channels to make sure
the sound
• Check you have your audio in record set as you require.
• Connect any additional Analogue audio inputs and adjust gain
accordingly.
• Enter monitor mode to ensure the video is coming in as expected.
• Check you have the correct Scene & Shot number selected.
(see page 21 – Organising Material on disk)
• Check your drive is inserted and has been formatted
• Check your timecode settings are as you need
• Choose how you will start/stop your recording
• Check for clean input:
By touching the screen in Monitor mode, you can remove the
Atomos overlays to give you a clean screen. If any overlay graphics
remain, these will be coming from your camera. Please check the
settings on your camera to switch these off.
Choosing your recording format
You can select the recording format by touching the top middle of the
touch screen where the format is indicated.
IMPORTANT: You need to match the format you are recording
internally on the camera with the format recorded on the Ninja-2.
If you are recording 24p internally on the camera you need to record
24p on the Ninja-2 so the recordings match. To adjust the recording
format simply touch the format icon repeatedly and the Ninja-2 will
cycle through the options available. The basic rule is match the format
of the internal recording on the camera (not the external output of the
camera). For more explanation on choosing the correct format on
the Ninja-2 and the relationship to camera internal format and output
format refer to Section 10 – Pulldown.
8. Monitoring and Recording
The Ninja-2 has a high-quality screen that adjusts to the scan frequency
of the incoming signal, for a smooth, accurate display.