*Subject to change without notice Atomos Shogun Flame – User Manual Edition 1: May 2016 22
Setting up for recording
As soon as you connect a supported signal to the Shogun Flame input
and have inserted a formatted drive the following will happen;
• The Rec icons will go solid
• The input source & format will be shown in the top left corner
• Audio inputs will show levels in bottom left corner
Recording Checklist
• Check there is a valid signal by checking the input menu ensuring all
eldsdisplayagreentick.
• Check the input signal is set to what you would like from the input menu:
- Progressive
- Progressive with 2:2 or 3:2 pulldown (1080i inputs only)
- Interlaced (HD Only)
• If you see No Input for any reason please check your camera settings
match a supported format for Shogun Flame. The formats supported
arelistedinthetechnicalspecicationspageattheendofthismanual.
• Connect any additional Analogue audio inputs and adjust gain
accordingly.
• Check you have the correct audio channels in record, set to you
required from the audio panel.
• Connect headphones and monitor the audio channels to make sure the
sound is as expected
• Ensure the video is coming in as expected. Make sure the signal is
clean and does not have any GUI overlays from the camera.
• Check you have the correct Scene & Shot number selected, this can be
adjustbytappingthelenametothetopofthescreen.
• Check your drive is inserted and has been formatted by the Shogun
Flame
• Check your Timecode and trigger settings are as required
• Choose how you will start/stop your recording
Choosing your recording format (Codec)
Select the codec name on to the top left of the screen to display the codec
menu.
From the codec section you can toggle between ProRes® or Avid
DNxHD
®
*. The Quality menu allows you to toggle codec compression
Apple ProRes offers 3 levels of compression (HQ, 422 & LT) DNx offers 4
(220x, 220, 145, 36 ) and DNxHR is available in HQX, HQ, SQ and LB.
The expected record time available from each codec selection is
automatically calculated from the available space on the media inserted.
If Avid DNxHD / DNxHR is required, you must activate it rst. This can
be done at www.atomos.com/support – DNxHD 220x/DNxHR HQX
are 10bit, all others are 8 bit, DNxHD36 is a proxy codec.
More information regarding Apple ProRes data rates can be obtained
online from Apple ProRes whitepaper PDF document.
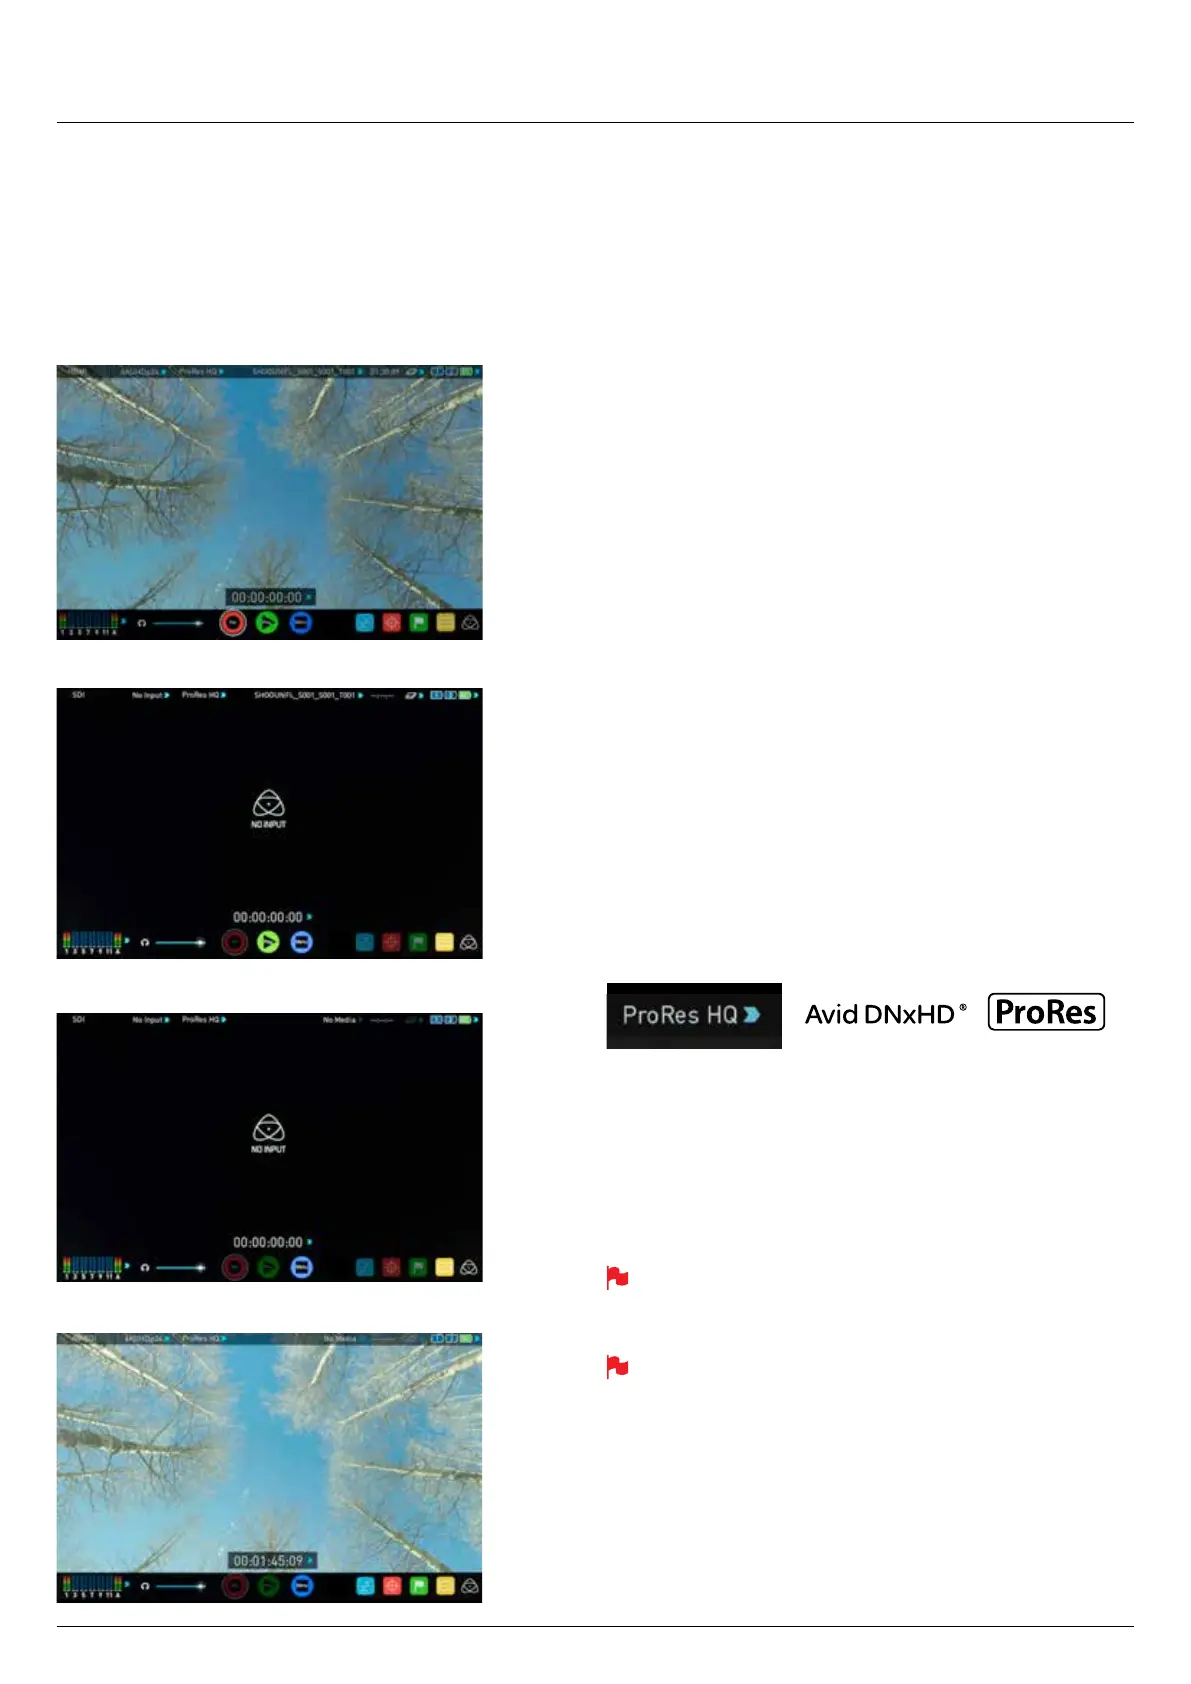
8. Monitoring and Recording
Ready to Record
No Input / Disk Present
No Input / No Disk / No Disk Formatted
Input Present / No Disk