Power top
Step 4: Close the power top
Applies to: vehicles with power top
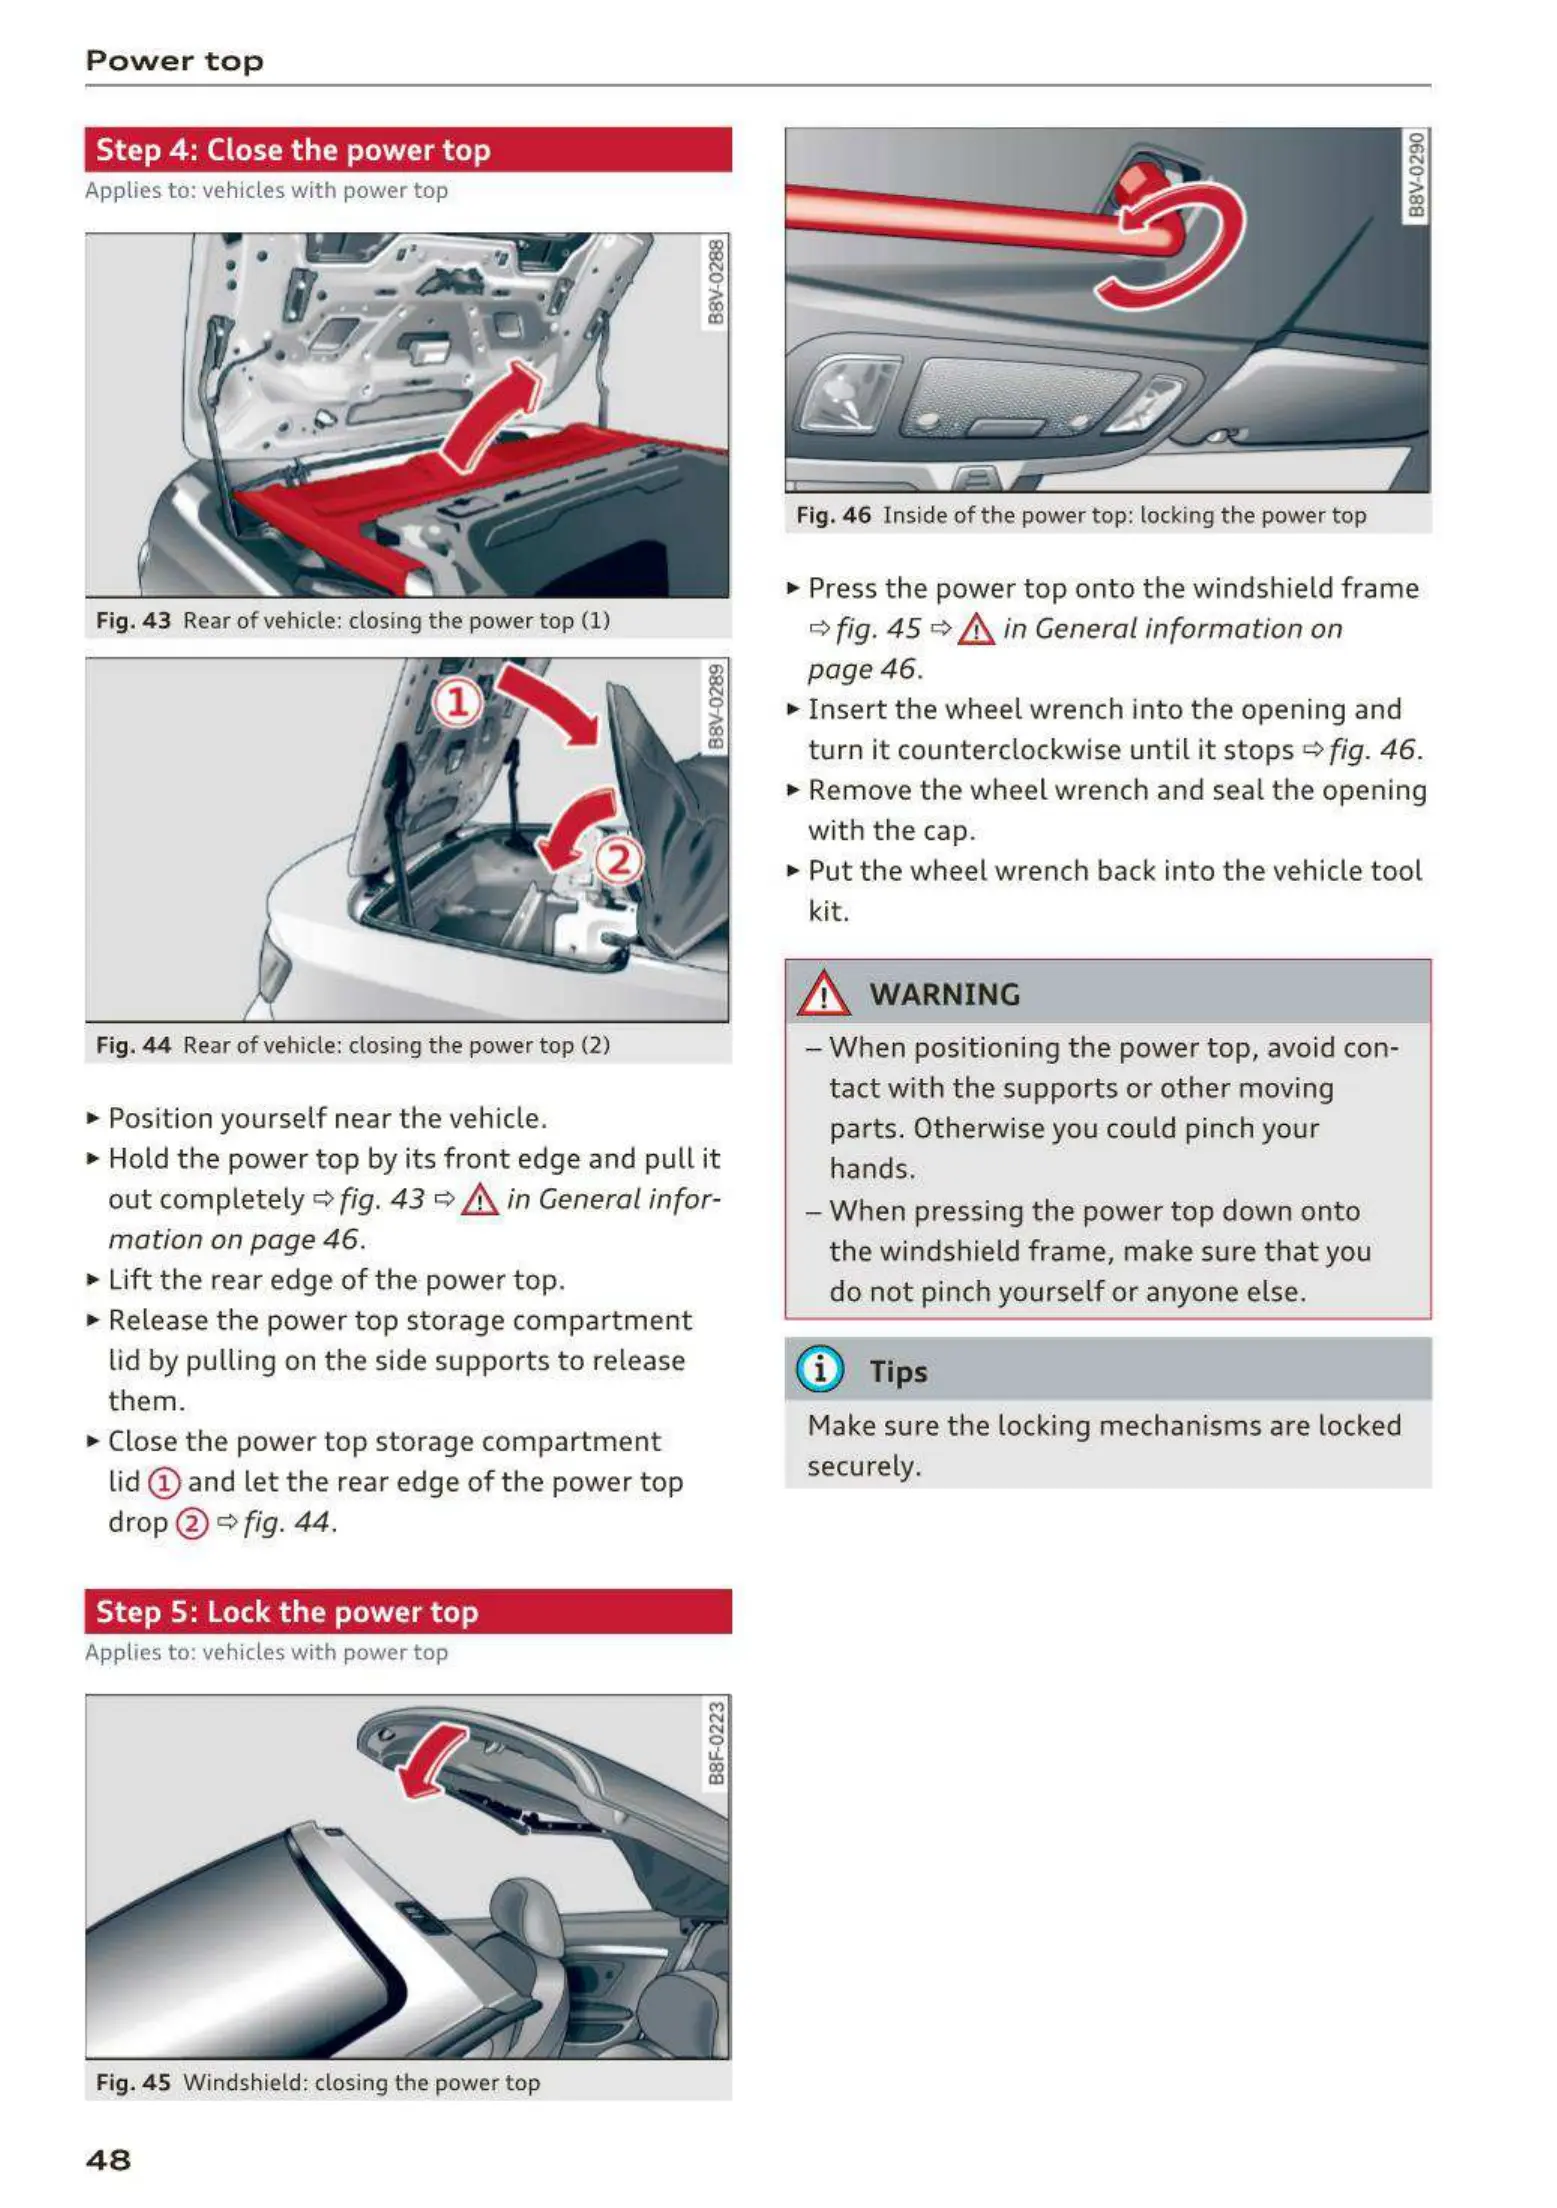
Fig. 43 Rear of vehicle: clos ing the power top (1)
Fig. 44 Rear of vehicle: clos ing the power top (2)
• Pos ition yourself near the vehicle .
• Hold the power top by its front edge and pull it
out completely ¢
fig. 43 ¢ &. in General infor-
mation on page 46.
• Lift the rear edge of the power top.
• Release the power top storage compartment
lid by pulling on the side supports to release
them.
• Close the power top storage compartment
lid (!) and let the rear edge of the power top
drop @ ¢fig.
44.
Step 5: Lock the power top
Applies to: vehicles with power top
Fig. 45 Windshield: closing the powe r top
48
Fig. 46 Inside of the power top: locking the power top
• Press the power top onto the windshield frame
¢ fig. 45 ¢ &. in General information on
page 46.
• Insert the wheel wrench into the opening and
turn it counterclockwise until it stops
¢ fig. 46.
• Remove the wheel wrench and seal the opening
with the cap.
• Put the wheel wrench back into the vehicle tool
kit.
_& WARNING
- When positioning the power top, avoid con-
tact with the supports or other moving
parts. Otherwise you could pinch your
hands.
- When pressing the power top down onto
the windshield frame, make sure that you
do not pinch yourself or anyone else.
(D Tips
Make sure the locking mechanisms are locked
securely.