Protected by copyright. Copying for private or commercial purposes, in part or in whole, is not
permitted unless authorised by AUDI AG. AUDI AG does not guarantee or accept any liability
with respect to the correctness of information in this document. Copyright by AUDI AG.
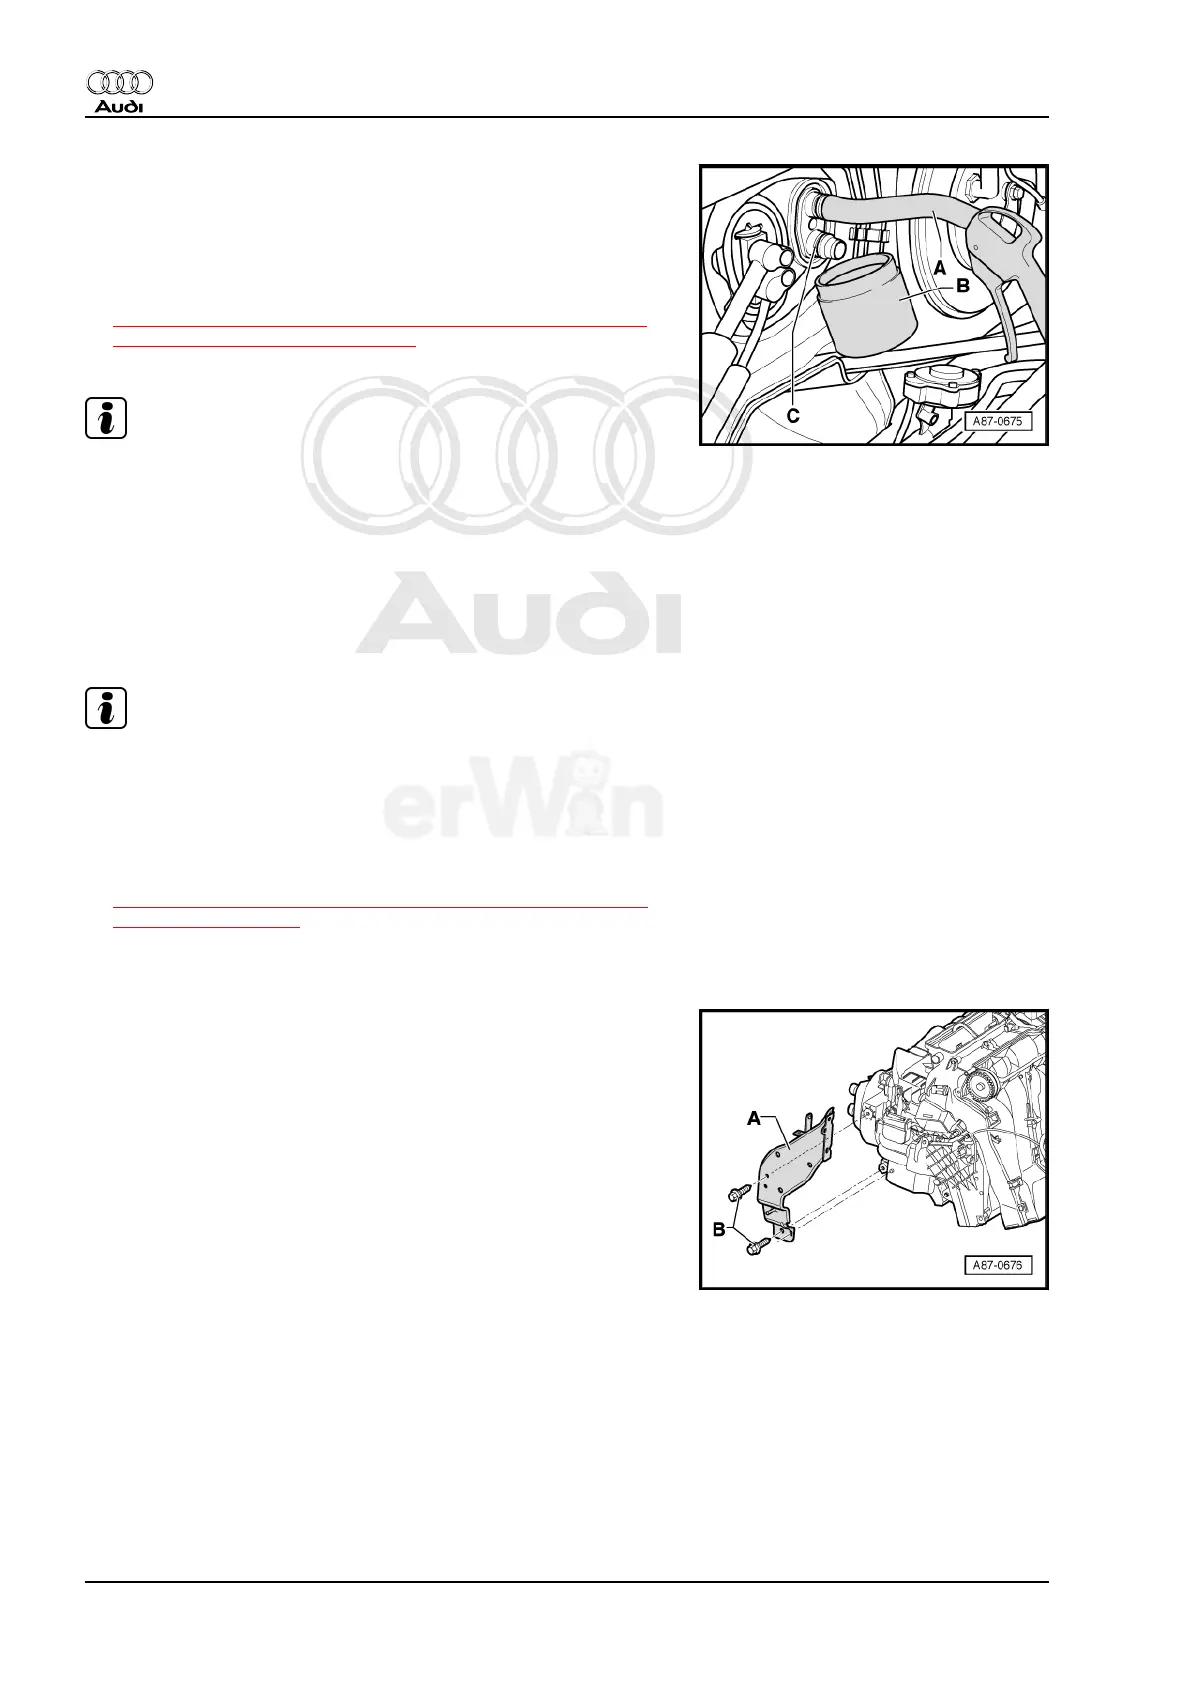
– Connect one section of hose -A- on to upper connection.
– Hold a container -B- under the lower connection -C-.
– Using a compressed air gun -D-, carefully blow coolant out of
heater core (into container -B-).
– Disconnect refrigerant lines from expansion valve, refer to
⇒ “5.18.13 Refrigerant Lines, Disconnecting and Connecting
From Expansion Valve“, page 180 and secure (for example,
with cable tie) so they do not interfere during installation.
Note
♦
Seal open pipe connections.
♦
To seal off all open connections on expansion valve or evap‐
orator, sealing caps from a replacement expansion valve or a
replacement evaporator can be used (preventing dirt and
moisture from entering the system).
– Remove glove compartment, driver's side storage compart‐
ment, front part of center console and instrument panel. Refer
to⇒ Body Interior; Rep. Gr. 70 ; Removal and Installation .
Note
To prevent the instrument panel shell from damage, instrument
panel should be placed on a clean work bench which is covered
with clean cardboard.
– Remove both left and right footwell vents.
– Remove the fresh air blower -V2- . Refer to
⇒ “1.14 Fresh Air Blower Control Module J126 and Fresh Air
Blower V2 “, page 36 .
– Remove instrument panel crossmember (central tube). Refer
to ⇒ Body Interior; Rep. Gr. 70 ; Removal and Installation .
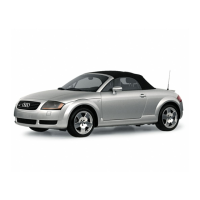
– Remove data bus on board diagnostic interface -J533- (se‐
cured to bracket -A- in area of steering column). Refer to ⇒
Electrical Equipment; Rep. Gr. 90 ; Removal and Installation .
– Remove bolts -B- and release bracket -A- from heater (bracket
remains on wiring harness secured to vehicle).
Audi TT 2007 ➤
Heating, Ventilation and Air Conditioning - Edition 01.2011
110 Rep. Gr.87 - Air Conditioning