Protected by copyright. Copying for private or commercial purposes, in part or in whole, is not
permitted unless authorised by AUDI AG. AUDI AG does not guarantee or accept any liability
with respect to the correctness of information in this document. Copyright by AUDI AG.
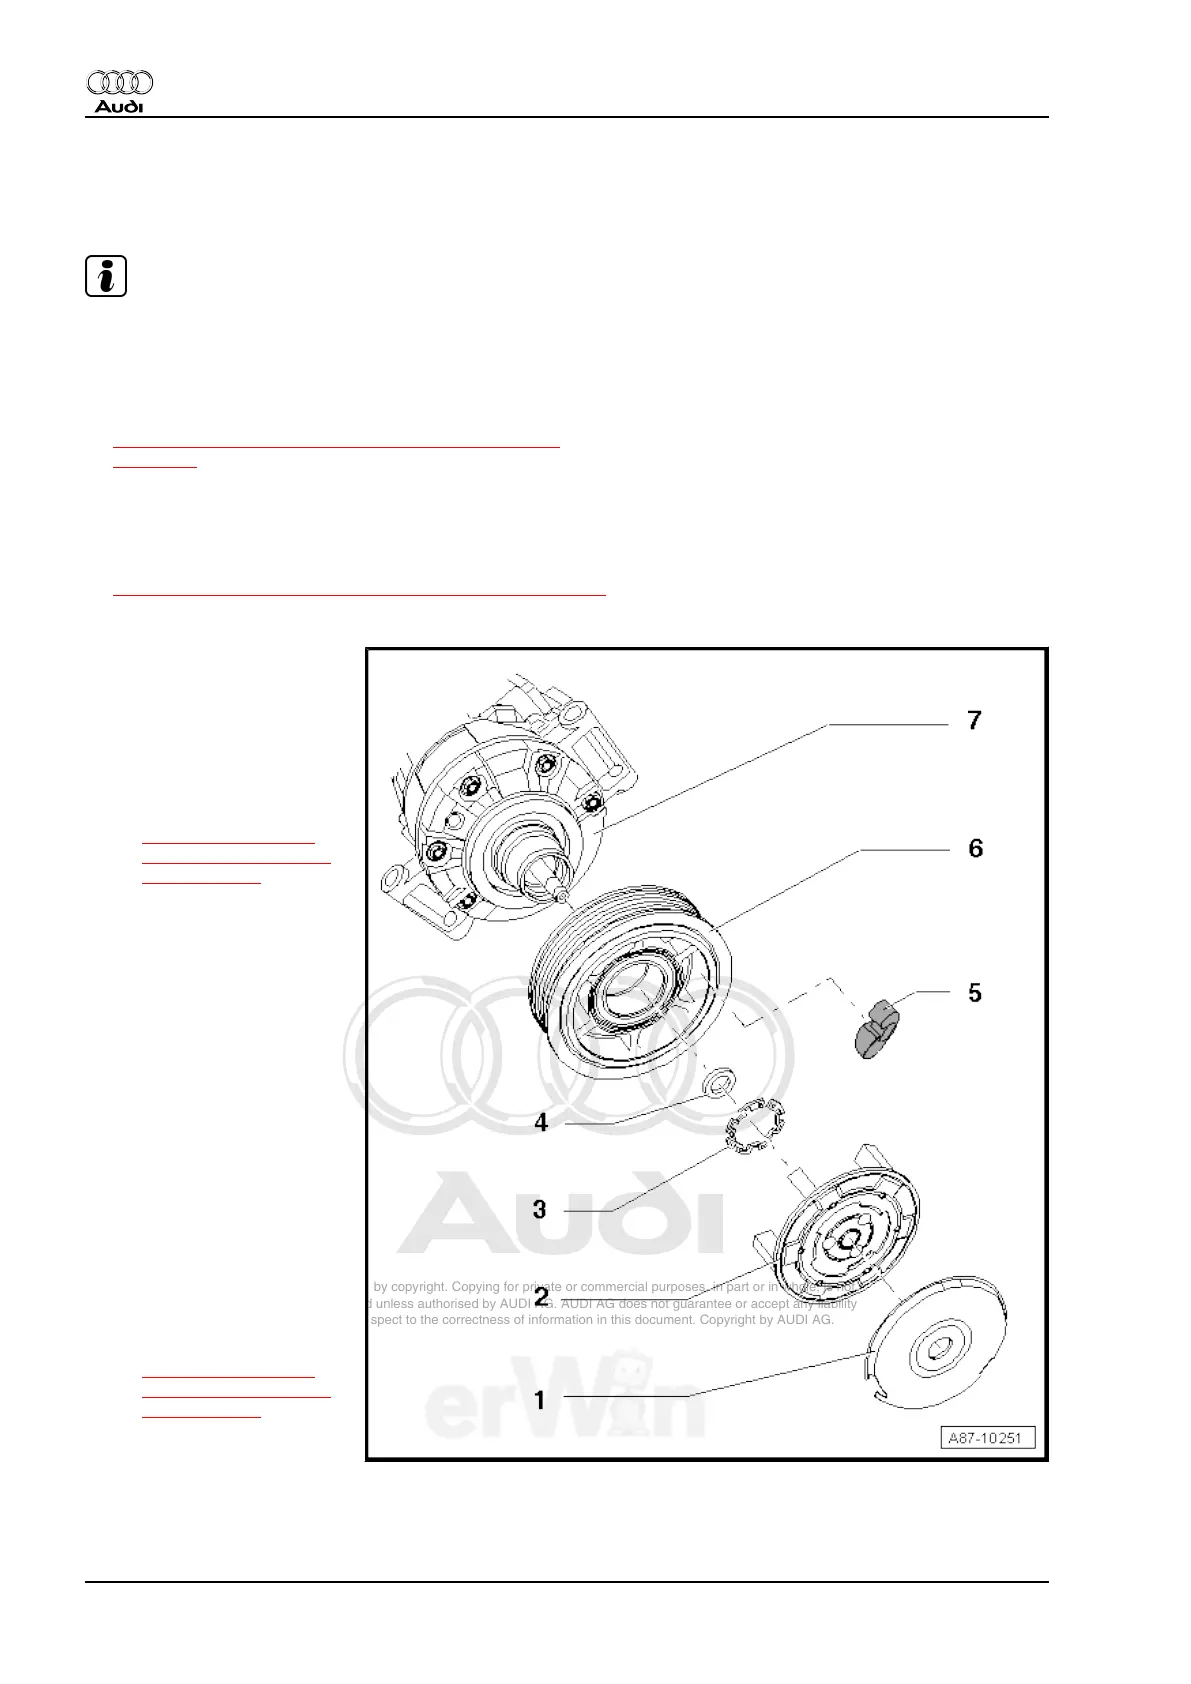
2.4 Belt Pulley, Denso A/C Compressor,
Version 1
Note
♦
If overload protection of pulley triggers, check the A/C com‐
pressor for ease of motion before replacing the pulley. If the
A/C compressor creates friction, replace it completely.
♦
To remove belt pulley, it depends on engine version if it is
necessary to remove A/C compressor from engine. Refer to
⇒ “5.1 A/C Compressor, Removing From Bracket“,
page 103 .
♦
Different versions of the pulley may be installed, depending on
A/C compressor construction type and engine version. Refer
to Electronic Parts Catalog (ETKA).
♦
Belt Pulley, removing and installing, refer to
⇒ “5.6.1 Denso A/C Compressor (Version 1)“, page 117 .
1 - Circlip With Rubber Disc
❑ Remove carefully using
a small screwdriver or
needle-nose pliers (es‐
pecially note belt pulley
when doing this).
❑ Removing and instal‐
ling, refer to
⇒ “5.6.1 Denso A/C
Compressor (Version
1)“, page 117 .
❑ The rubber disc that is
vulcanized on serves as
noise insulation during
low compressor output
when engine is idling.
2 - Drive Plate
❑ Attached to the A/C
compressor input shaft.
❑ Different versions. Re‐
fer to Electronic Parts
Catalog (ETKA).
❑ The overload protection
takes over when the tor‐
que is excessive (for ex‐
ample, if the A/C com‐
pressor runs with resist‐
ance) and the belt pulley
runs freely without driv‐
ing the A/C compressor.
❑ Removing and instal‐
ling, refer to
⇒ “5.6.1 Denso A/C
Compressor (Version
1)“, page 117 .
❑ Tightening specification
35 Nm.
3 - Circlip
❑ Replace
❑ Install on correct side (flat side toward A/C compressor).
Audi TT 2007 ➤
Heating, Ventilation and Air Conditioning - Edition 01.2011
52 Rep. Gr.87 - Air Conditioning