Protected by copyright. Copying for private or commercial purposes, in part or in whole, is not
permitted unless authorised by AUDI AG. AUDI AG does not guarantee or accept any liability
with respect to the correctness of information in this document. Copyright by AUDI AG.
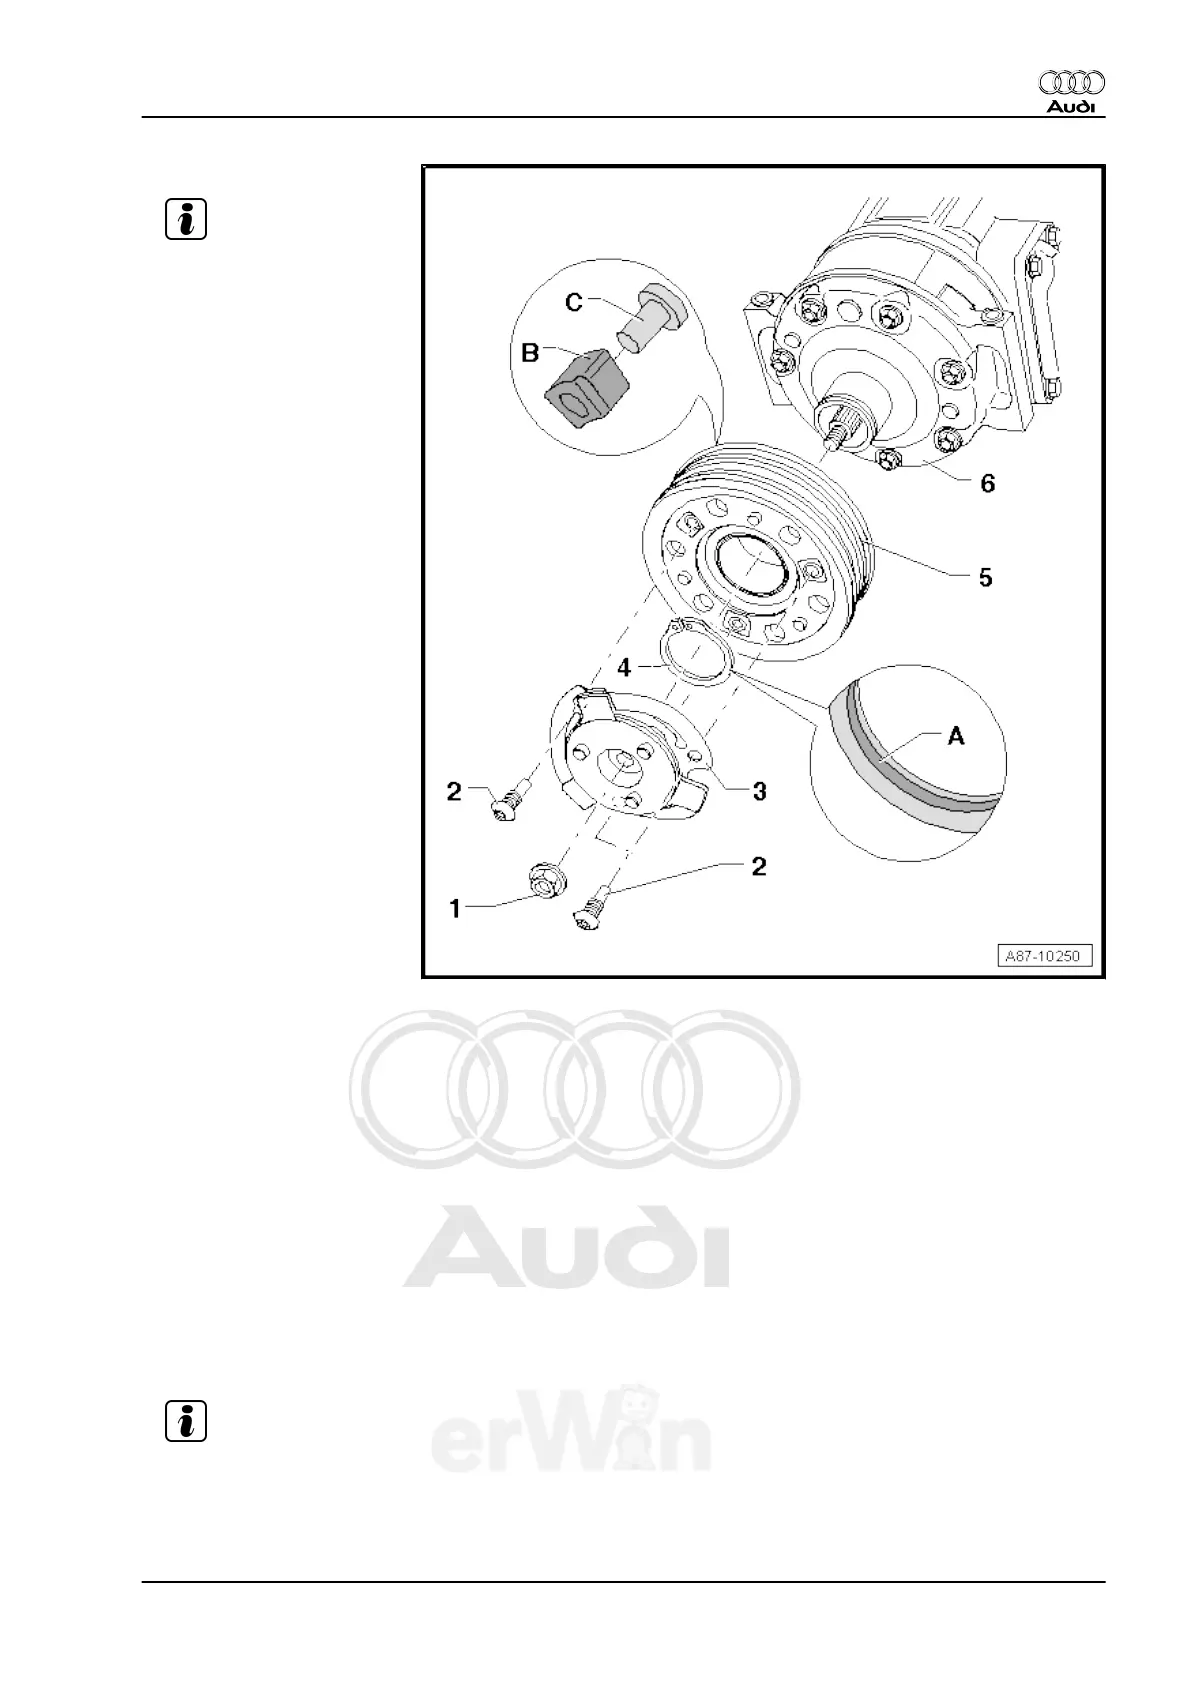
1 - Hex Head Nut
Note
❑ To loosen and tighten
hex nut, hold belt pulley
firmly in place using a
standard band wrench
(with webbing).
❑ Clean threads of hex nut
and threads of A/C com‐
pressor shaft of old
thread locking com‐
pound before screwing
on.
❑ Install the hex nut with
thread locking com‐
pound (e.g. with D 000
600 A2). Refer to Elec‐
tronic Parts Catalog.
❑ Nut tightening specifica‐
tion: 25 Nm
2 - Screw
❑ To loosen and tighten
bolts, hold belt pulley
firmly in place using a
standard band wrench
(with webbing).
❑ Tightening specification
12 Nm
❑ Clean old bolt locking
compound from thread
of bolts and threads of
belt pulley before screw‐
ing on.
❑ Install the bolts with
thread locking com‐
pound (for example, D 000 600 A2). Refer to the Electronic Parts Catalog.
3 - Drive Plate
❑ The overload protection (securing spring elements), takes over when the torque is excessive (for exam‐
ple, if the A/C compressor runs with resistance) and the belt pulley runs freely without driving the A/C
compressor.
❑ Drive plate spring elements damp vibrations and noise.
4 - Circlip
❑ Replace
❑ Install on proper side, beveled insertion edge -A- faces away from A/C compressor (install flat side facing
the A/C compressor).
❑ When installing circlip, note that it cannot be bent open more than is necessary for installation.
5 - Belt Pulley
❑ Clean A/C compressor flange before sliding on pulley.
❑ With rubber elements -B- and threaded plates -C- for decoupling belt pulley from A/C compressor input
shaft (rubber elements damp vibrations and noise).
Note
6 - A/C Compressor
❑ Different versions may be installed, depending on engine version and country version of vehicle. Refer
to Electronic Parts Catalog (ETKA).
Audi TT 2007 ➤
Heating, Ventilation and Air Conditioning - Edition 01.2011
5. Removal and Installation 123