Protected by copyright. Copying for private or commercial purposes, in part or in whole, is not
permitted unless authorised by AUDI AG. AUDI AG does not guarantee or accept any liability
with respect to the correctness of information in this document. Copyright by AUDI AG.
– Disassemble the A/C unit. Refer to
⇒ “6.2 A/C Unit“, page 188 .
– Disassemble evaporator housing. Refer to
⇒ “6.3 Evaporator Housing“, page 190 .
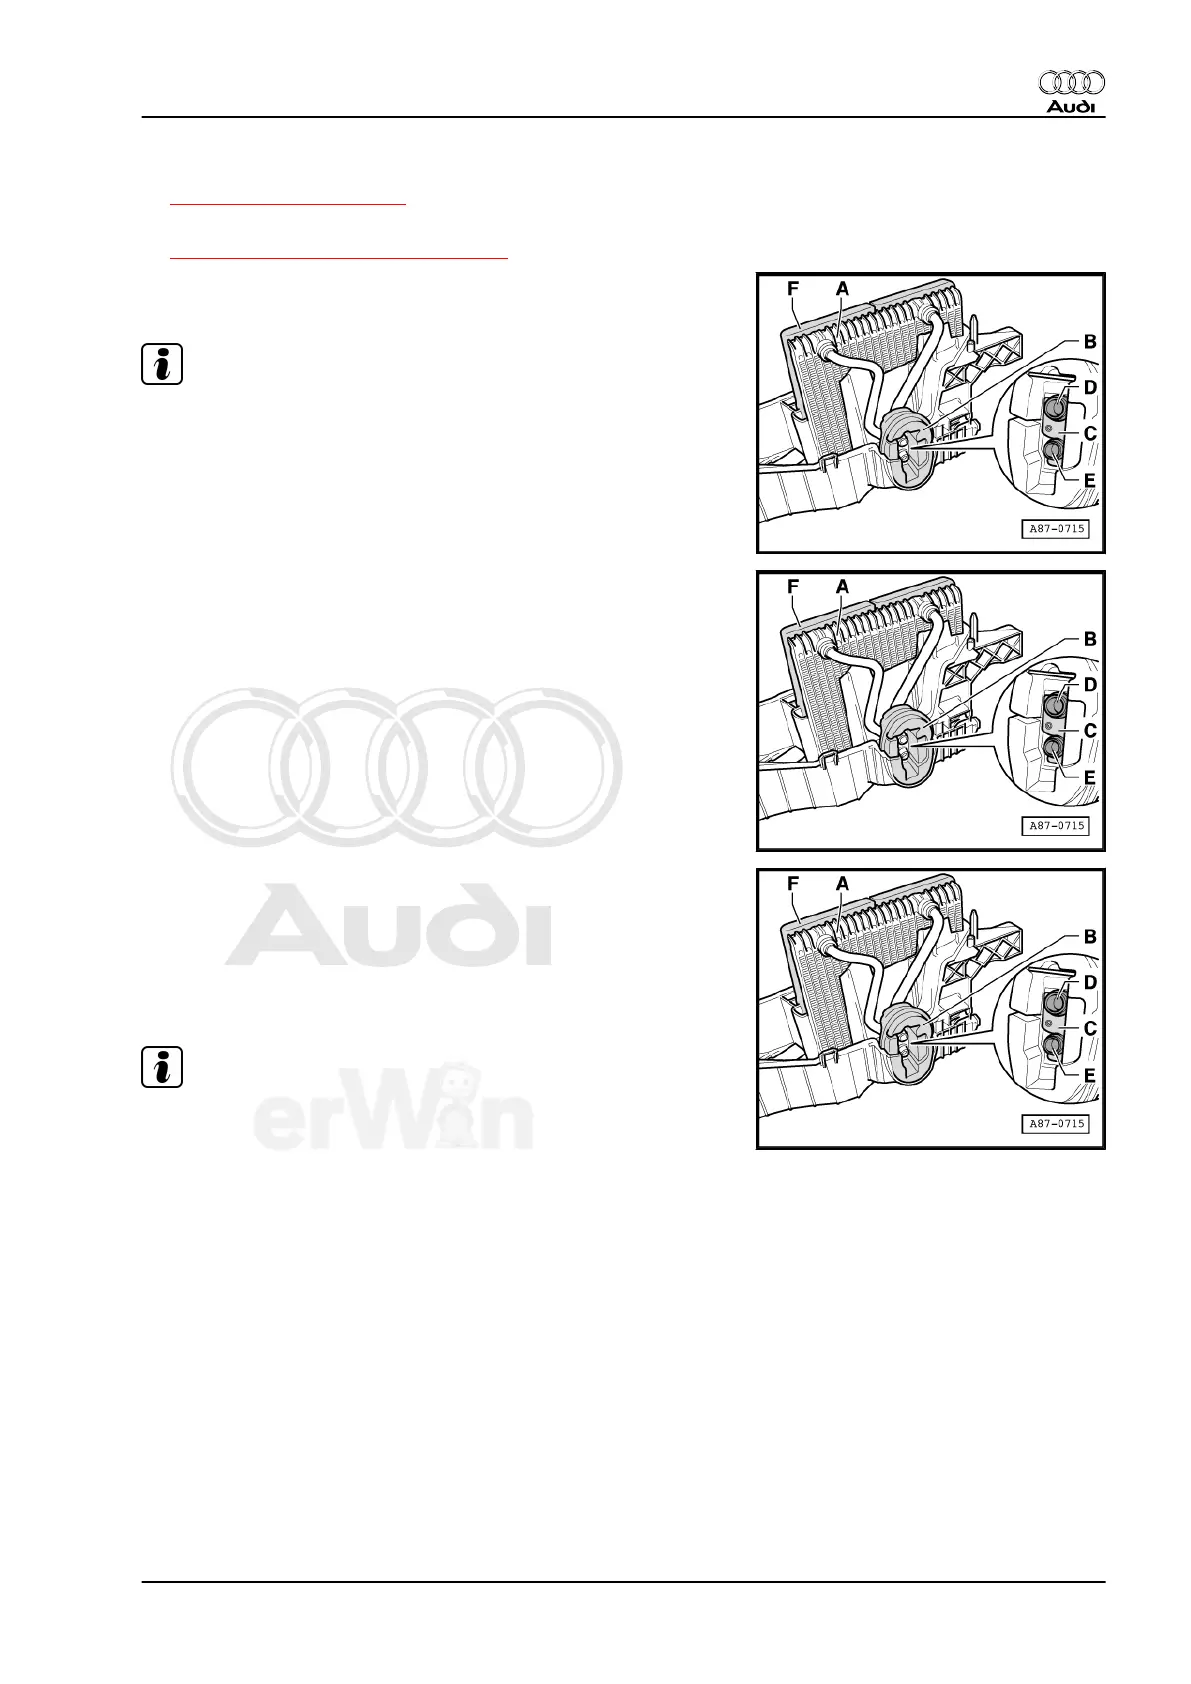
– Remove evaporator -A- from lower section of evaporator
housing.
Note
♦
Before inserting evaporator, check condensation water drain,
clean if necessary.
♦
Before inserting evaporator, clean evaporator housing (and
the evaporator if necessary).
– When inserting evaporator -A- into lower section of evaporator
housing and when assembling both housing halves, make
sure the seal -F- is not damaged.
– Check seal -F- (it must be glued all around) before inserting
evaporator.
– Place bracket -C- and seal / insulation -B- onto connecting
pipe of evaporator -D- and -E-.
– Insert evaporator -A- into lower section of evaporator housing
according to illustration.
Note
♦
After assembling both housing halves, check seal / insulation
-B- for correct seating at pass-through for both refrigerant lines
-D- and -E-.
♦
Check seating of bracket -C- on both refrigerant lines -D- and
-E- for correct seating.
♦
If heat protection insulation -B- is missing or not installed cor‐
rectly, it can cause reduced performance of the A/C system
(change of adjusted control characteristics of expansion valve
due to radiant heat).
♦
Removed evaporator contains refrigerant oil which must be
restored to the refrigerant system (with new evaporator). Refer
to ⇒ Refrigerant R134a Servicing; Rep. Gr. 00 ; Removal and
Installation .
Audi TT 2007 ➤
Heating, Ventilation and Air Conditioning - Edition 01.2011
5. Removal and Installation 173