Verifit
®
User's Guide Version 4.8 © November 2016
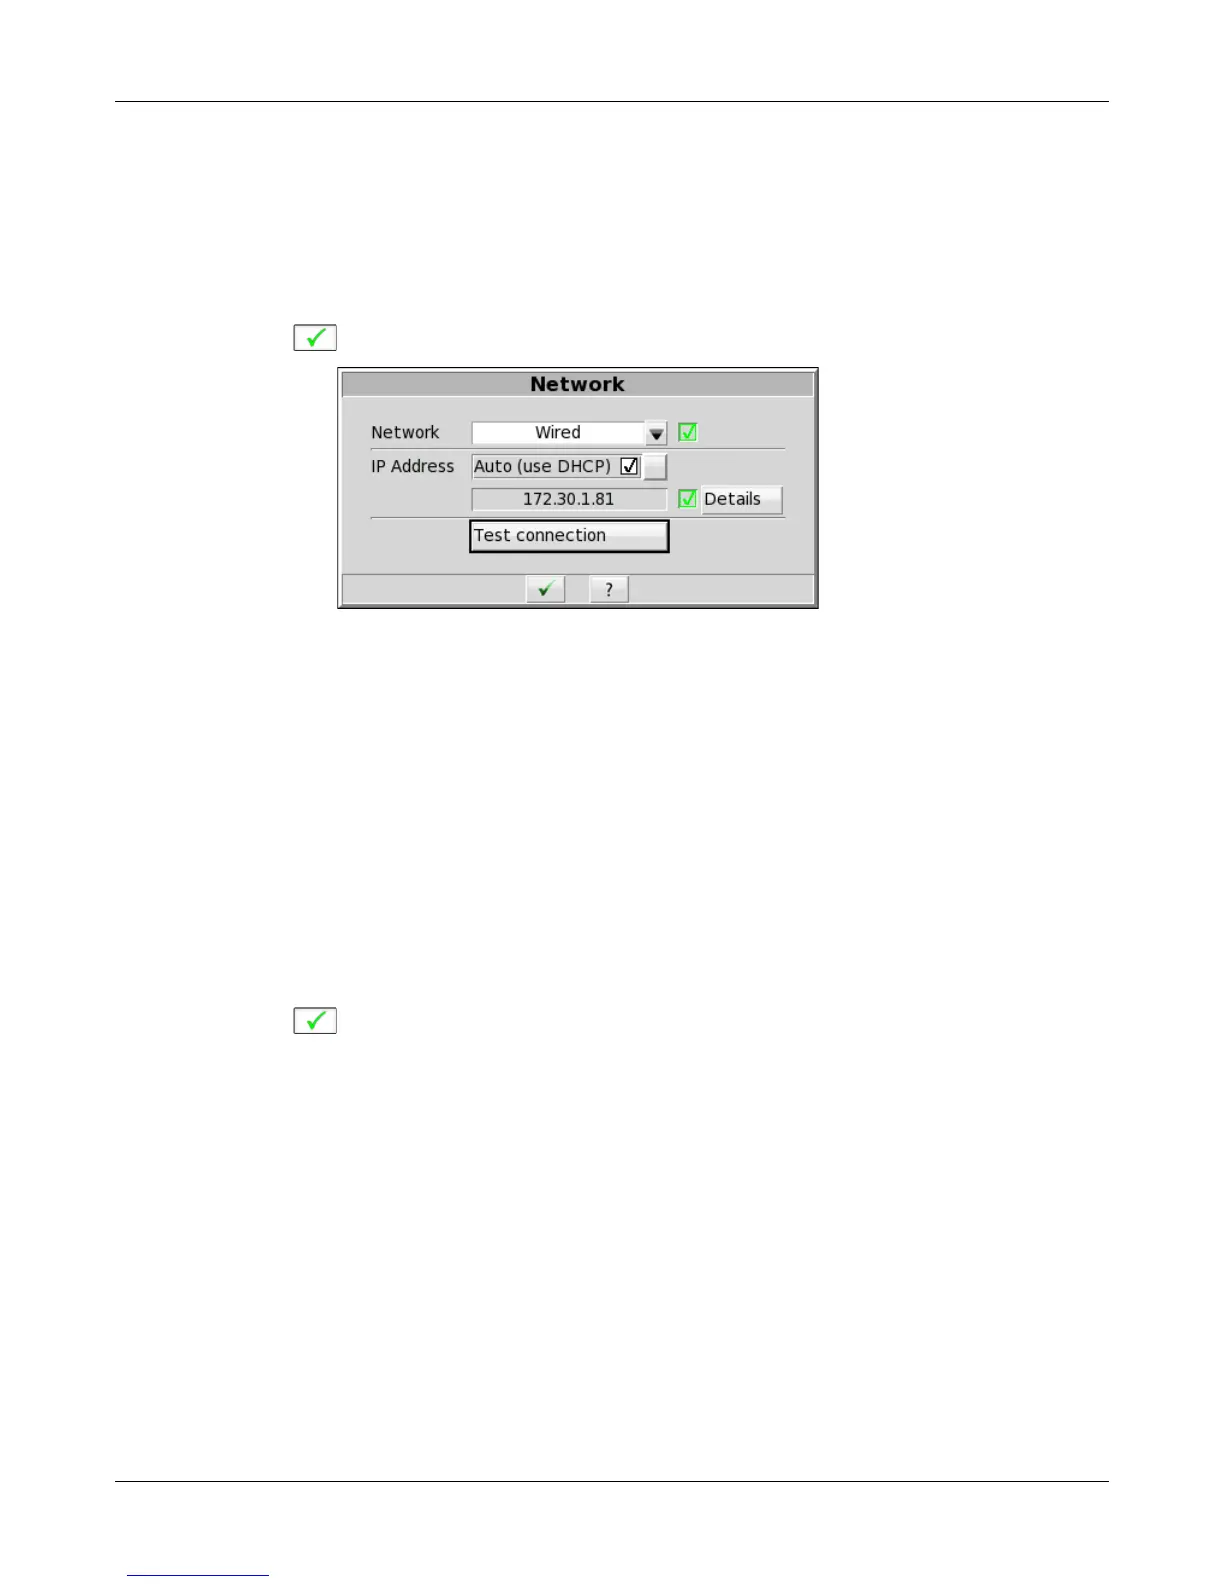
(a) Select [Change] to set [Network] to the Wired option.
(b) In most cases, your network will support automatic address assignment (DHCP) and you need to only
enable [Auto].
(c) Click [Test settings] to test your settings.
(d) If the test is successful, your computer address will be reported.
(e) Click to apply your settings.
5. To connect to a wireless local-area network (WLAN):
(a) Select [Change] to set [Network] to the Wireless option.
(b) Click [Scan].
(c) The Wireless Network poster will be presented and the Verifit will automatically scan for available
wireless networks.
Note: non-broadcast SSIDs are not supported and wifi networks containing {}[]"'|\ will not be displayed
in the pull-down menu.
(d) Confirm the wireless security type for your network. If you are unsure of the security type, please consult
your network administrator.
(e) Type the security key or pass phrase into the [Password] text field.
(f) Click [Test connection] to test your settings.
(g) Click to apply your changes.
118