Verifit
®
User's Guide Version 4.8 © November 2016
8 Speechmap Fitting Procedures
The Speechmap fitting screen provides a number of choices for inputting and applying audiometric data for the
verification of hearing instrument fittings. The procedures in this section assume a familiarity with Test Box
Measures - Setup, On-Ear Measures - Setup, On-Ear Measures Screen Setup and Speechmap.
Speechmap screen choices
Speechmap screen choices are made by clicking on the relevant buttons for [On ear or Test box], [Graph or
Table], [Dual view or Single view], [L or R or L+R], [Audiometry], [BTE + HA-4, BTE + mold, ITE, ITC, CIC,
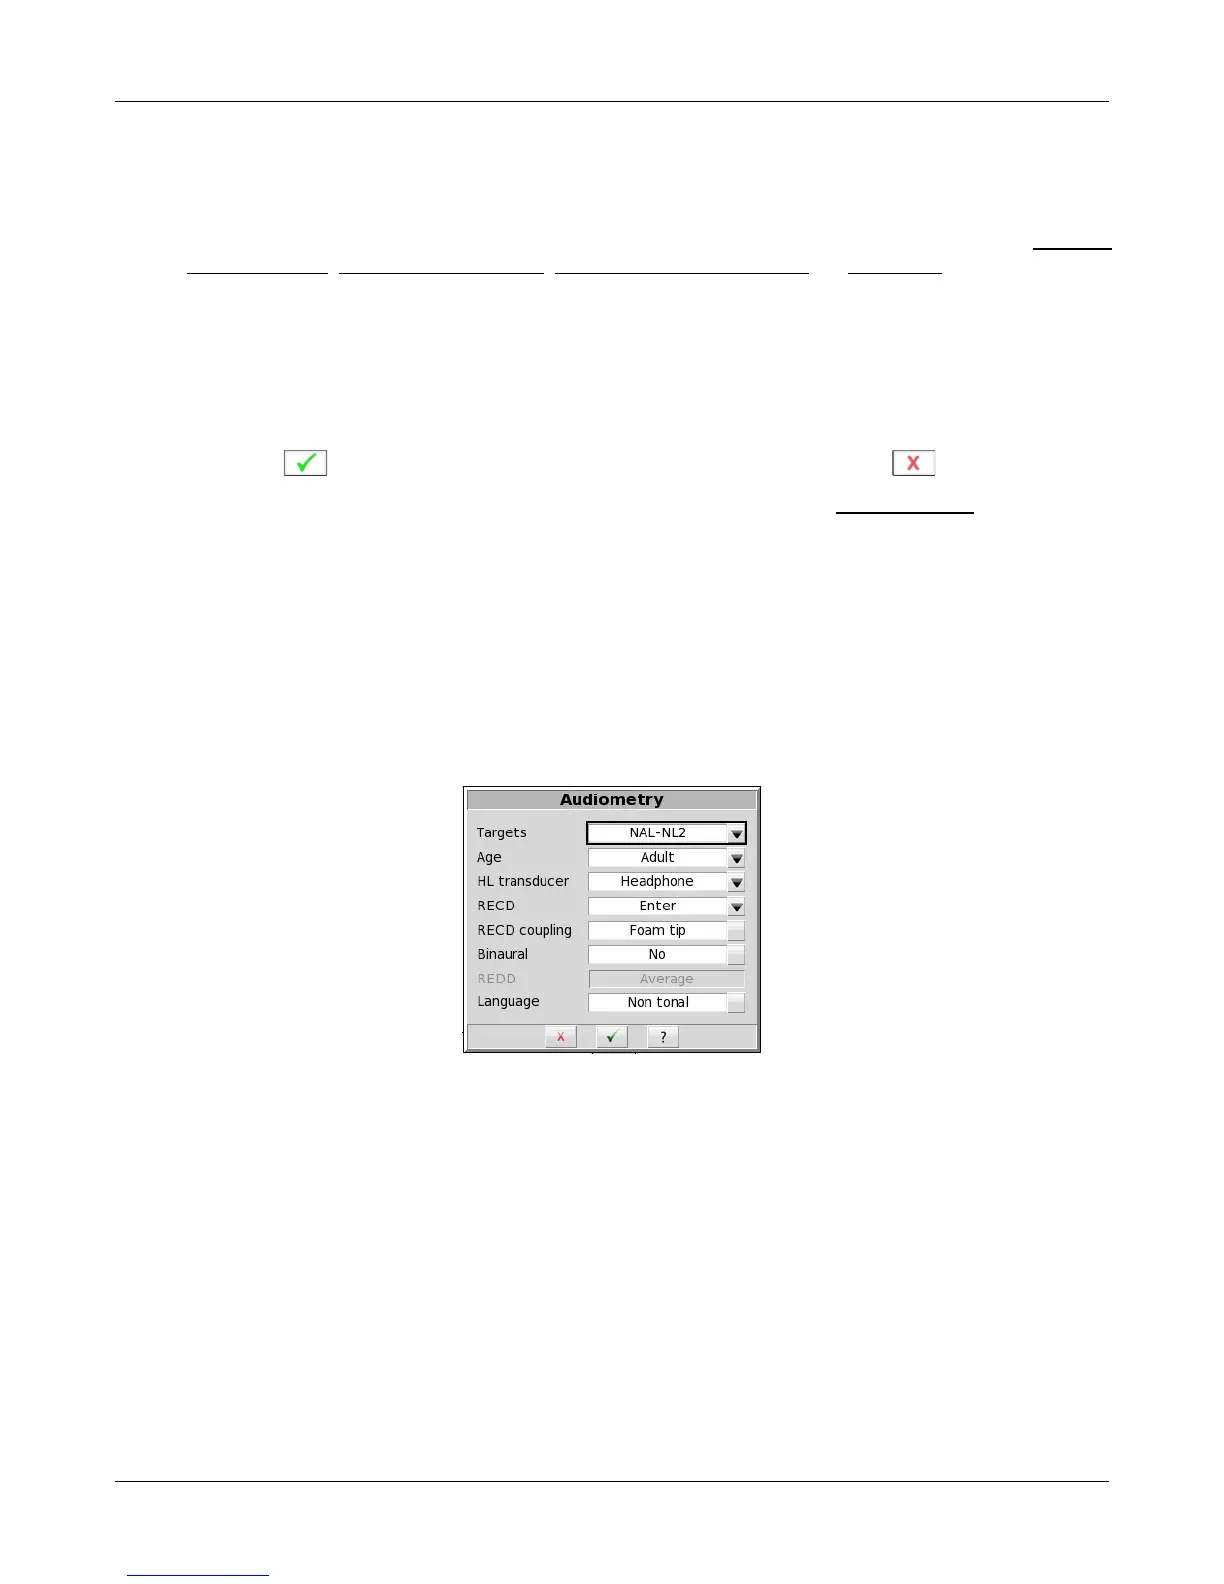
CIC-shallow, RITE, Body, Open, CROS or FM] and [Loss simulator] Clicking on [Audiometry] will cause a
related selection poster to be presented. Changes made on this poster are applied and the poster closed by
clicking on . The poster may be closed without applying the changes by clicking .
Defaults are the last-used choices if test setup memory has been turned on. See Saving test setup.
1. Targets: Fitting rule. Select from DSL Adult, DSL Child, NAL-NL1, NAL-NL2, Camfit restoration, Camfit
equalisation or None. The target selection also defines audiometric transforms for calculating SPL
55