Verifit
®
User's Guide Version 4.8 © November 2016
To test your selected options immediately, click the [Print test page] button. The test page includes all of your
selected printing options using sample screen images. Results are generated on the printer or in a file, according
to your selected options.
Windows-shared printers and folders
In Printing Setup and Session Setup, you can click the [Details] button to enter details for accessing Windows-
shared printers or folders. The details include the domain, server and share names, as well as your username and
password credentials for the selected domain and server. (Note that wherever these instructions refer to domain,
you can substitute workgroup, which on many small networks is simply called WORKGROUP.)
Domain and Server
In Printing Setup and Session Setup, click on [Details]. The Verifit will briefly confirm the network connection.
If the network connection fails, the will Verifit present the Network setup details, where you can correct any
setup problems before trying again. See the section, Network Setup for details.
With a successful network connection, the Verifit will automatically scan for the domains and servers available
on your network. Most networks have only one Windows domain, which the Verifit will select automatically.
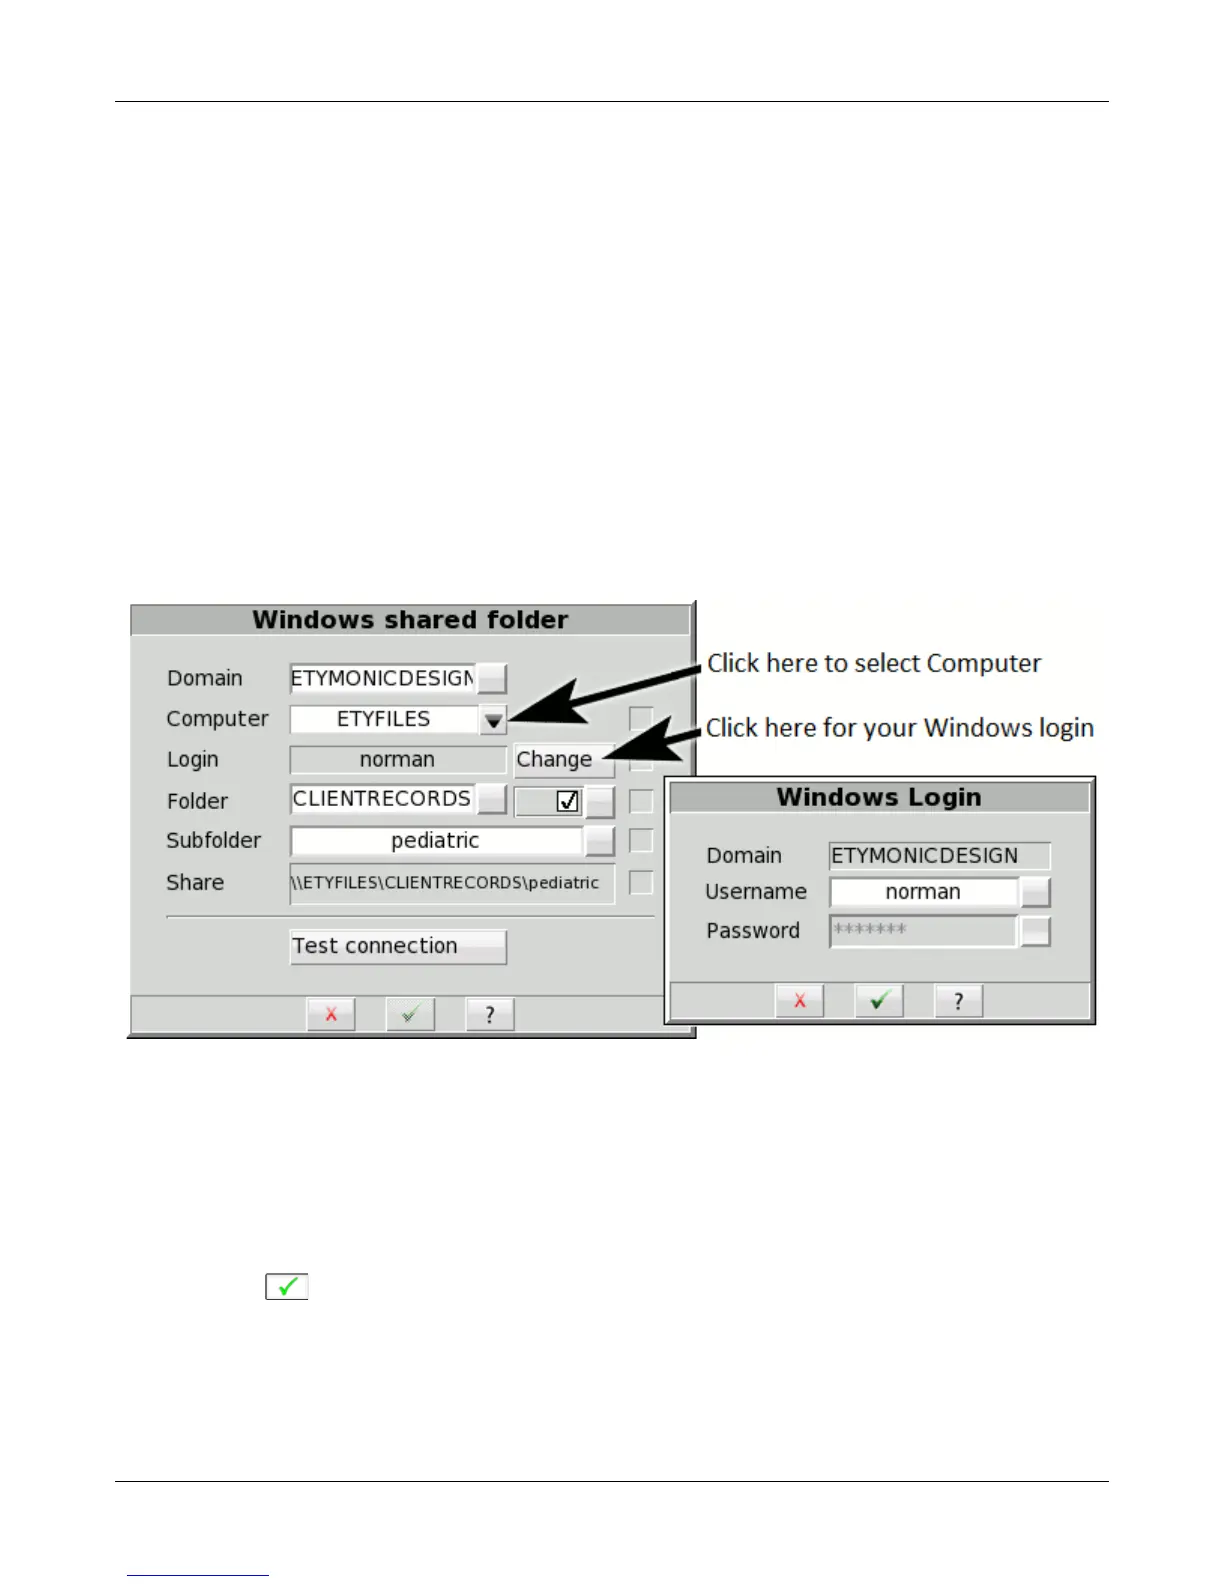
Windows shared folder setup
Windows login
If this is the first time that you have set up the Windows-share, then you will need to enter some details.
1. Select the Domain, if necessary – many networks have only one
2. Select the Computer from the list of available computers
3. Click [Change] to enter your Windows username and password
4. Click to accept the Windows Login details
Note that your Windows login details are stored separately for each of the printer share, the printing folder share
and the session folder share. You will need to enter your username and password details separately for each,
even if the details are the same for all of them.
Share name entry
131