Verifit
®
User's Guide Version 4.8 © November 2016
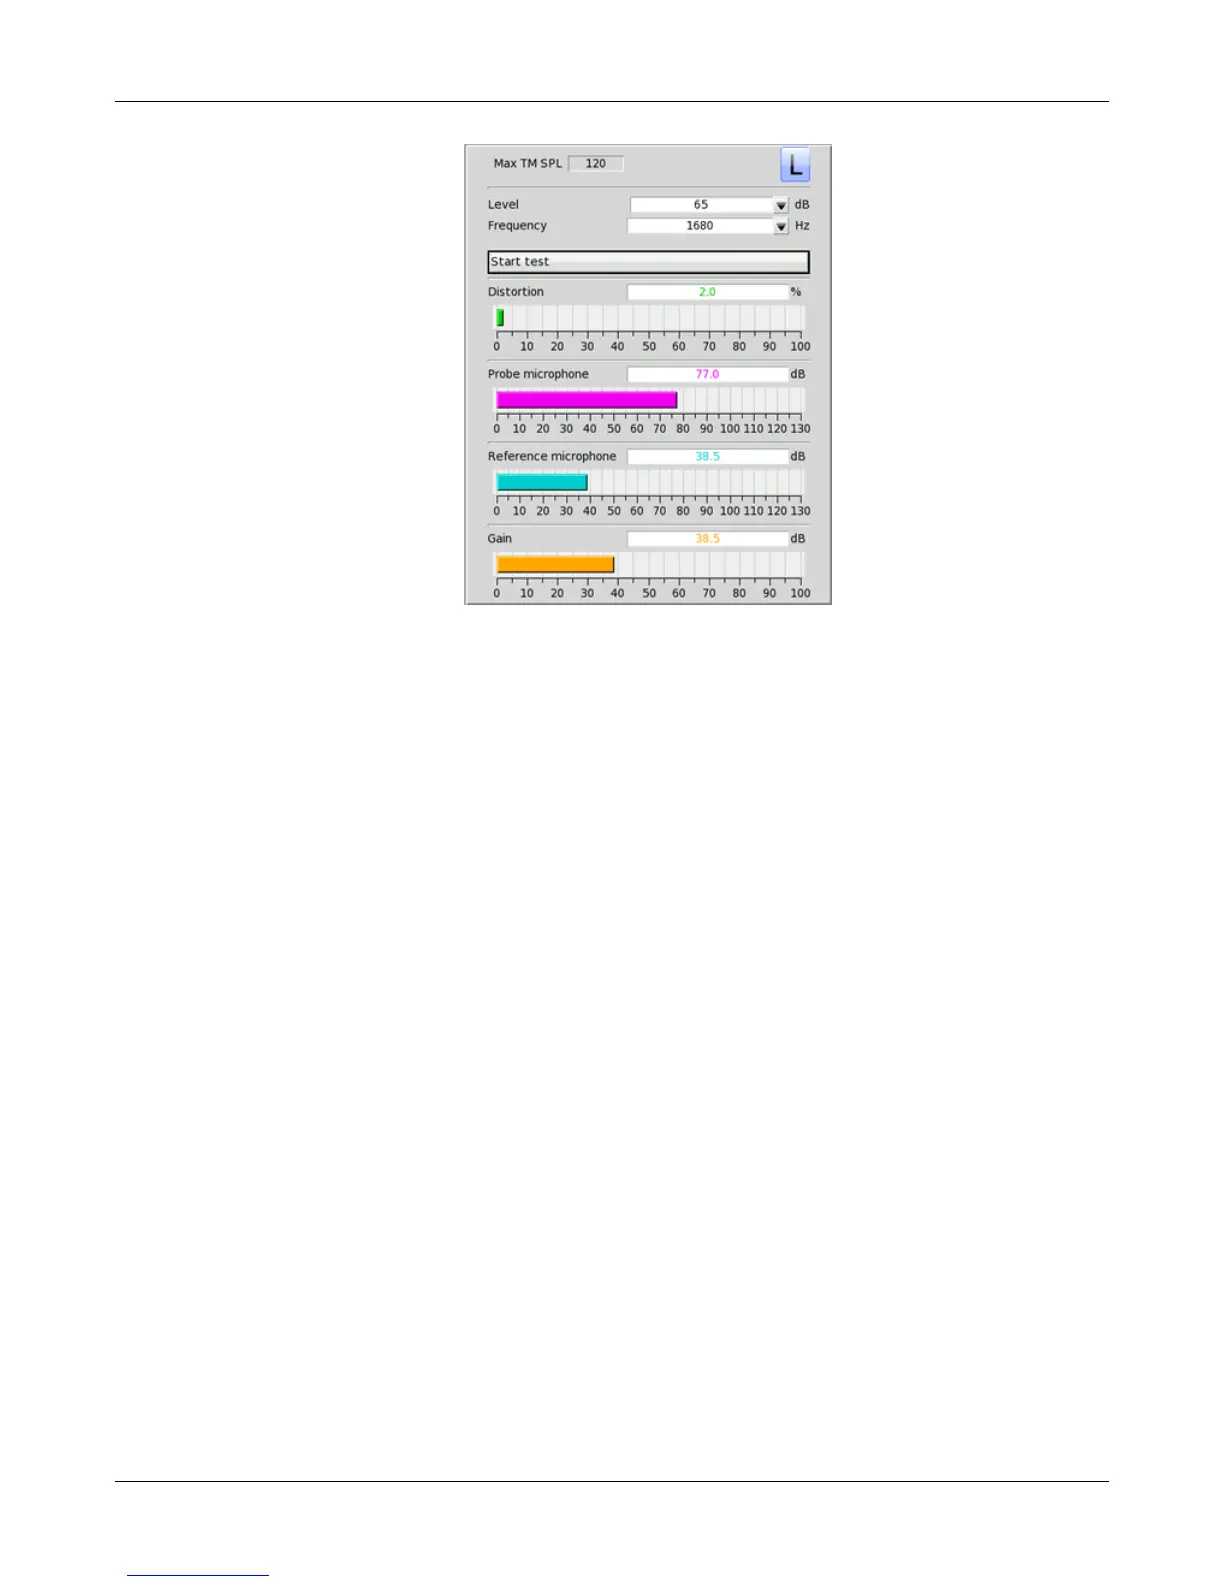
3. Click the Level window, then select the desired stimulus level from the drop-down list.
4. Click the Frequency window, then select the desired frequency from the drop-down list. (Distortion
measurement data is available only from 200-2500 Hz.)
5. Click [Start test] to start the test. [Start test] changes to [Stop Test]. To stop the measurement, click [Stop
test]. You may change Level and Frequency without stopping the test.
Sound level meter using on-ear microphones
The manual control feature enables the Verifit to be used as a sound level meter to perform C-weighted, A-
weighted or 1/12th octave analysis of sound as measured by the probe and reference microphones. A and C-
weighted measurements are limited to frequencies above 100 Hz and the averaging time and update rate are 384
ms.
1. Refer to On-Ear Measures - Setup to prepare the system for use and for proper positioning of the client and
the probe tube.
2. Right-click the mouse to raise the Home prompt and select [Manual control] under On-ear.
3. Click the Level window, then select 0 dB stimulus level from the drop-down list.
4. Click the Filter window, then select 1/12th octave, A-weighted, or C-weighted from the drop-down list.
5. For 1/12th octave filter, click the Frequency window, then select the desired frequency from the drop-down
list.
6. Click [Start test] to start the test. [Start test] changes to [Stop Test]. To stop the measurement, click [Stop
test]. You may change Level and Frequency without stopping the test.
77