49
USER'S MANUAL
bit One HD /
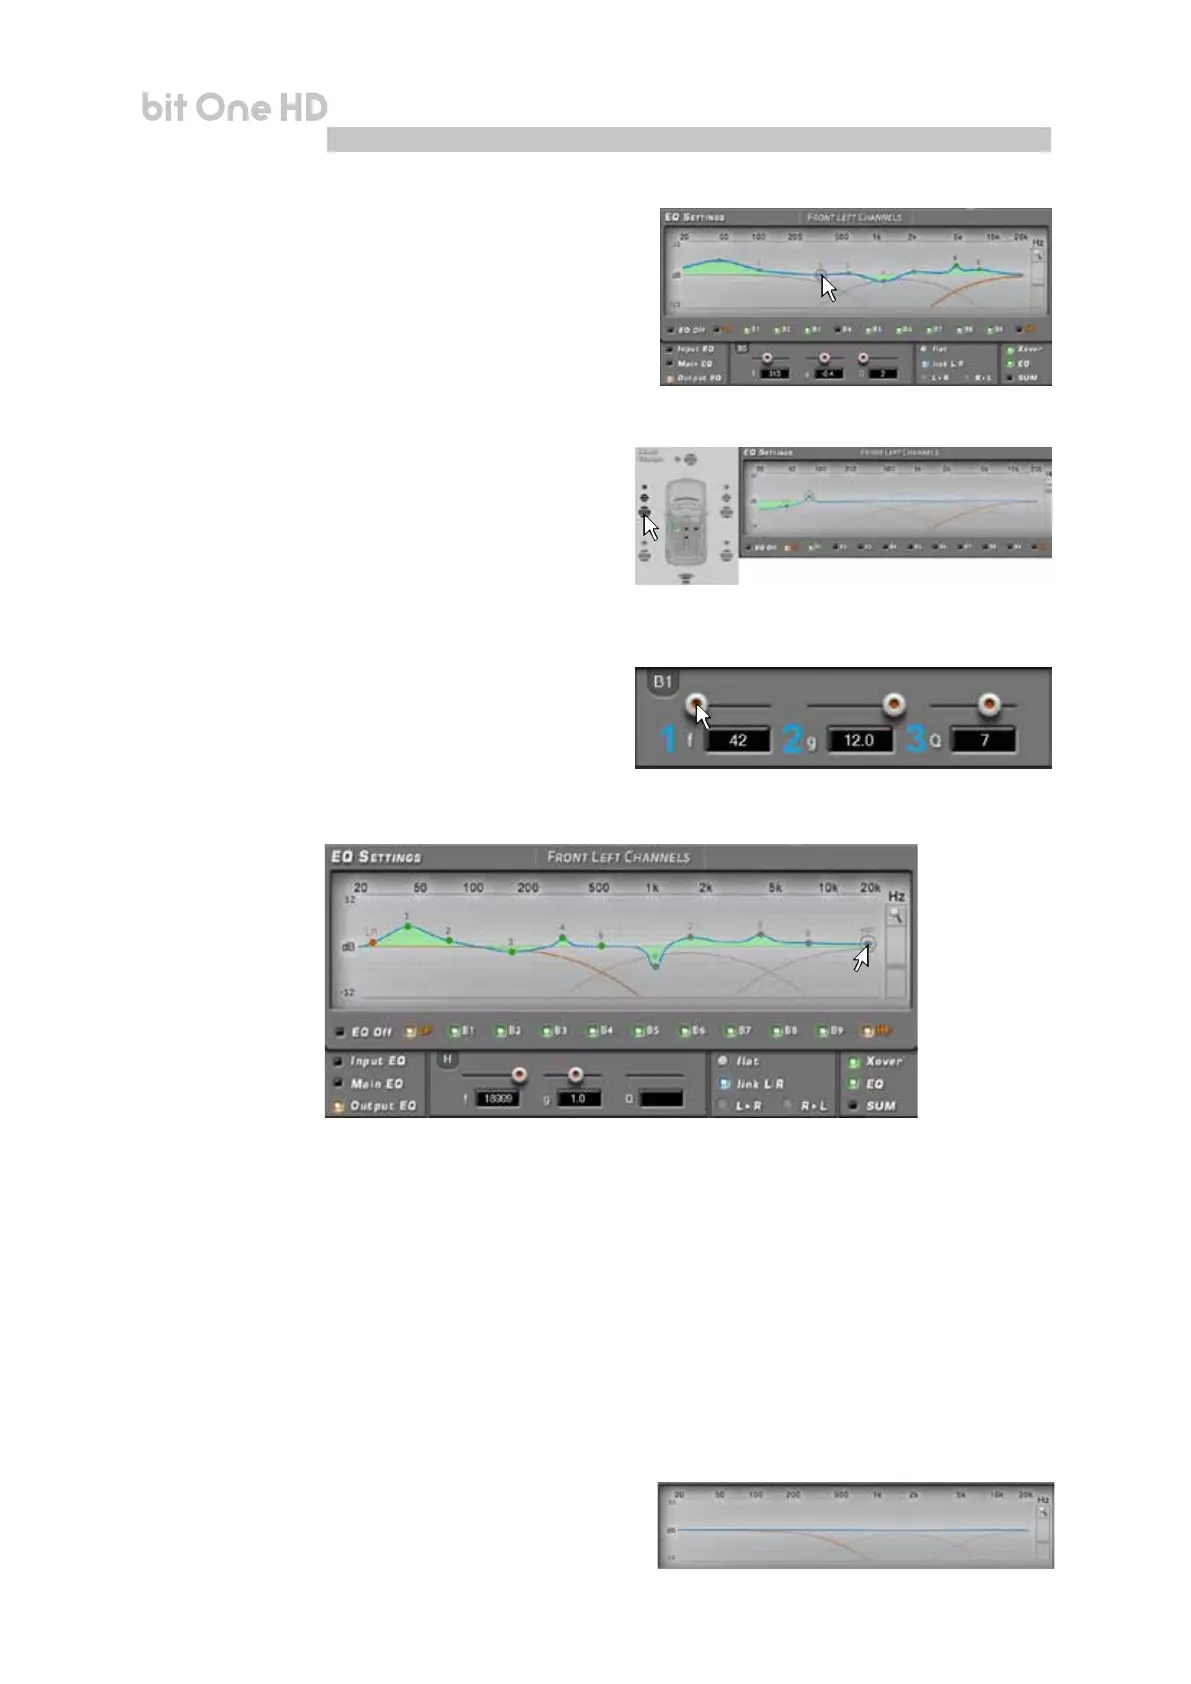
3. Output EQ: it displays the equalization curve of the bit One HD
selected channel output. A calibration of the input can be
performed with an equalizer featuring 11 poles of which 9
parametric poles and two Shielding (LP HP).
The equalizer works with functional groups:
- an equalizer for the Front Left Channels;
- an equalizer for the Front Right Channels;
- an equalizer for the Rear Left Channels;
- an equalizer for the Rear Right Channels;
- an equalizer for the Center;
- an equalizer for the Subwoofer.
To change the equalizer parameters in order to set an
equalization curve, select the channel to be equalized
from the “Channel Map” menu, enable the parametric
pole to operate on, place the mouse pointer on the section
to be set up and shape the curves with the mouse left
click (green curve).
To change the “Q” factor of the selected equalization
section, a mouse featuring a rotating nger wheel can be
used.
To operate on the parametric equalizer the setup
window (as shown in the image to the side) can also
be used, providing a more detailed setting on the
following parameters:
1. operating frequency pole 20÷20 kHz.
2. parametric pole gain ±12dB.
3. quality factor Q 1÷10.
The equalizer features specic functions to ease the calibration.
1. Flat: when selected, it restores all sliders of the
parametric equalizer to 0 dB position
2. Link L/R: when activated, it applies the equalization
curve to the right and the left channel simultaneously
3. L->R R->L: this function is active when “Link L/R”
is disabled. By Clicking on one of the two buttons the
equalization curve can be transferred from the Left to
the Right channel and vice versa
4. Xover: by selecting the box (red curve), it allows the
user to see the electric response under ltering (XOVER).
During the equalizer calibration the systems shows the modications applied to the electric signal transferred
to the speakers by the ampliers in real time.
The actual audio signal reproduced by the system depends on the type of speakers used and their position.
To analyze the acoustic response it is essential to use a spectrum analyzer connected to the microphone.
Otherwise you can rely on your experience with listening and proceed to a ne tuning according to this.
8