MENU FUNCTION
-33-
6.4.6 System
In this menu list, you can check or change some system settings.
Move the cursor to “SYSTEM”, and press ”ENTER”. You will see a similar screen as the following:
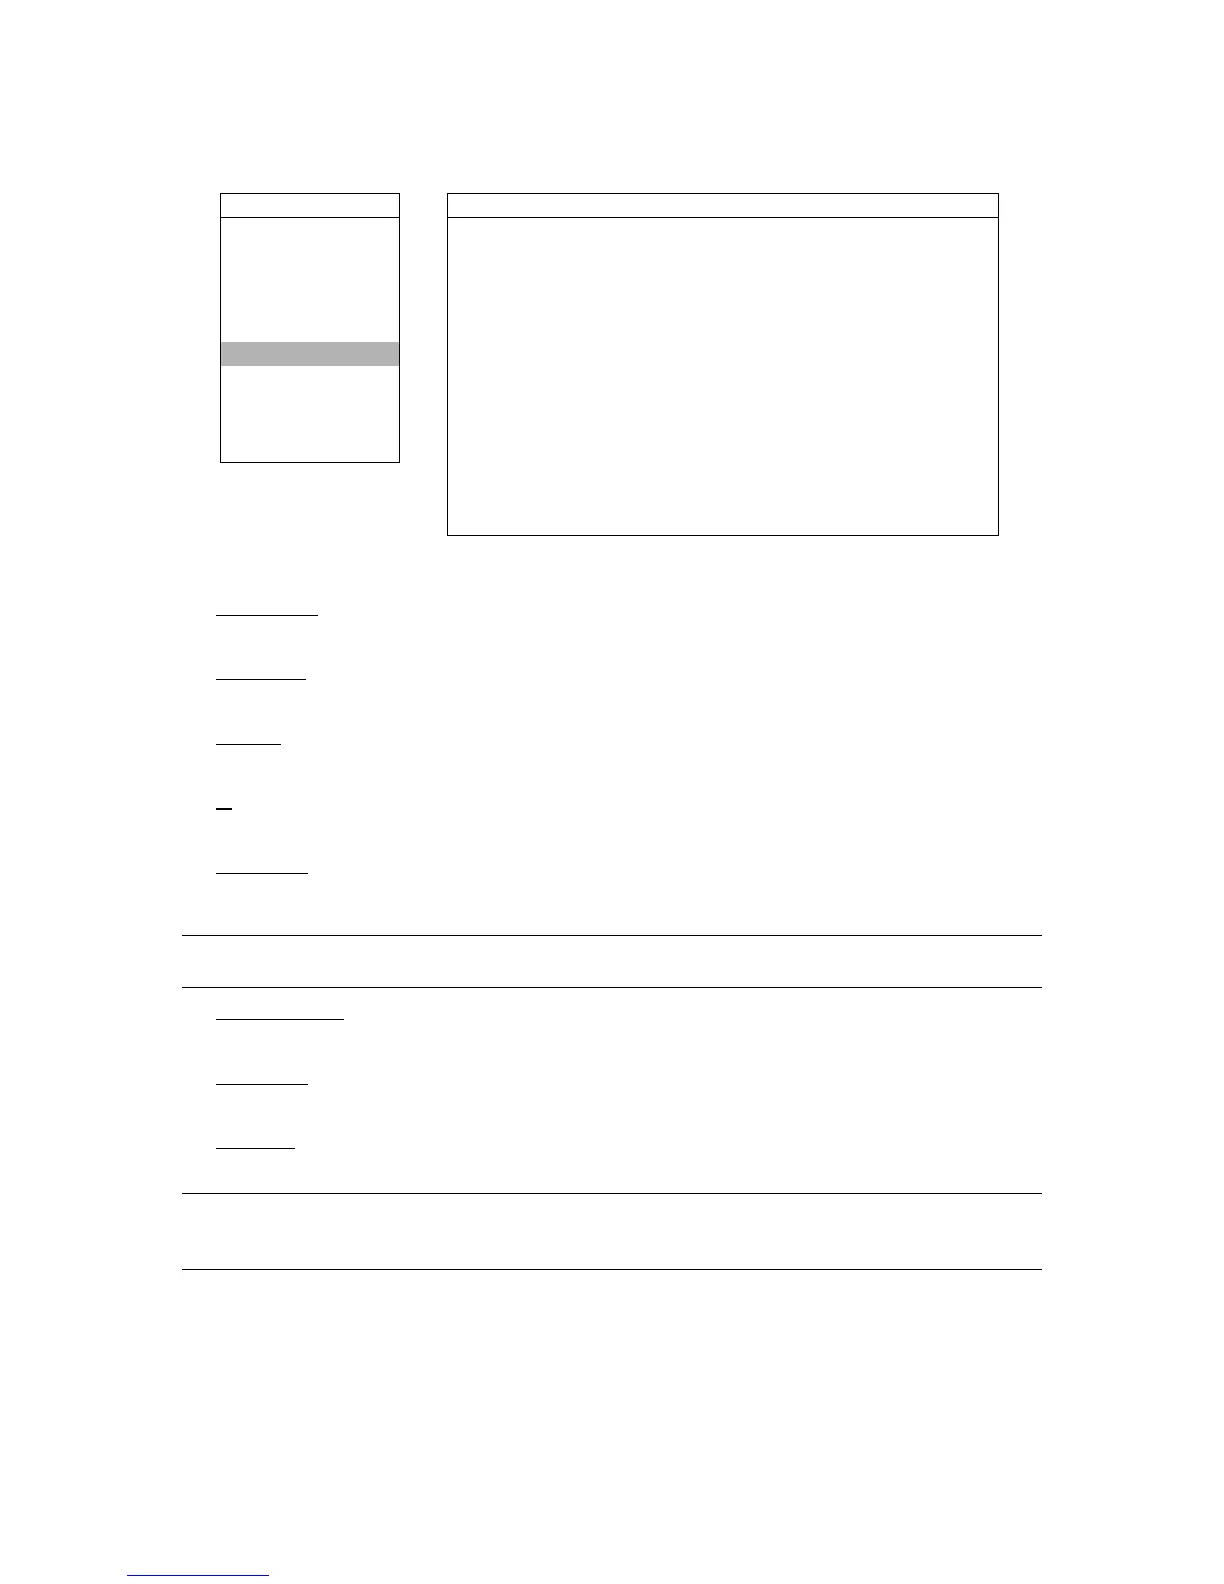
ADVANCE
SYSTEM
CAMERA
SERIAL TYPE RS-485
DETECTION BAUD RATE 02400
DISPLAY HOST ID 001
ALERT IR ON
REMOTE PASSWORD SETUP
SYSTEM
RESET DEFAULT RESET
NETWORK CLEAR HDD EXT 003
BACKUP UPGRADE NO
HDD INFO R.E.T.R. (MIN) 03
EVENT LOG AUTO KEYLOCK NEVER
LANGUAGE ENGLISH
VERSION 1088-10-K2-04-AA-11
VIDEO FORMAT NTSC
The submenu items are described below:
1) SERIAL TYPE
Press “ENTER” or “+” / “-” button to set the serial type of the DVR (RS-485 / RS-232).
2) BAUD RATE
Press “ENTER” or “+” / “-” button to set the baud rate of the DVR (2400 / 9600 / 19200 / 57600).
3) HOST ID
Press “ENTER” or “+” / “-” button to set the ID of the DVR (0 ~ 255).
4) IR
Press “ENTER” or “+” / “-” button to enable or disable IR function (ON / OFF).
5) PASSWORD
Press “ENTER” to reset the password for accessing the DVR system (ADMIN PASSWORD or GUEST PASSWORD).
You can set the password up to 4 digits.
Note: Users who use guest password to access the DVR will be only allowed to view the live streaming video
and sequence display, shift the channel display, and lock keys.
6) RESET DEFAULT
Press “ENTER” to reset all settings as default, and select “YES” to confirm or “NO” to cancel.
7) CLEAR HDD
Press “ENTER”, and select “YES” to confirm to clear HDD or “NO” to cancel.
8) UPGRADE
Press “ENTER”, and select “YES” to confirm upgrade or “NO” to cancel.
Note: To use this function, you need to have the upgrade file saved in a compatible USB flash drive, and
insert it into the USB port at the front or rear panel. For the list of compatible USB flash drives, please
refer to “APPENDIX 4 COMPATIBLE USB FLASH DRIVE BRAND” at page 75.