MAIN MENU
24
remember to make video backup.
NVR date and time are changed accidentally when the recording function is activated. Otherwise, the recorded
data will be disordered and you will not be able to find the recorded file to backup by time search.
3) RESET DEFAULT
Click “SUBMIT” to reset all settings as default, and select “YES” to confirm or “NO” to cancel. The NVR will
reboot after reset.
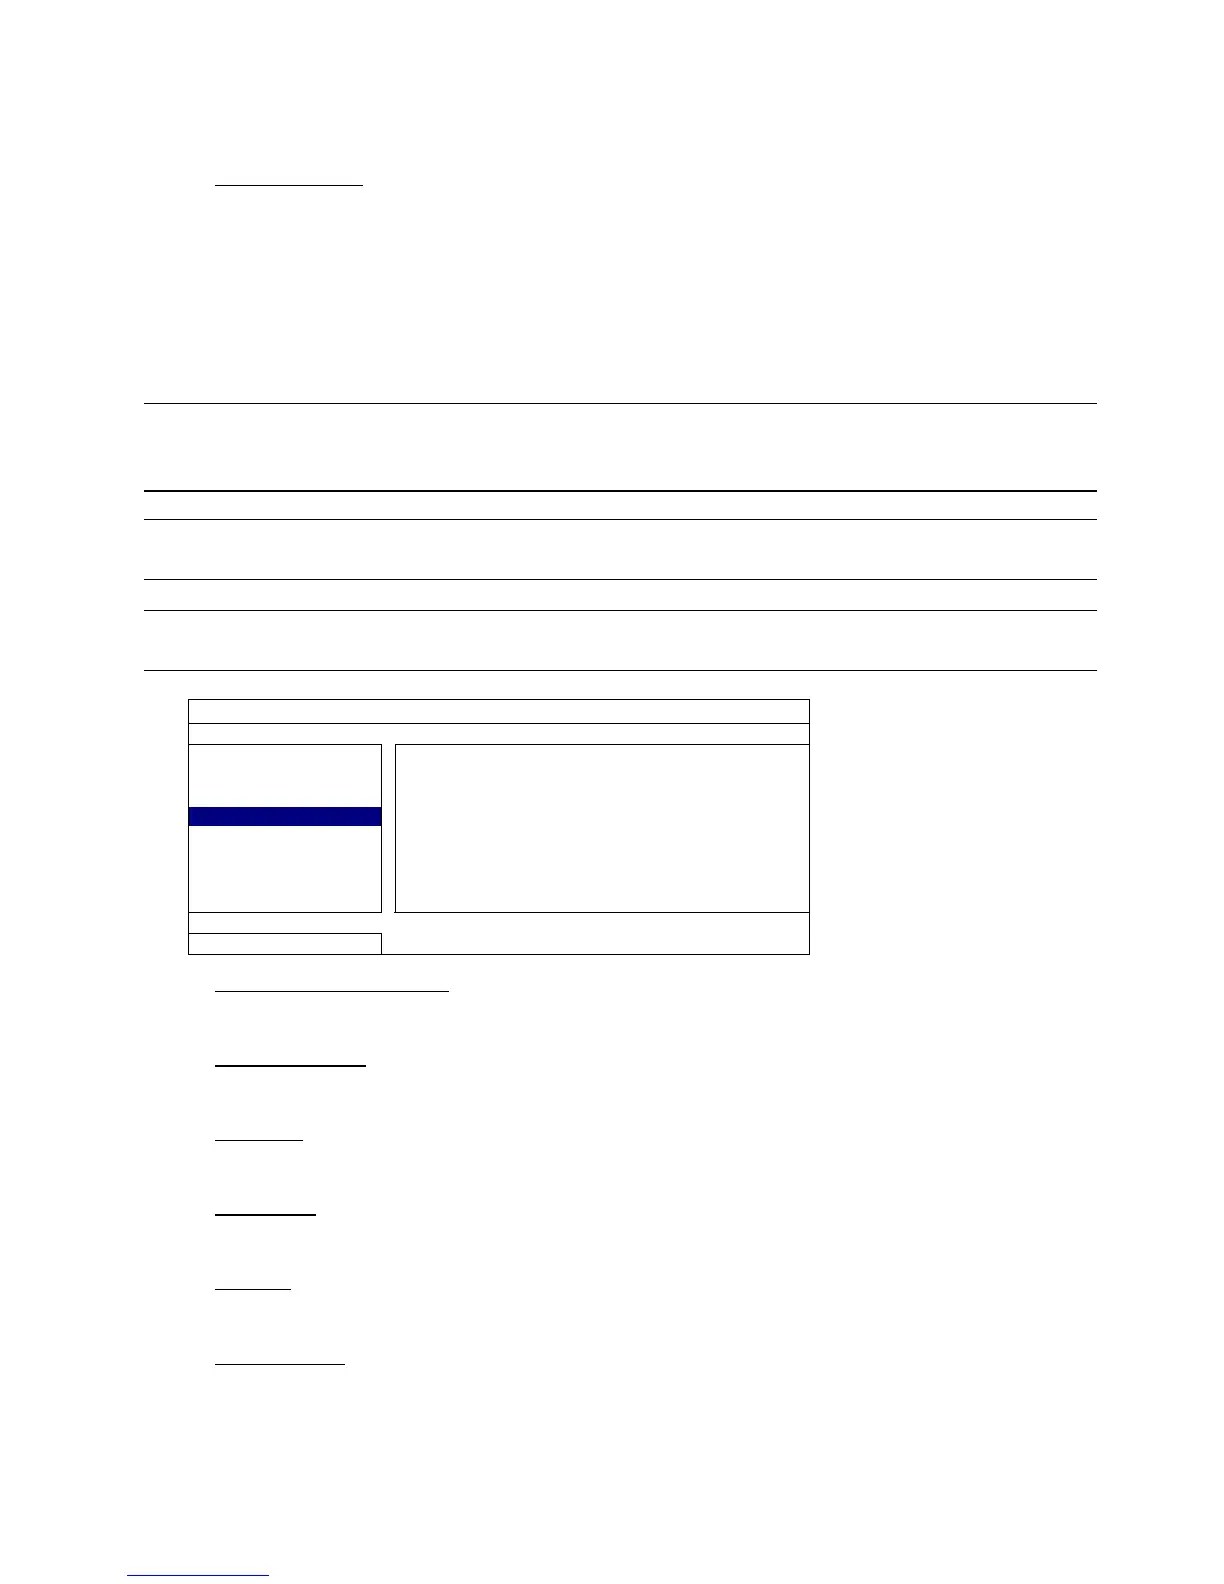
6.2.4 BACKUP DATA (USB)
This function is used to copy recorded video data from the NVR hard disk to a USB flash drive.
Insert a compatible USB flash drive to the USB port at the front panel, and you’re able to start video backup.
Note: Before using the USB flash drive, please use your PC to format the USB flash drive to FAT32
format first. For the list of compatible USB flash drives, please refer to “APPENDIX 2 COMPATIBLE
USB FLASH DRIVE LIST” at page 41.
Note: The backup video can be played on the PC. For details, please refer to “4.8 Video Playback on PC”
at page 15.
Note: For video backup, please use USB flash drive or back your data up over the Internet. It’s not
recommended to connect the HDD to your PC directly.
SYSTEM
ACCOUNT
START DATE 2009/NOV/19
TOOLS
START TIME 08:30:21
SYSTEM INFO
END DATE 2009/NOV/19
BACKUP DATA (USB)
END TIME 17:59:29
BACKUP LOG (USB)
CHANNEL
05 06
HARD DISK ALL HDD
BACKUP SUBMIT
REQUIRE SIZE: 554MB SUBMIT
EXIT
AVAILABLE SIZE: 3788.0MB
1) START DATE / START TIME
Select the start date & time.
2) END DATE / TIME
Select the end date & time.
3) CHANNEL
Click to select the channel(s).
4) HARD DISK
Select the hard disk containing the video data you need or “ALL HDD”.
5) BACKUP
Click “SUBMIT” to start backup.
6) REQUIRE SIZE
To know the size of the expected backup video before backup, click “SUBMIT” to start calculating.