MAIN MENU
28
Then, click “SETUP” to enter the access information of the camera:
CONFIG-CH1
USER NAME
admin
PASSWORD **********
CACHE TIME (MSEC)
MODEL AVTECH
GET TYPE IP CAMERA
PROFILE PROFILE-3
TYPE H264
IMAGE SIZE 720 X 480
QUALITY
I.P.S. 30
AUDIO ON
EXIT
Step1: Enter the user name and password to access the IP camera.
Step2: Click “GET TYPE” to detect and make sure the access information you’re intended to connect is correct.
Step3: Select the image size, image quality, and I.P.S.
Note: The options selectable for “IMAGE SIZE” and “I.P.S.” depends on the camera you’re intended to
connect.
Step4: (Optional) For the camera with audio recording, select “ON” or “OFF”.
6.4.2 CAMERA
ADVANCED CONFIG
C O N N E C T I O N CH1 CH2 CH3 CH4 CH5 CH6
CAMERA
BRIGHTNESS 128
DETECTION
CONTRAST 128
ALERT
SATURATION 128
NETWORK
HUE 128
DISPLAY
COV. OFF
RECORD
REC ON
NOTIFY
REC AUDIO ON
CHANNEL TITLE EDIT
PORT FORWARD 81
PORT FORWARD ENABLE ON
EXIT
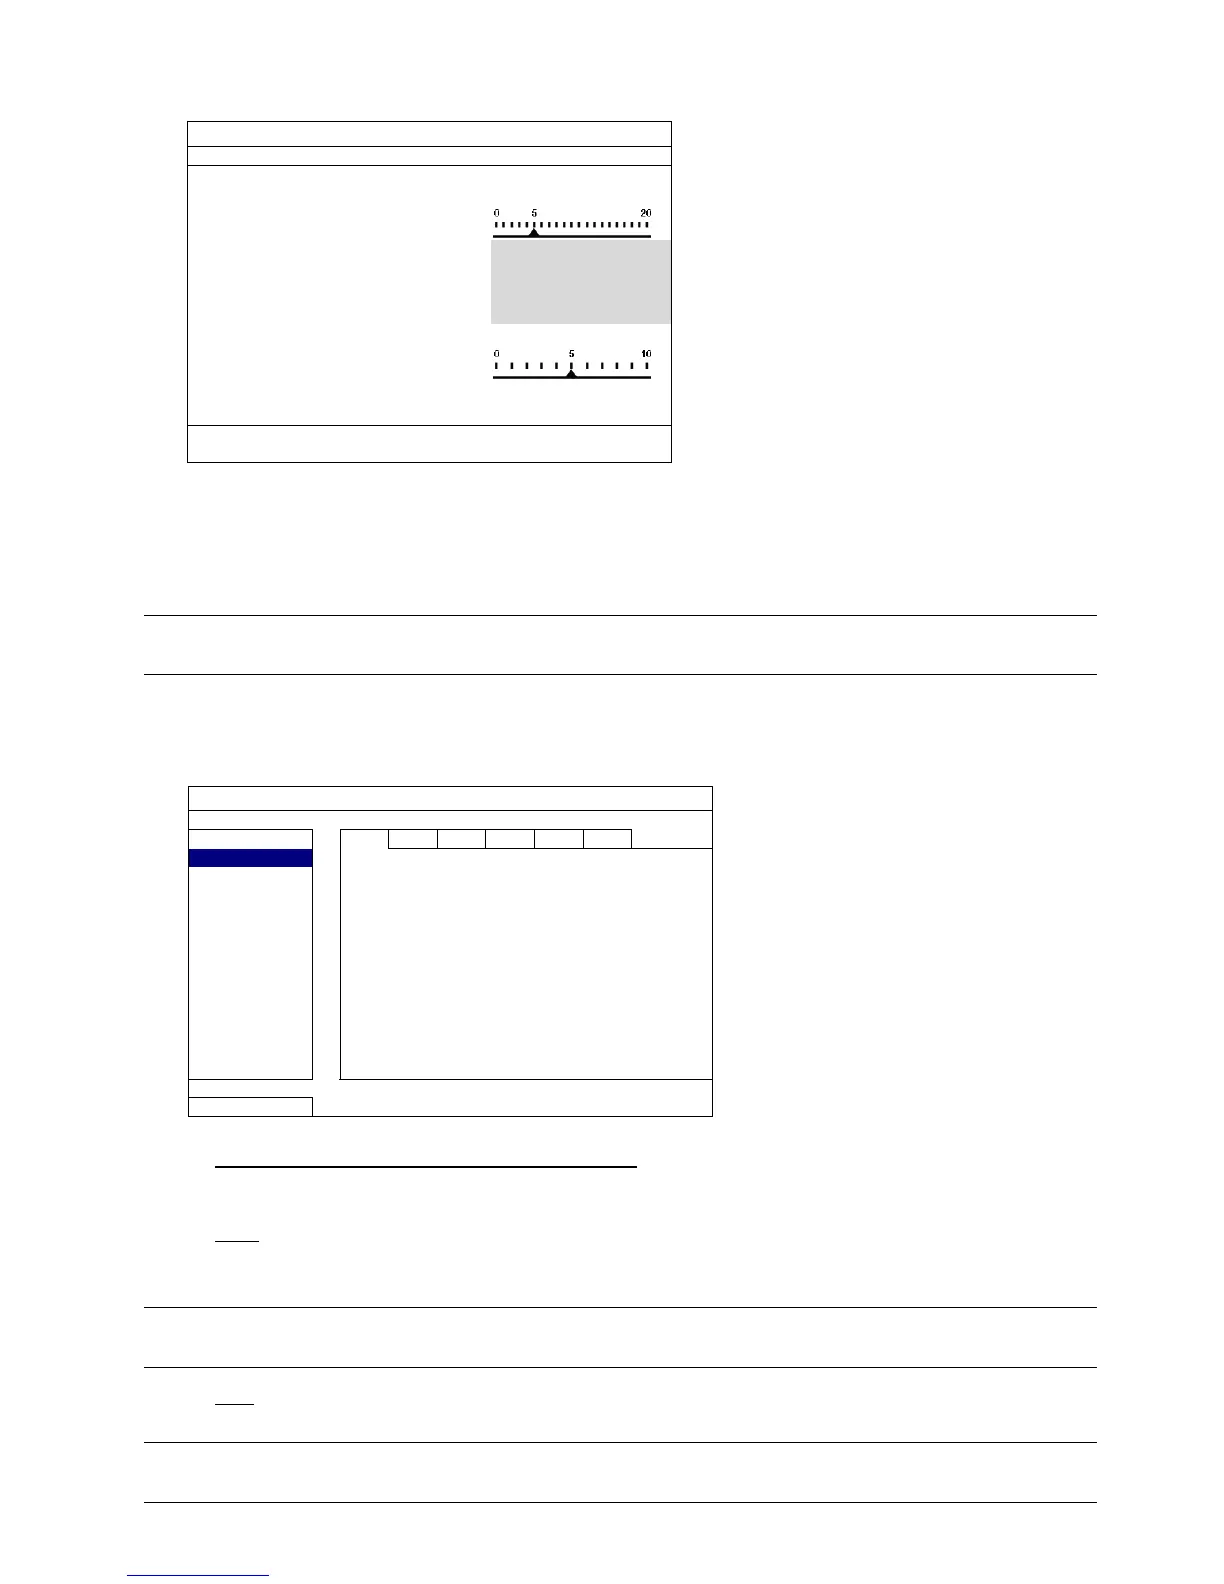
1) BRIGHTNESS / CONTRAST / SATURATION / HUE
Click the current value to manually adjust the brightness/contrast/saturation/hue of each channel here.
2) COV.
Select if you want to mask the selected channel under recording (ON / OFF). When this function is activated,
the wording “COV.” will be shown on the channel screen.
Note: To hide the wording “COV.” when this function is on, go to “DISPLAY”, and set “DISPLAY COVERT”
to “OFF”. For details, please refer to “6.4.6 DISPLAY” at page 32.
3) REC
Select if you want to enable recording for the selected channel (ON / OFF).
Note: When this function is disabled, no manual, event or timer recording will be activated even if any
of these three record functions is set to “ON”.