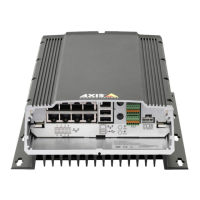
AXIS Camera Station S2216 Mk II Appliance
Manage the built - in switch
2. In the Lock column, click to lock the specic port.
Unlock a MAC address from a port
1. In the menu bar , click Network overview .
2. In the Lock column, click to unlock the specic port.
Lock or unlock all ports
1. In the menu bar , click Network overview .
2. T o lock all ports, go to the Lock ports drop - down menu and select Lock all .
3. T o unlock all ports, go to the Lock ports drop - down menu and select Unlock all .
Settings
Congure network settings
Y ou can change the switch’s IP address. But for most camera installations, we recommend using the default settings. The reason for
this is that a surveillance network is normally isolated from other networks, for example a corporate LAN. In this case, you would
only use the surveillance network to manage and collect surveillance devices and data from the video management software
installed on the server .
1. In the menu bar , go to Settings > Network settings .
2. Enter the connection type, IP address, subnet mask, gateway , primary DNS, secondary DNS, and hostname.
Note
The factory default settings are: a static IP connection with address 192.168.1 0.1 and a subnet mask with address
255.255.255.0.
3. Click Save .
Congure date and time
1. In the menu bar , go to Settings > Date and time .
2. Select the country and time zone.
3. T o set the time manually , select Manual and manually adjust the time.
4. T o set up an NTP server , select NTP server and enter the NTP server address.
Note
NTP only works when the switch is connected to a network and congured with Internet access.
5. Click Save .
Congure DHCP server
Y ou can congure the switch to use its internal DHCP server for assigning IP addresses to connected devices. When you use the switch
uplink connection to allow devices to access or be accessed by external applications, you must specify the gateway and DNS addresses.
1. In the menu bar , go to Settings > DHCP server .
2. Select Enable DHCP server .
26