Bandit
31Copyright 12/17
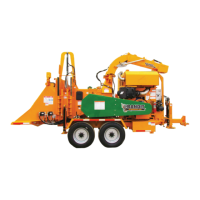
MODEL 20XP
BEFORE TRANSPORTING THE MACHINE THE FOLLOWING MUST BE COMPLETED.
1. Idle engine, disengage clutch.
2. Make sure the top feedwheel is in the lowered position.
3. Raise the front of the machine or transport trailer with the tongue jack and remove the stabilization
blocks used. If the machine is equipped with a hydraulic tongue jack, remove the lock pin before raising
the front of the machine.
4. Couple machine or transport trailer to transport vehicle by lowering the machine onto the hitch. Make
sure the hitch matches the coupling size. Then secure hitch and lock it.
5. Place the tongue jack in the transport position. If the machine is equipped with a hydraulic tongue jack,
lift the foot pad to the transport position and install the lock pin.
6. If equipped, place the stabilizer legs in the transport position, fully retracted and install the lock pin.
7. Place all hydraulic controls in the “o” position.
8. Turn o engine, wait for the chipper disc/drum to come to a complete stop and you must have the
ignition key in your possession.
9. Disconnect and store the tether remote control or the radio remote control in the cabinet, if equipped.
10. Attach the safety chains by crossing them under hitch, make sure to allow the proper amount of slack
in chains to avoid binding or dragging the ground when making turns.
11. If trailerized machine is equipped with a conveyor, secure the tail light tether cords and hook up the
plug-ins. The light assembly with the green pigtail is for the curb side and the light assembly with the
yellow pigtail is for the road side.
12. Connect the brake breakaway cable (if equipped) and plug in the electrical connection for the lights on
the machine or transport trailer.
13. Check running lights, turn signals, and brake lights. All must be operating properly before transporting
the machine. If equipped with electric brakes, check brakes to make sure they are operating correctly.
14. If equipped with air brakes, connect the brake lines and make sure the air tank drain valve is closed.
Check brakes to make sure they are operating correctly.
15. Remove all excess debris. Remove any wood or debris which may have collected.
16. Store all tools in the tool box and make sure all boxes and cabinets are closed and secured.
17. Check tires for correct pressure, cuts or damaged rims.
18. Check lug nuts and retorque if necessary. Check new units before operation, check again after 20-25
miles (32-40 km) and regularly check at least weekly.
19. Inspect and replace any axle dust caps that are damaged or leaking.
20. Check wheel bearings and grease or oil axles per axle manufacturer’s manual.
21. Walk around the machine to conrm that everything is secure and that there is not anything loose that
could fall o during transport. Look under machine to ensure nothing is dragging. Look down both sides
of the machine for anything sticking out that may become damaged during transport.
22. If machine is equipped with a vise, make sure to secure in place and clamp jaws closed.
23. Close and secure any of the following, if equipped: engine cowl doors and side panels, radiator debris
screens, inspection doors, housing covers, tanks caps and covers, etc.
24. If the machine is self propelled and on a transport trailer, make sure the trailer has the correct load
capacity, the machine is positioned on the trailer for correct weight distribution, and the machine is
securely bound down to the trailer bed per your States binding requirements. Make sure the loading
ramps are securely stored for transport. (See Loading & Unloading Self-Propelled Machines.)
25. The machine is now ready for transport. Make sure to obey all local regulations and laws regarding the
transporting of this type of machine.
26. Do not drive too fast for road conditions or exceed speed regulations for equipment towing. Machine
must be hauled level and the towing vehicle must be sized to handle hitch weight, towing weight, and
braking requirements.
TRANSPORTATION PROCEDURES
TRANSPORTATION PROCEDURES
WARNING
!