2
Installaon Instrucons
2.1 Mounng Instrucons
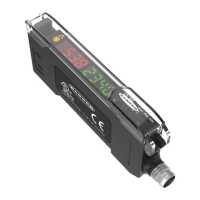
Mount on a DIN Rail
1. Hook the DIN rail clip on the boom of the DF-G3 over
the edge of the DIN rail (1).
2.
Push the DF-G3 up on the DIN rail (1).
3. Pivot the DF-G3 onto the DIN rail, pressing unl it snaps
into place (2).
Mount to the Accessory Bracket (SA-DIN-BRACKET)
1. Posion the DF-G3 in the SA-DIN-BRACKET.
2.
Insert the supplied M3 screws.
3. Tighten the screws.
Remove from a DIN rail
1. Push the DF-G3 up on the DIN rail (1).
2.
Pivot the DF-G3 away from the DIN rail and remove it (2).
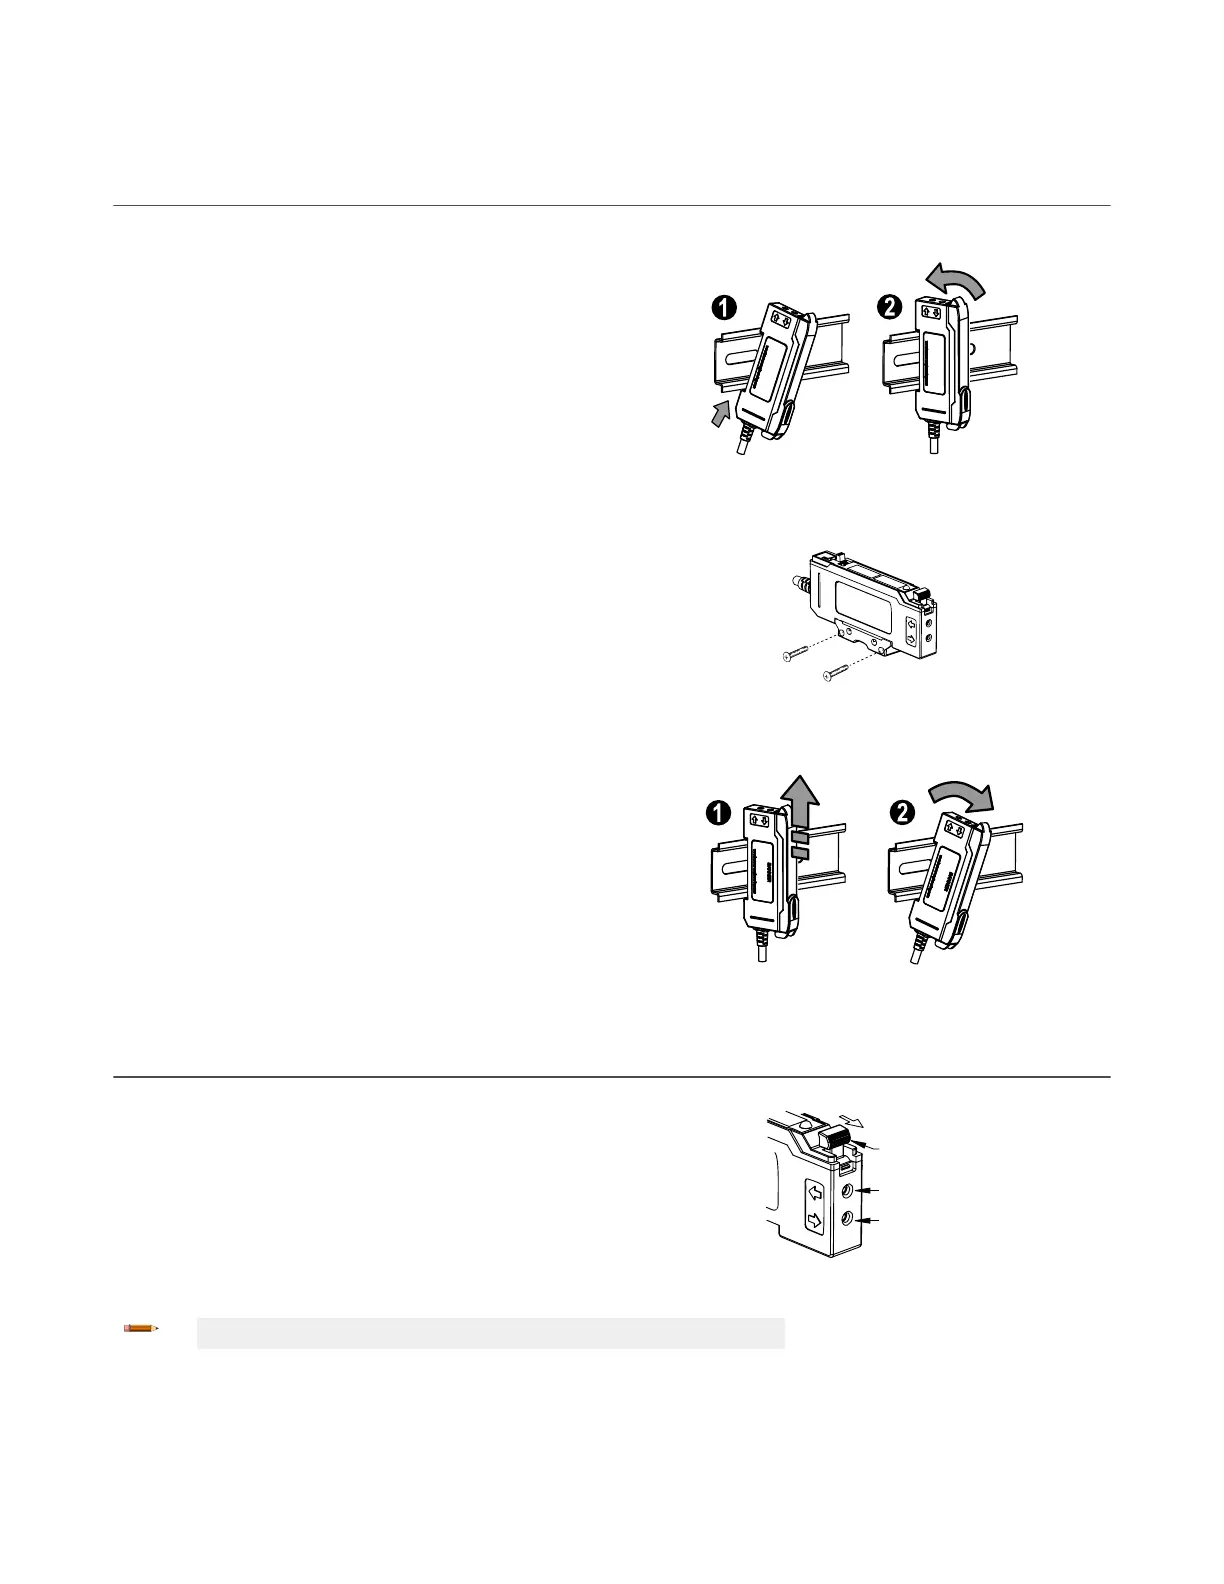
2.2 Installing the Fibers
Follow these steps to install glass or plasc
bers.
1. Open the dust cover.
2.
Move the ber clamp forward to unlock it.
3.
Insert the ber(s) into the ber port(s) unl they stop.
4.
Move the ber clamp backward to lock the ber(s).
5. Close the dust cover.
Fiber Emitter
Port
Fiber Receiver
Fiber Clamp
Port
Move forward
to release the
fibers
Note: For opmum performance of IR models, if applicable, glass bers must be used.
DF-G3 Long Range Expert
™
Dual Display Fiber Amplier
6 www.bannerengineering.com - Tel: 763.544.3164
 Loading...