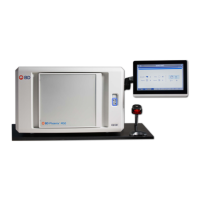
Operator Controls
13
4 The user unloads the specimen rack and passes the layered specimens on to the
centrifugation step.
3.2 Operating sequence details
The following steps describe the details of the BD PrepMate™ Automated Accessory operating
sequence.
1
The user powers on and prepares the instrument. See
BD PrepMate™ operating
instructions
.
2 The first row of syringes is positioned for pickup and is lifted from the specimen rack.
3 Th
e syringe plungers are lifted to a draw level and pushed back down one time while the
syringes are being lifted. This pre-mix step improves smoothness of movement of the
plunger against the syringe wall during the dispense cycle.
4 Th
e specimen rack is positioned so that the BD SurePath Liquid-based Pap Test
preservative vials are directly underneath the syringes.
5
The syringes are lowered so that their tips puncture the seals on the caps of the BD SurePath
Liquid-based Pap Test preservative vials and stop near the bottom of each vial.To reduce the
possibility of specimen contamination, the tops of vials are not removed during this process.
6 The syringe plungers move up and down for eight cycles to mix the specimen.
7 T
he plungers are raised to draw the specimen into the syringes.
8 Th
e syringes are raised and the specimen rack is positioned so that the tips are directly over
the centrifuge tubes.
9 Th
e syringes are lowered so that their tips rest inside and against the side of the tube
containing BD Density Reagent.
10 Th
e specimen is slowly dispensed into the tubes at 3 gradually increased speeds so as not
to mix with the BD Density Reagent in the tubes.
NOTE
The instrument may be silent and appear to have stopped during
th
is operation.
11 Th
e syringes are then raised and the specimen rack backs up to the original syringe load
position.
12 Th
e syringes are lowered back into the specimen rack and the tray backs up to release them.
13 T
he syringe holder is raised to the top position, completing transfer of the first group of four
specimens.
14 Steps 1–
12 are repeated for the remaining rows until the processing cycle is complete.
15 T
o eliminate the possibility of specimen contamination, vials, syringes and tubes are
disposable. They are not reused.
4 Operator Controls