33
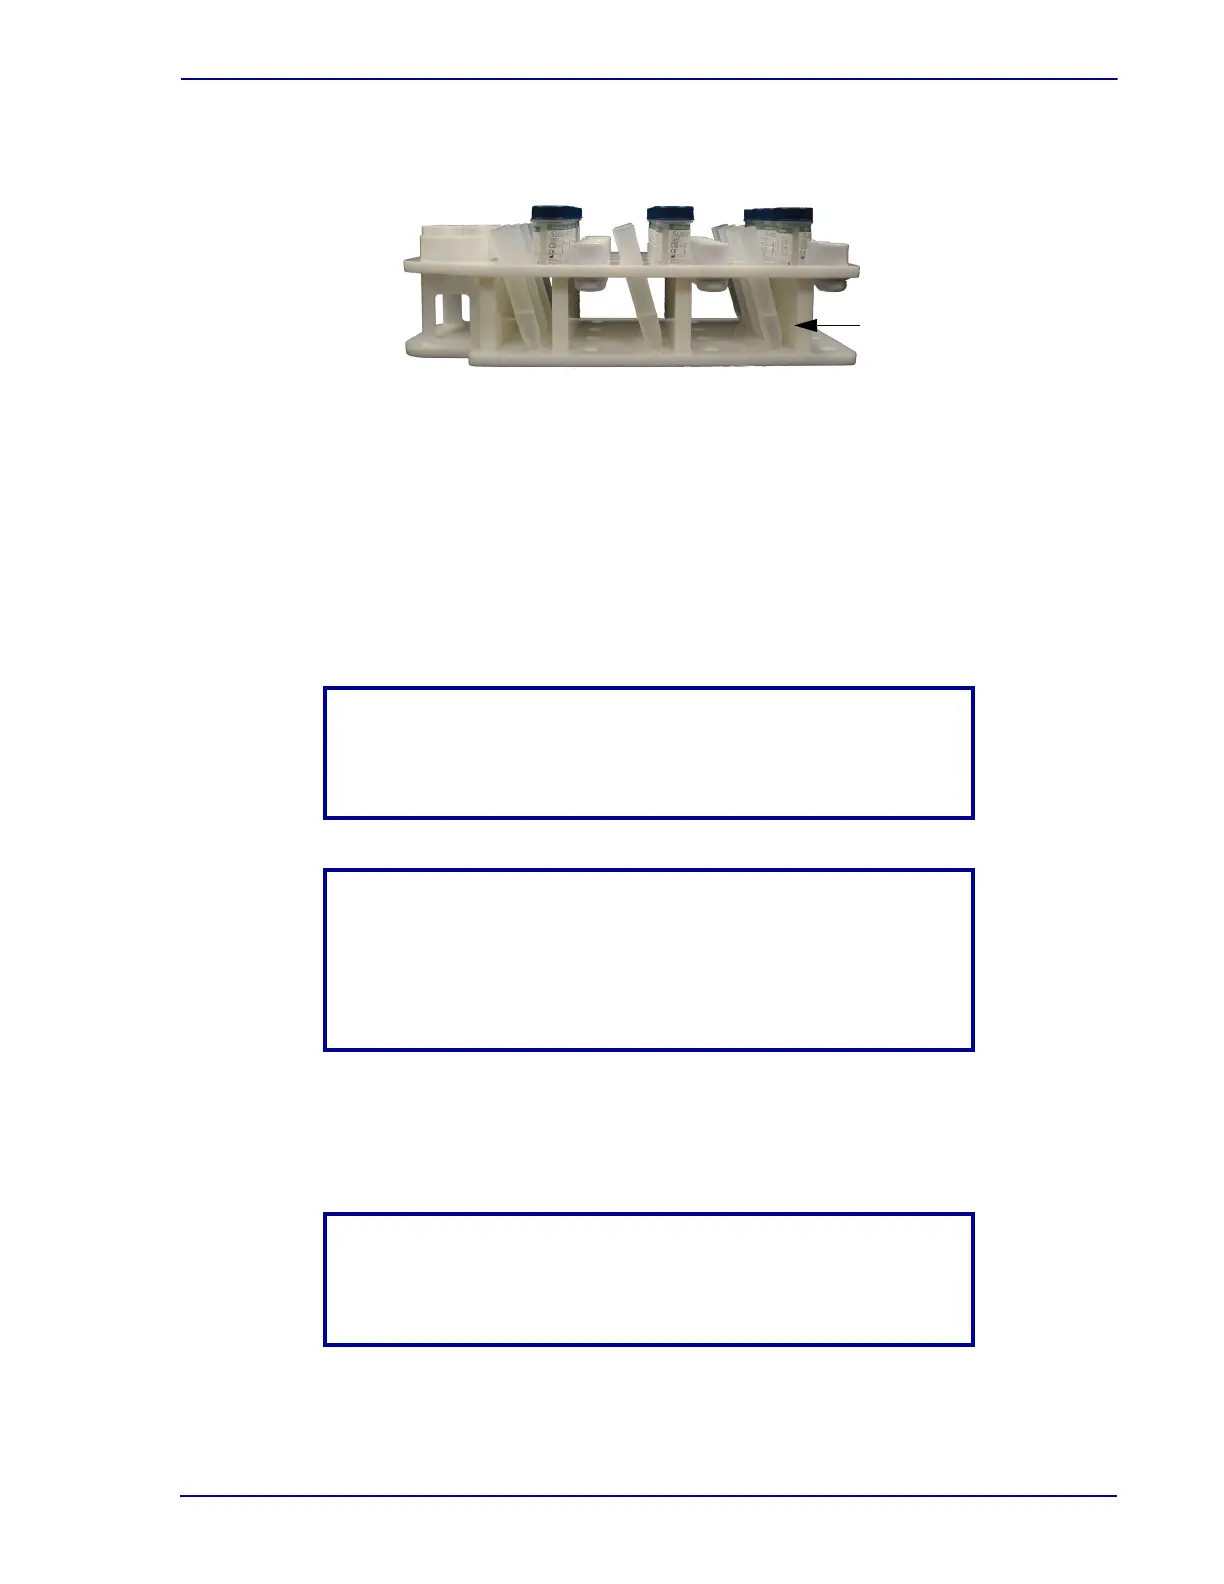
Figure A.3 -Centrifuge tubes loaded into specimen rack
After the initialization sequence is complete, the instrument displays the message
PREPMATE READY, (v X.X) LOAD SPECIMEN RACK ( X.X indicates the current software
version).
3 Use th
e supplies included in the installation kit to load the specimen rack with 12 capped
vials, syringing pipettes (syringes), and centrifuge tubes. Make sure that the vials are fully
seated in their circular wells and place a syringe into the rack adjacent to each vial. Make
sure that the plunger of each syringe is fully seated.
NOTE
The BD PrepMate™ Automated Acc
essory will not operate if a
plunger is too high.
NOTE
For the purposes of this installation procedure, no live patient
sp
ecimens are used. Refer to the BD PrepMate
TM
Automated
Accessory Operator’s Manual for instructions on processing live
patient specimens.
4 L
oad the specimen rack onto the instrument’s tray. Slide the specimen rack in from the front
until the tray latch at the front left corner of the tray engages (See Figure A-1 for tray latch
illustration).
NOTE
If the tray is not properly latched, th
e touchscreen display will not
update.