HD-973P Series Multi-Level Parking Lift 22 P/N 5900076 — Rev. B3 — January 2024
Moving the Posts into Position
Once you have created the Chalk Line Guides, move the Posts into position.
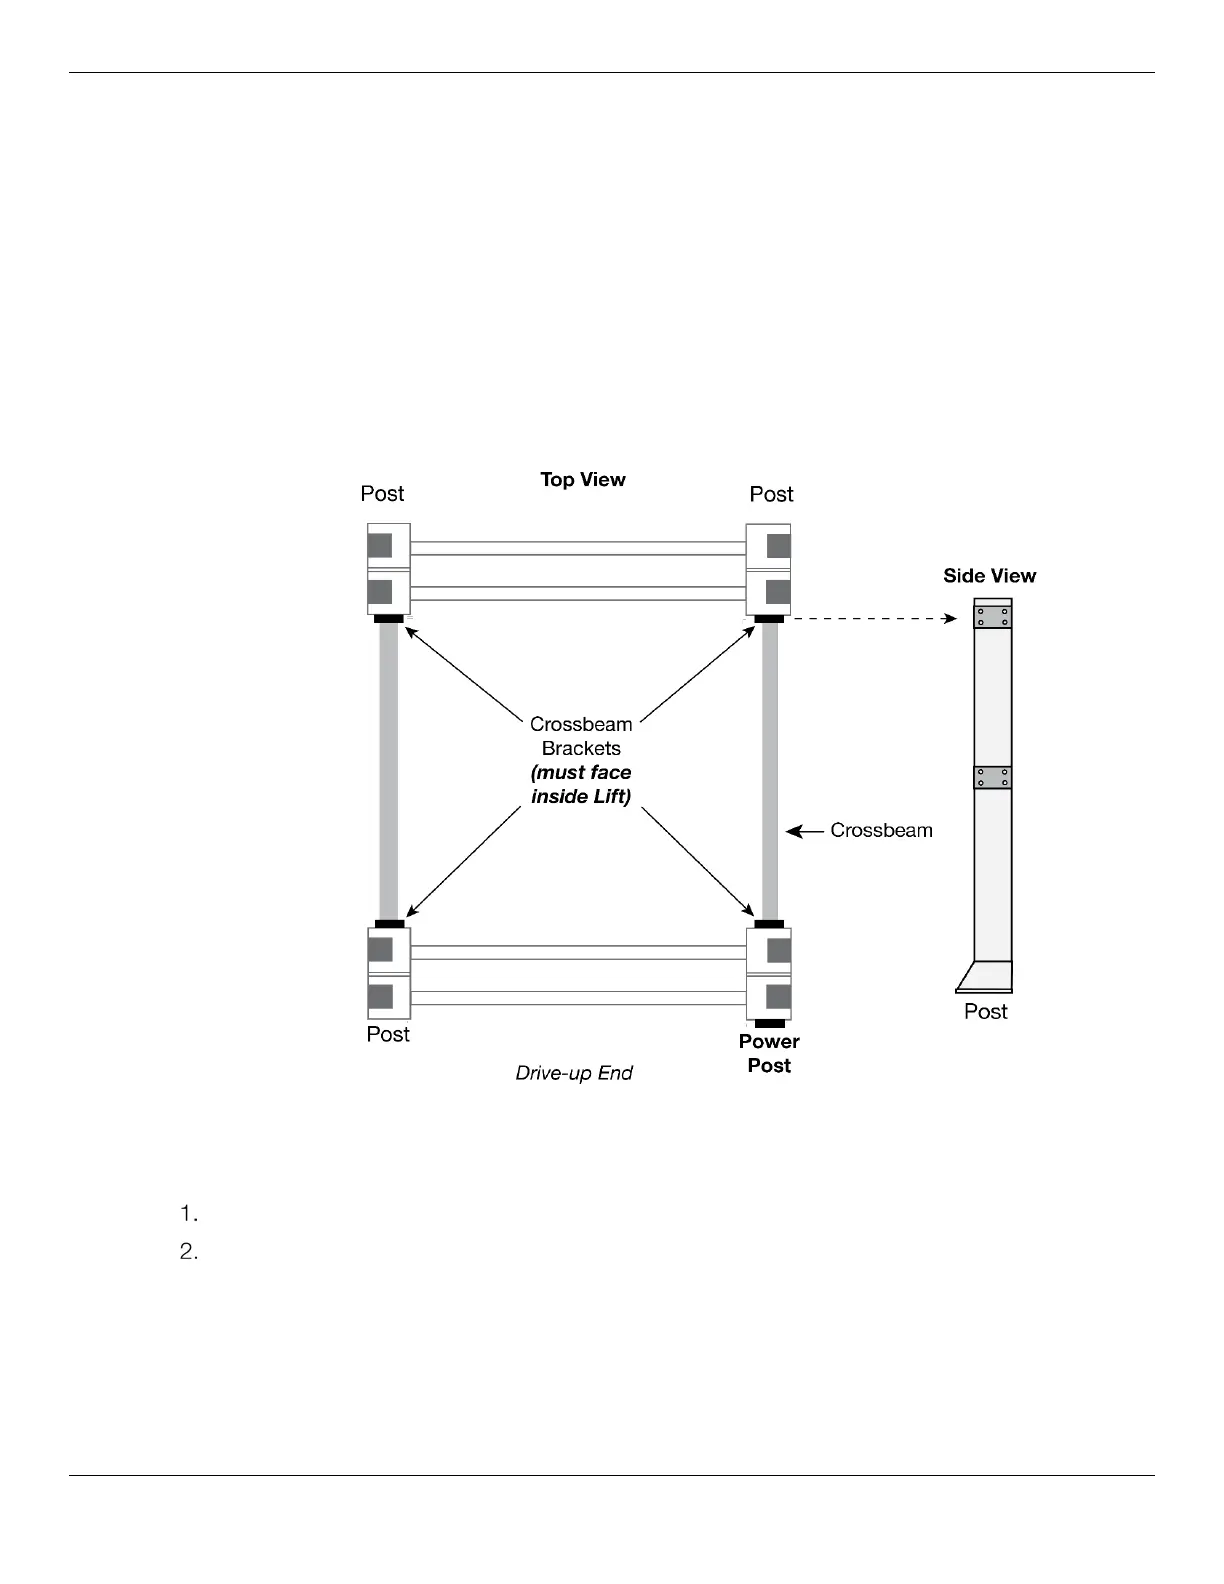
Each Post has two Brackets used for attaching the Crossbeams; the Crossbeams add structural
stability to the Lift; the Crossbeam Brackets must face the inside of the Lift.
The Power Post has two Crossbeam Brackets that face the inside of the Lift, and an extra two
Brackets (one facing the inside of the Lift, the other facing the Drive-up End) used for mounting the
Power Unit.
Important: Position the Power Post at your chosen location. Remember, the
Power Post can only go in two possible locations: the Front Driver-side or the Rear
Passenger-side. Refer to Lift Orientation for more information.
The following drawing shows how to position the four Posts.
Figure combines Top View and Side View. Figure positions the Power Post in the Rear-Passenger Side
Not drawn to scale. Some components not shown.
To move the Posts into position:
Orient the Posts in their required positions, with the Post Brackets facing the inside of the Lift.
Using a Forklift or Shop Crane, carefully move each Post to the inside corners of the Chalk Line
Guides.
Do not stand up the Posts yet; some of the following procedures are easier to complete if the
Posts are laying on the ground.