HD-973P Series Multi-Level Parking Lift 35 P/N 5900076 — Rev. B3 — January 2024
Before routing the Lifting Cables, extend the Piston on the Hydraulic Cylinder.
To extend the Piston:
Remove the Shipping Plug from the Return Line Connector.
The Return Line Connector is on the Cylinder end closest to where the Power Unit will be.
Attach an air pressure source to the Return Line Connector.
Use the air pressure to extend the Hydraulic Cylinder’s Piston.
Do not exceed 50 psi.
If the Cylinder does not move, stop using air pressure; instead, use a pulling device (such as a
Come Along Tool) to extend the Piston; be careful not to damage the Piston.
Reinstall the Shipping Plug to the Return Line Connector.
To route Lifting Cables A and C:
Make sure you have nearby the four Lifting Cables and Sheaves you removed earlier.
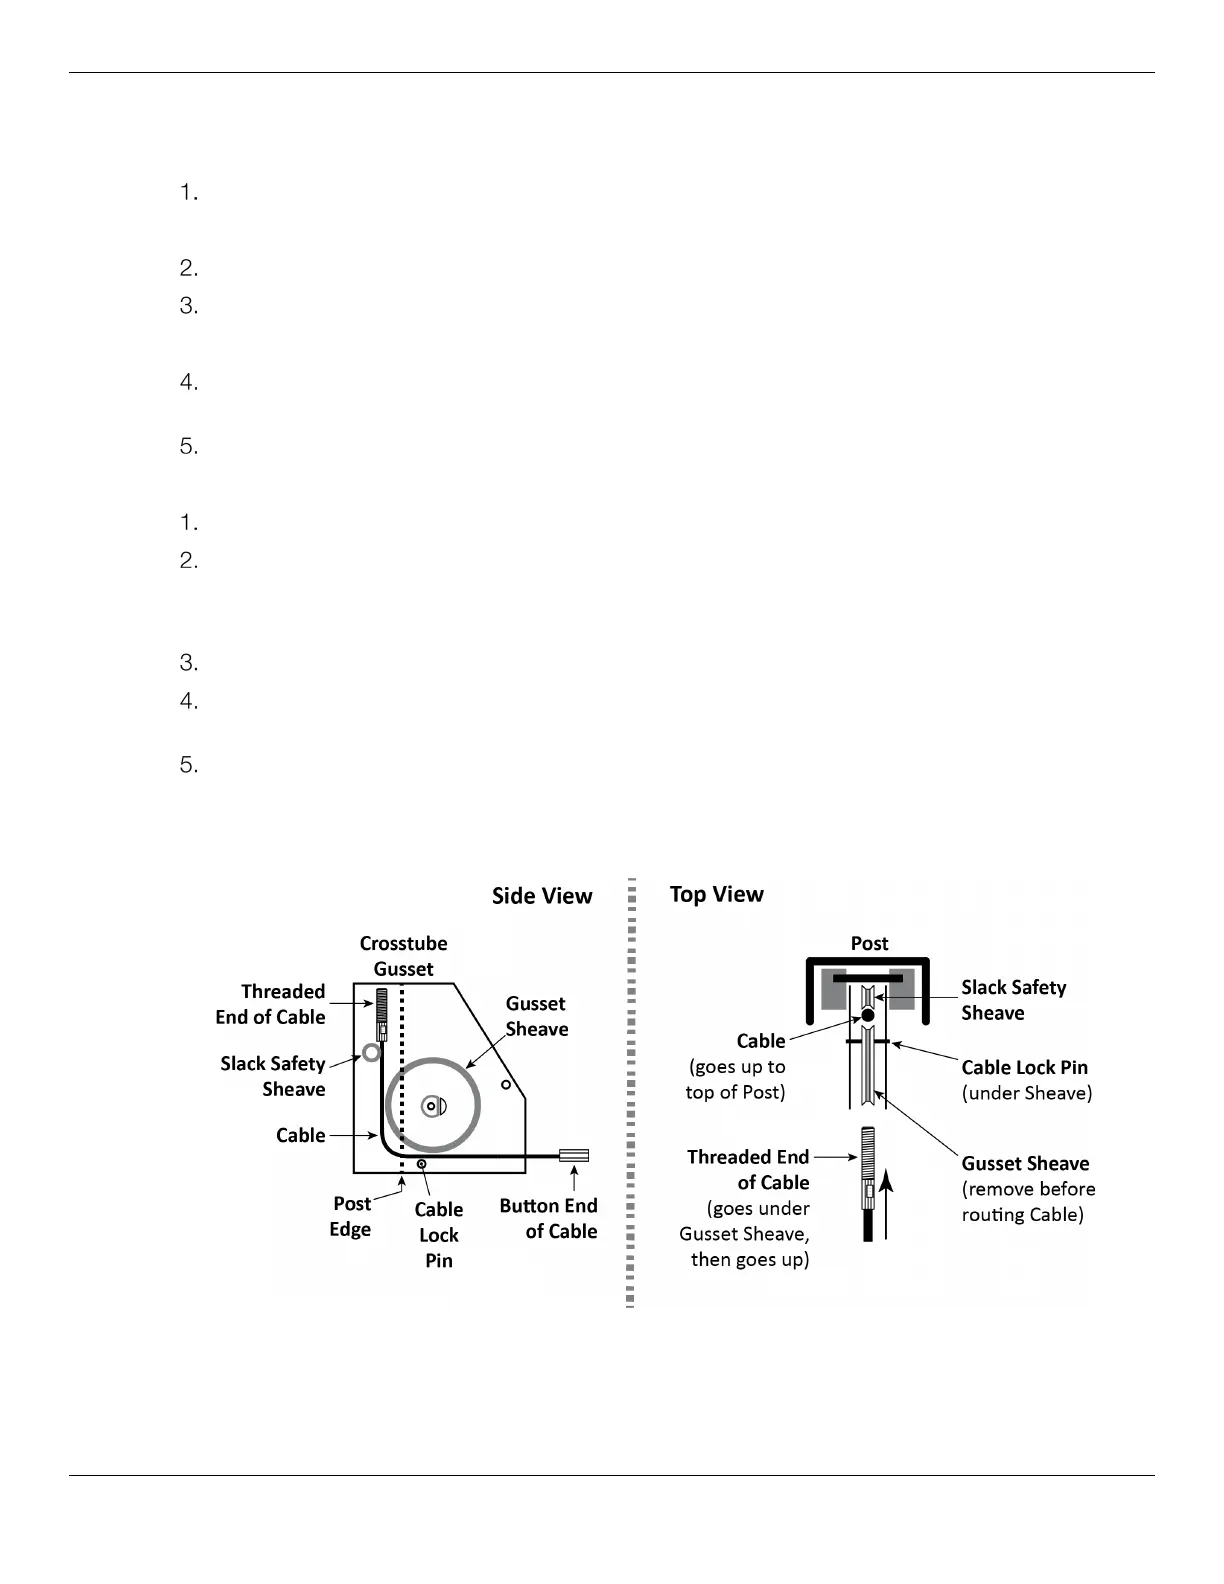
Starting with Lifting Cable A, move the entire thing to just under the Large Window it goes
through, near the bottom of Post A.
Check the label to make sure you have the correct Cable.
Remove the Nut and Washer from the Threaded end (but keep it nearby, you will need it soon).
Route the Threaded end of Lifting Cable A into its Large Window in the Crosstube, push it towards
Post A, and then pull the Threaded end out of the Crosstube at the bottom of the Gusset.
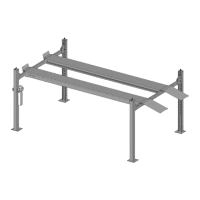
Route the Threaded end of Lifting Cable A under where the Gusset Sheave will go when it is
reinstalled, then route it up towards the top of the Post past the top of the Crosstube Gusset.
When you start routing the Cable up, it must be between the Gusset Sheave and Slack Safety
Sheave, as shown below.
Important: When routing a Lifting Cable in its Post, it must go under where the Gusset
Sheave will go when the Gusset Sheave is reinstalled and then, when it heads up
towards the top of the Post, it must be between where the Gusset Sheave will go
and where the Slack Safety Sheave already is. If the Cable is not in this exact
location, the Slack Safeties will not work correctly later.