The microswitches on the slave boards are factory-set so as to interface a master boiler (50 M, 100 M or 100 M DEP)
to a slave boiler (100 S or 100 S DEP). If further slave boilers need to be connected, only the microswitches on these
boilers will need to be reset.
Accessing the SLAVE boards
- Move the main system switch to "off"
- Access the slave boards inside the boiler control panel (see the steps described on page 65)
- Follow the address setting procedure described below, and then connect the boilers using the special bus cable (see
the wiring diagrams starting from page 14).
Setting the ADDRESSES
Each slave board (one for each heat generator) must be configured so as to be recognised in the right sequence by
the master board.
The slave generators should first of all be divided into blocks; the system can manage up to 15 blocks of four slave
generators each.
For example, if 5 slave generators are connected to a master, there are two blocks: the first made up of four slave gene-
rators and the second of one slave generator.
Consequently, the addresses should be set as follows:
- Identify the block of four that the slave generator being configured belongs to (for example block 1, 2, ………, up to
block15)
- Identify the position of the slave generator inside each block (e.g. position 1, 2, 3 or 4).
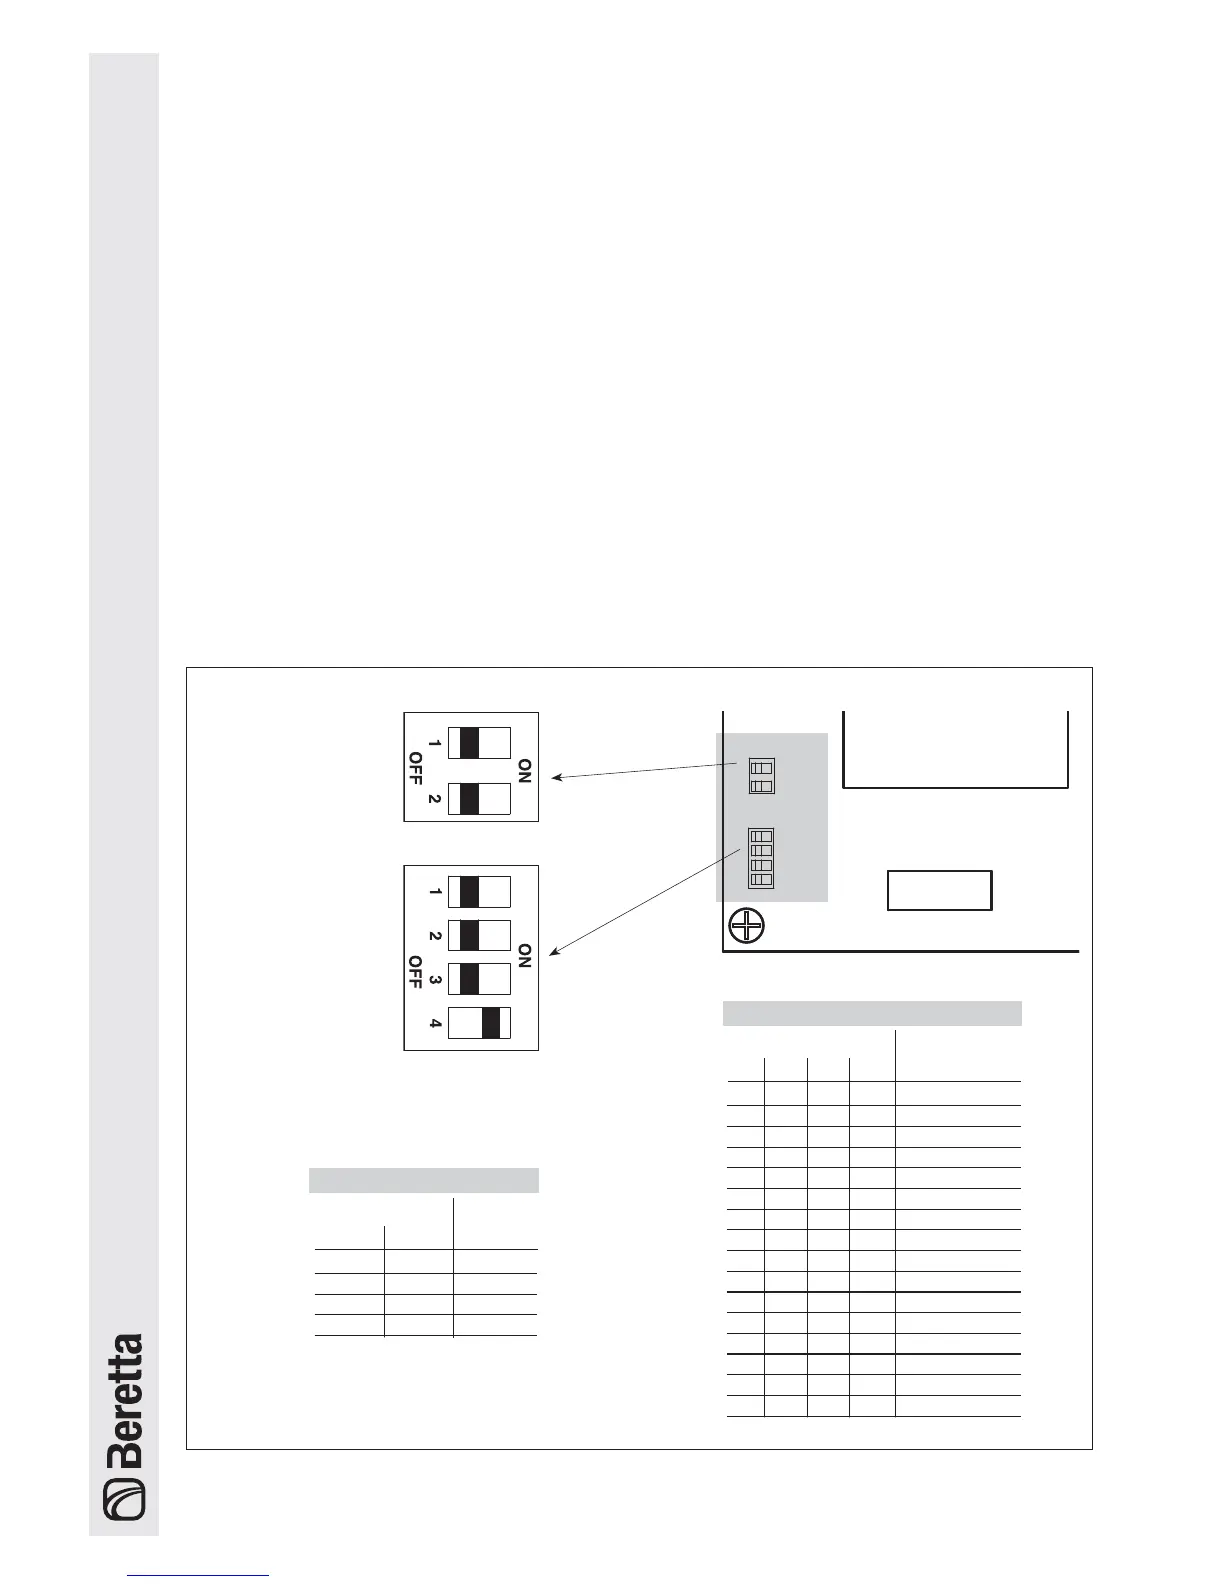
SLAVE address
SLAVE board
BLOCK address
Table of BLOCK addresses
OFF OFF OFF OFF Emergency
OFF OFF OFF ON 1st block
OFF OFF ON OFF 2nd block
OFF OFF ON ON 3rd block
OFF ON OFF OFF 4th block
OFF ON OFF ON 5th block
OFF ON ON OFF 6th block
OFF ON ON ON 7th block
ON OFF OFF OFF 8th block
ON OFF OFF ON 9th block
ON OFF ON OFF 10th block
OFF OFF ON ON 11th block
ON ON OFF OFF 12th block
ON ON OFF ON 13th block
ON ON ON OFF 14th block
ON ON ON ON 15th block
Microswitches BLOCK
12 3 4
Table of SLAVE addresses
OFF OFF 1
OFF ON 2
ON OFF 3
ON ON 4
Microswitches SLAVE
address
12
Setting the Addresses for Cascading Configurations