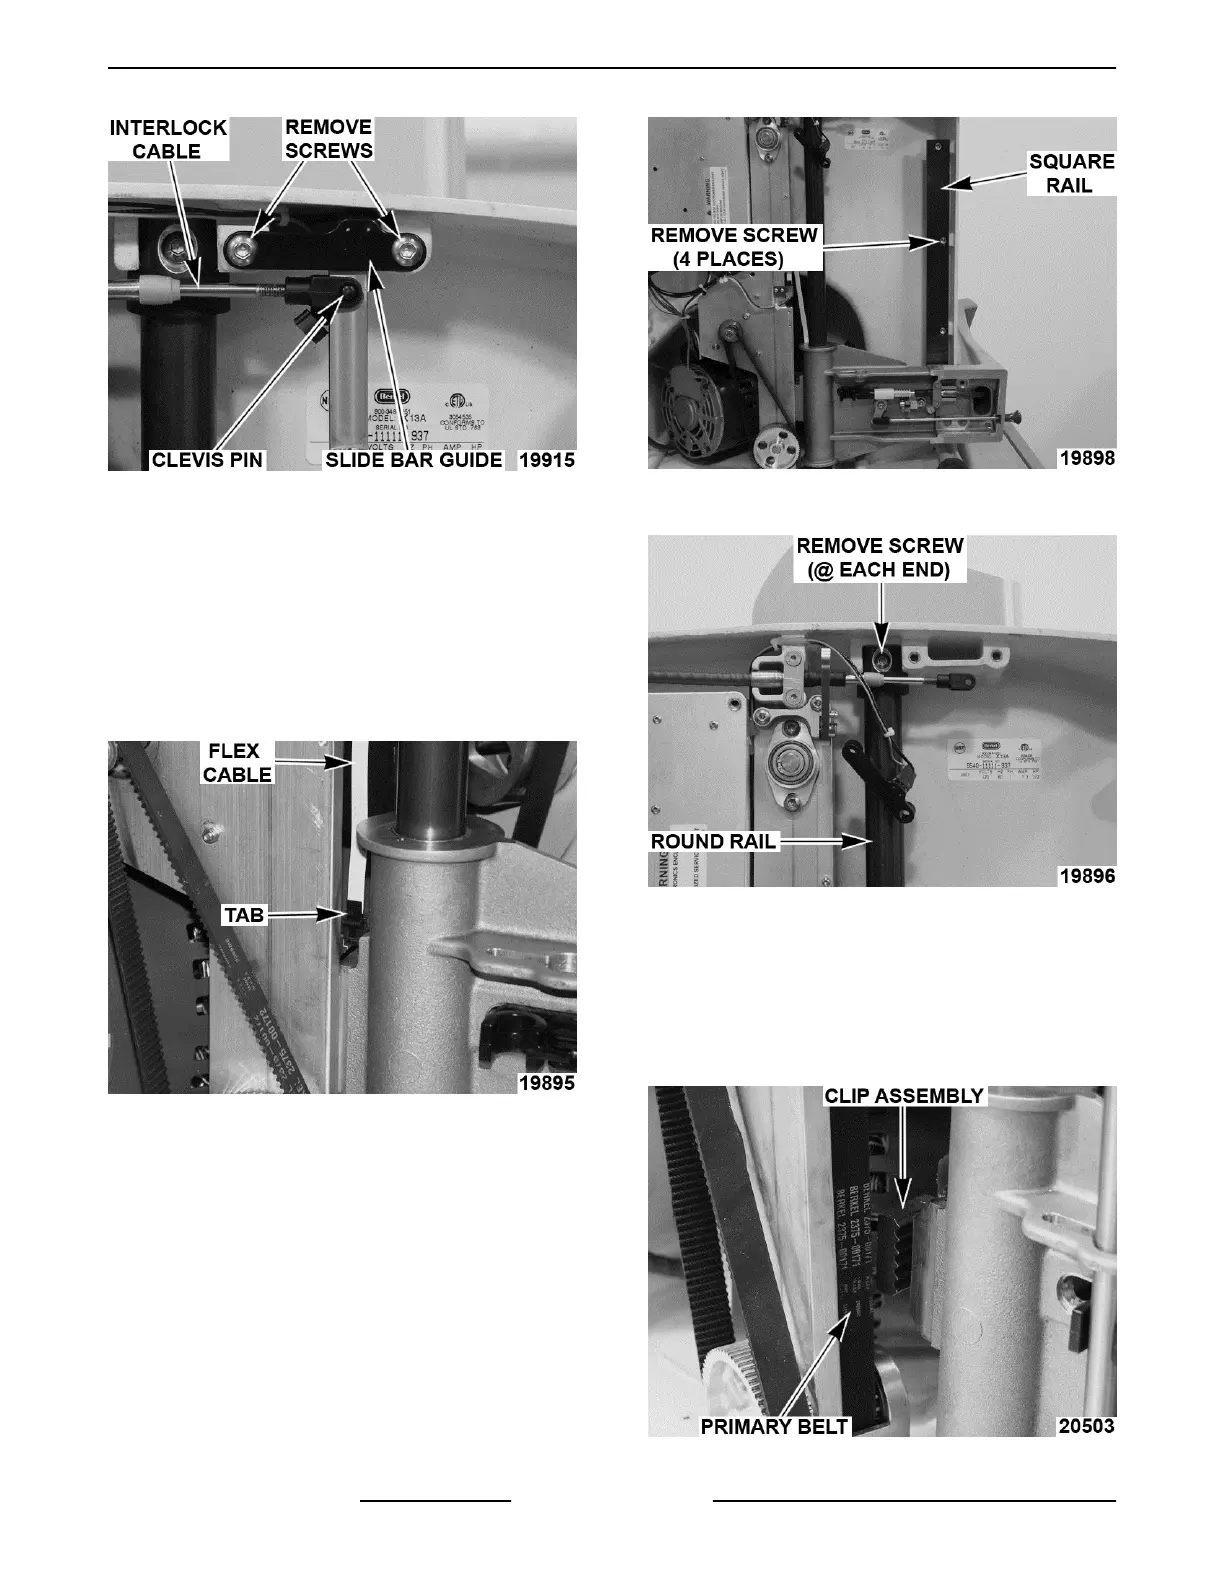
Fig. 9
NOTE: Push interlock cable to the left. DO NOT pull
cable out (to the right).
6. Remove screw and washer securing other end of
slide bar.
7. Remove slide bar (noting orientation for
reinstallation).
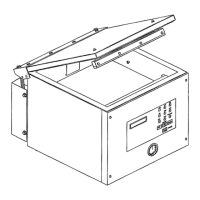
8. Push in tab and lift flex cable to disconnect
(X13A, X13AE).
Fig. 10
9. Remove screws and square rail.
NOTE: Reposition arm assembly and remove bottom
screw first.
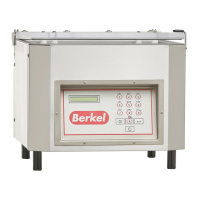
Fig. 11
10. Remove 2 screws securing round rail.
Fig. 12
11. Remove round rail and arm assembly.
12. Reverse procedure to install.
NOTE: Screws go in countersunk side of round rail.
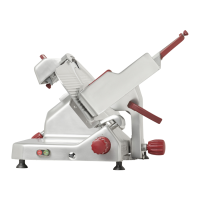
A. Place primary autodrive belt in clip
assembly. (X13A, X13AE)
Fig. 13
X13 SLICER - REMOVAL AND REPLACEMENT OF PARTS
F25332 Rev. A (0718) Page 10 of 36