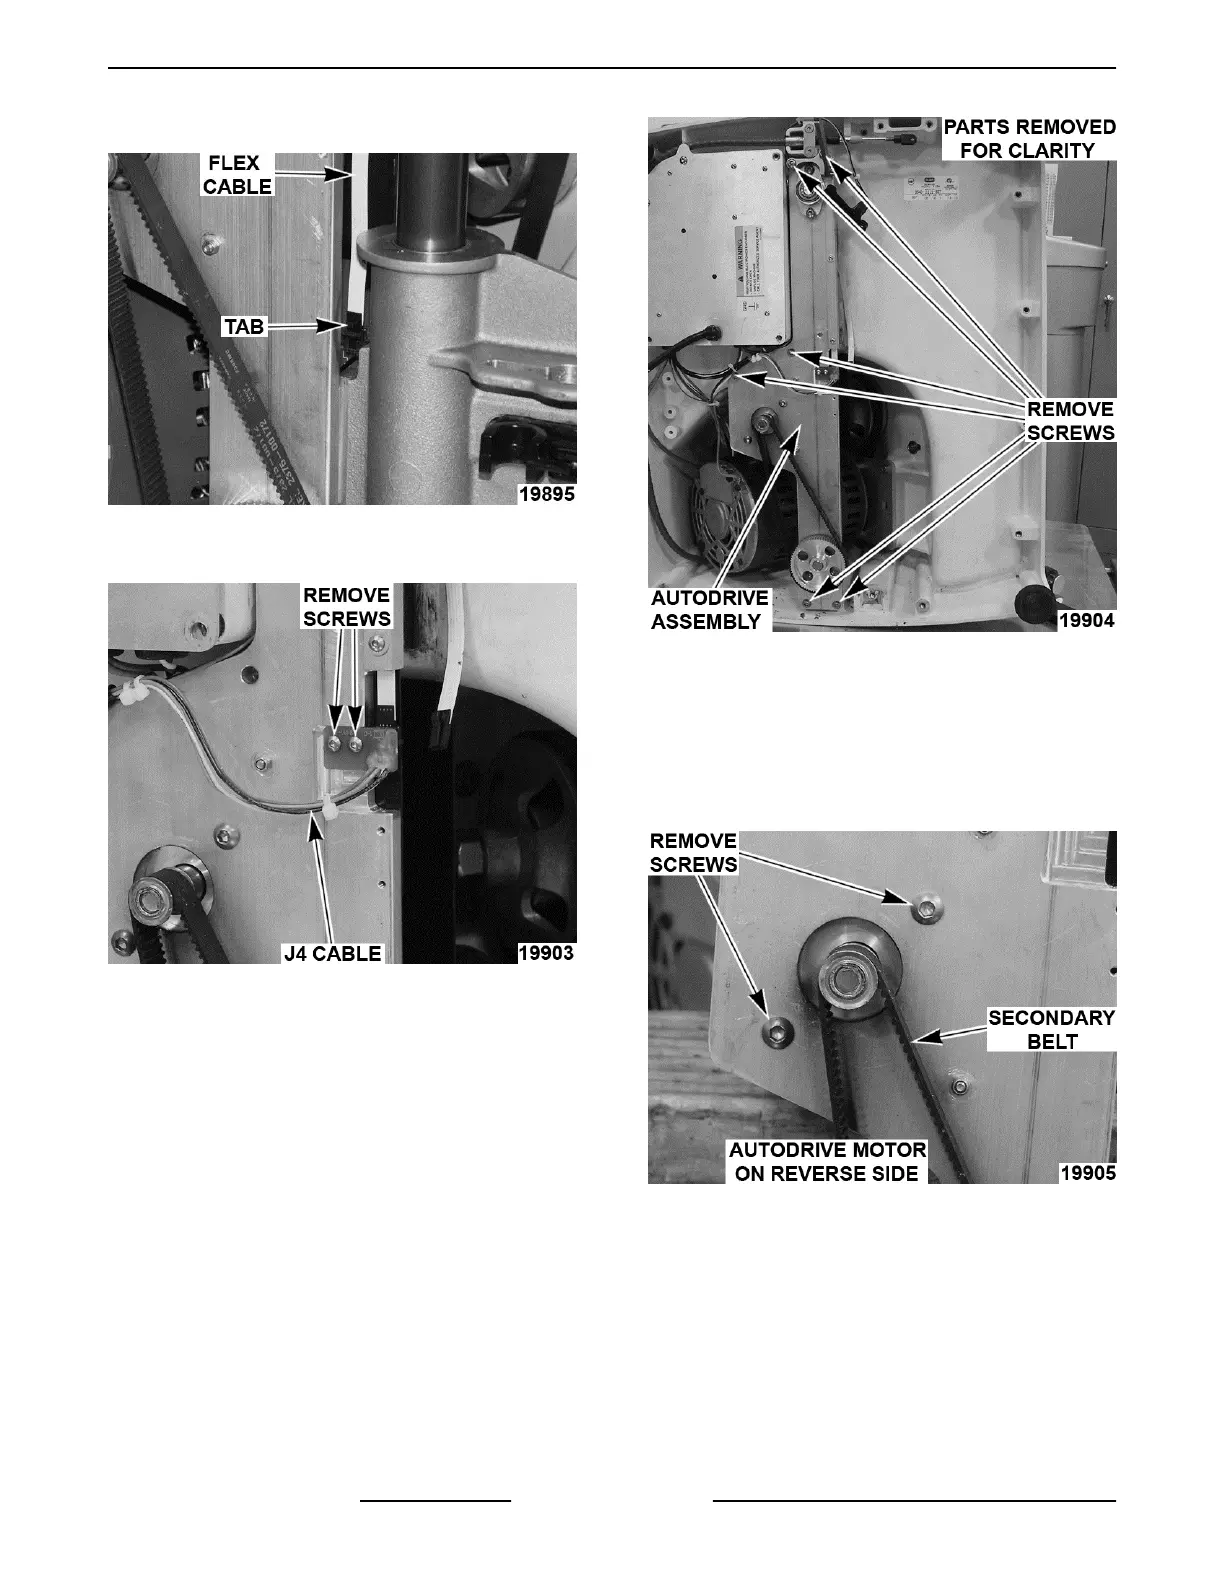
2. Push in tab and lift flex cable to disconnect.
Fig. 33
3. Remove screws mounting J4 cable.
Fig. 34
4. Remove screws securing autodrive assembly.
A. Kickstand assembly is free to remove.
Fig. 35
5. Remove autodrive assembly.
Autodrive Mechanism Disassembly
NOTE: Remove only those parts required to access
part(s) being replaced.
1. Remove screws securing autodrive motor.
Fig. 36
2. Remove autodrive motor and secondary belt.
3. Remove screws and washers securing autodrive
transmission housing.
NOTE: Transmission housing on opposite side.
X13 SLICER - REMOVAL AND REPLACEMENT OF PARTS
F25332 Rev. A (0718) Page 16 of 36