Bio-Well Company
www.bio-well.com
Software Interface
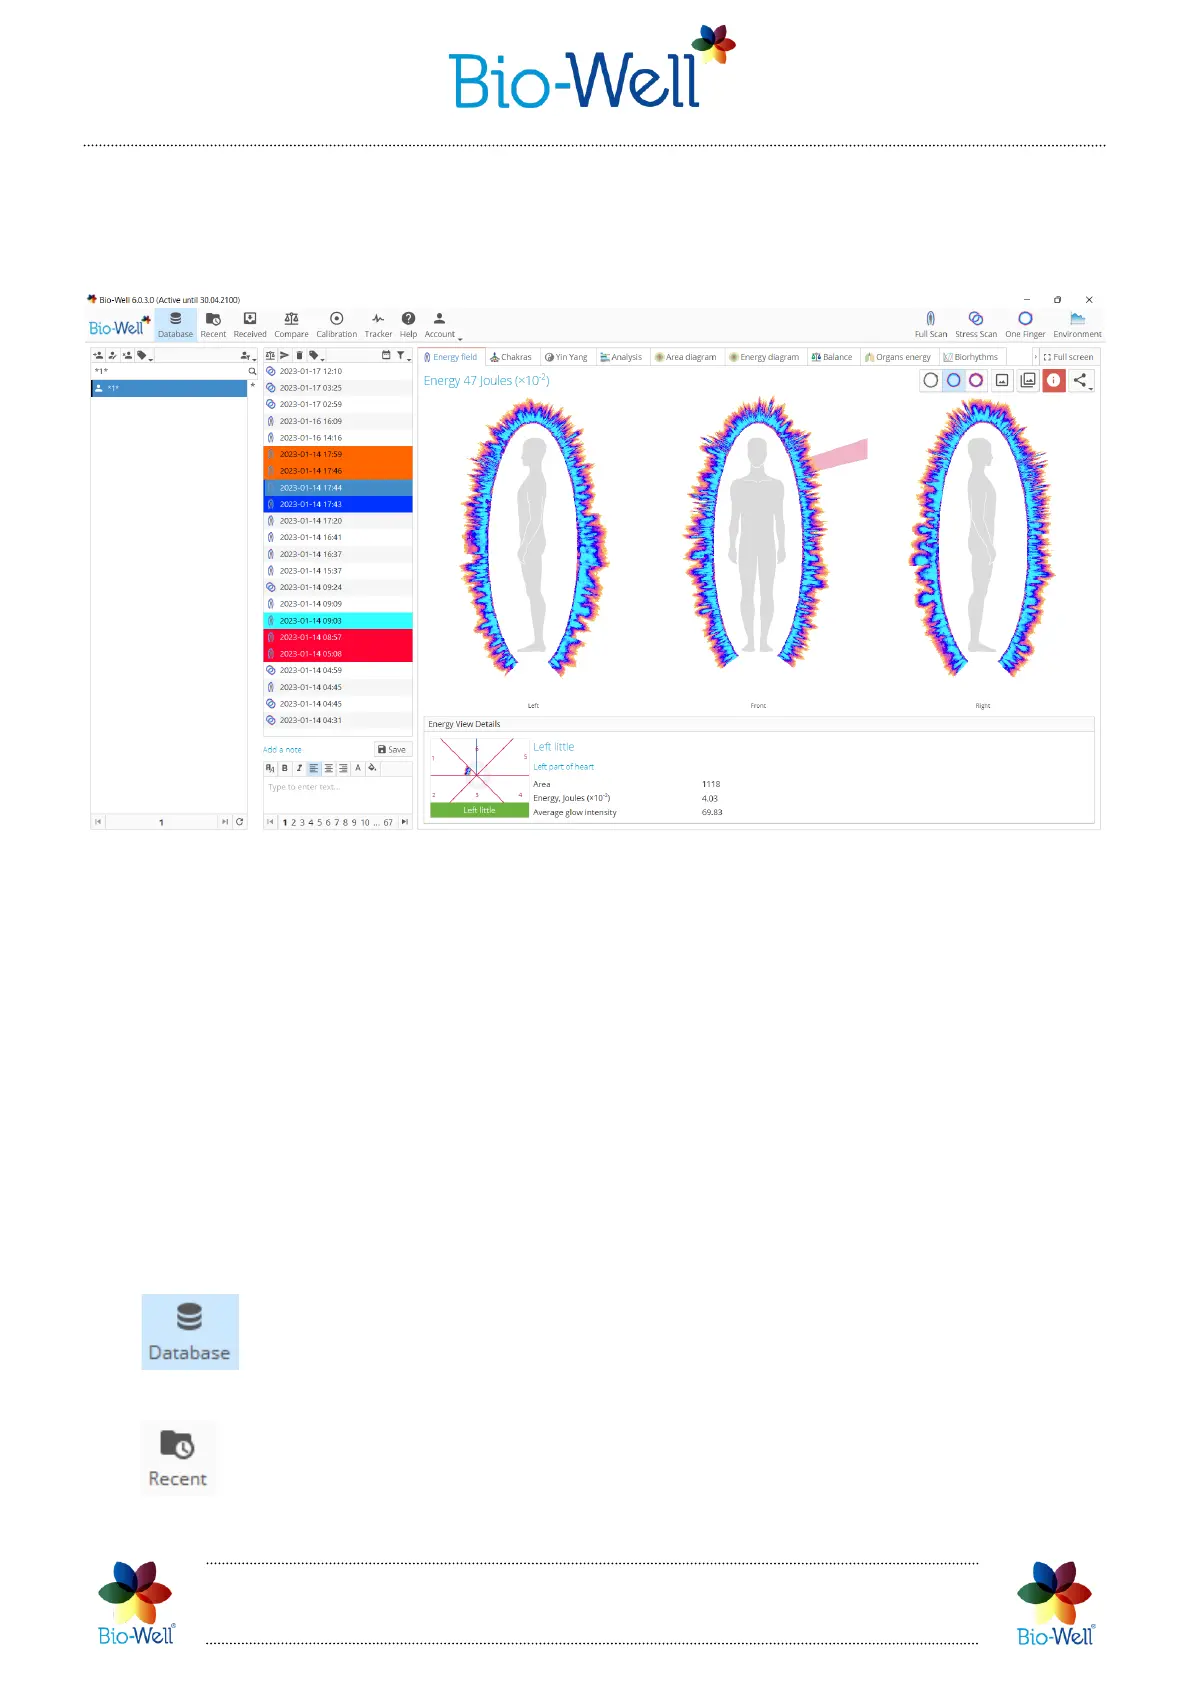
Once logged in, the main window will appear (pic. 2). This dashboard-style layout
provides access to all software functions and scan history.
Pic. 2. Main screen of the Bio-Well Software.
In the top bar of the window you can find the version of the Bio-Well Software that
you are logged in and in brackets you can find the expiry date of your paid subscription.
Main screen interface of the Bio-Well Software can be divided into three parts:
control panel (at the top of the screen); database part (left side of the screen), that
consists of two columns; and results part (right side of the screen), that represents the
results of processing the obtained GI.
Control panel
Control panel is divided into two parts: left side is devoted to the database and
settings, right part is devoted to the buttons for creating new scans in “Full scan”,
“Stress scan”, “One finger” or “Environment” modes.
- standard view of User’s database represented as a list of Cards
organized according to alpha-numeric sequence (see pic. 2).
- User’s database view where Scans are organized according to the date
and time of the Scan. Each line consists of 3 parts (from left to right): name of the Card,
 Loading...