BP-007 User’s Manual
- 6 -
Note: The detailed information of the network settings, please refer to the User’s Manual.
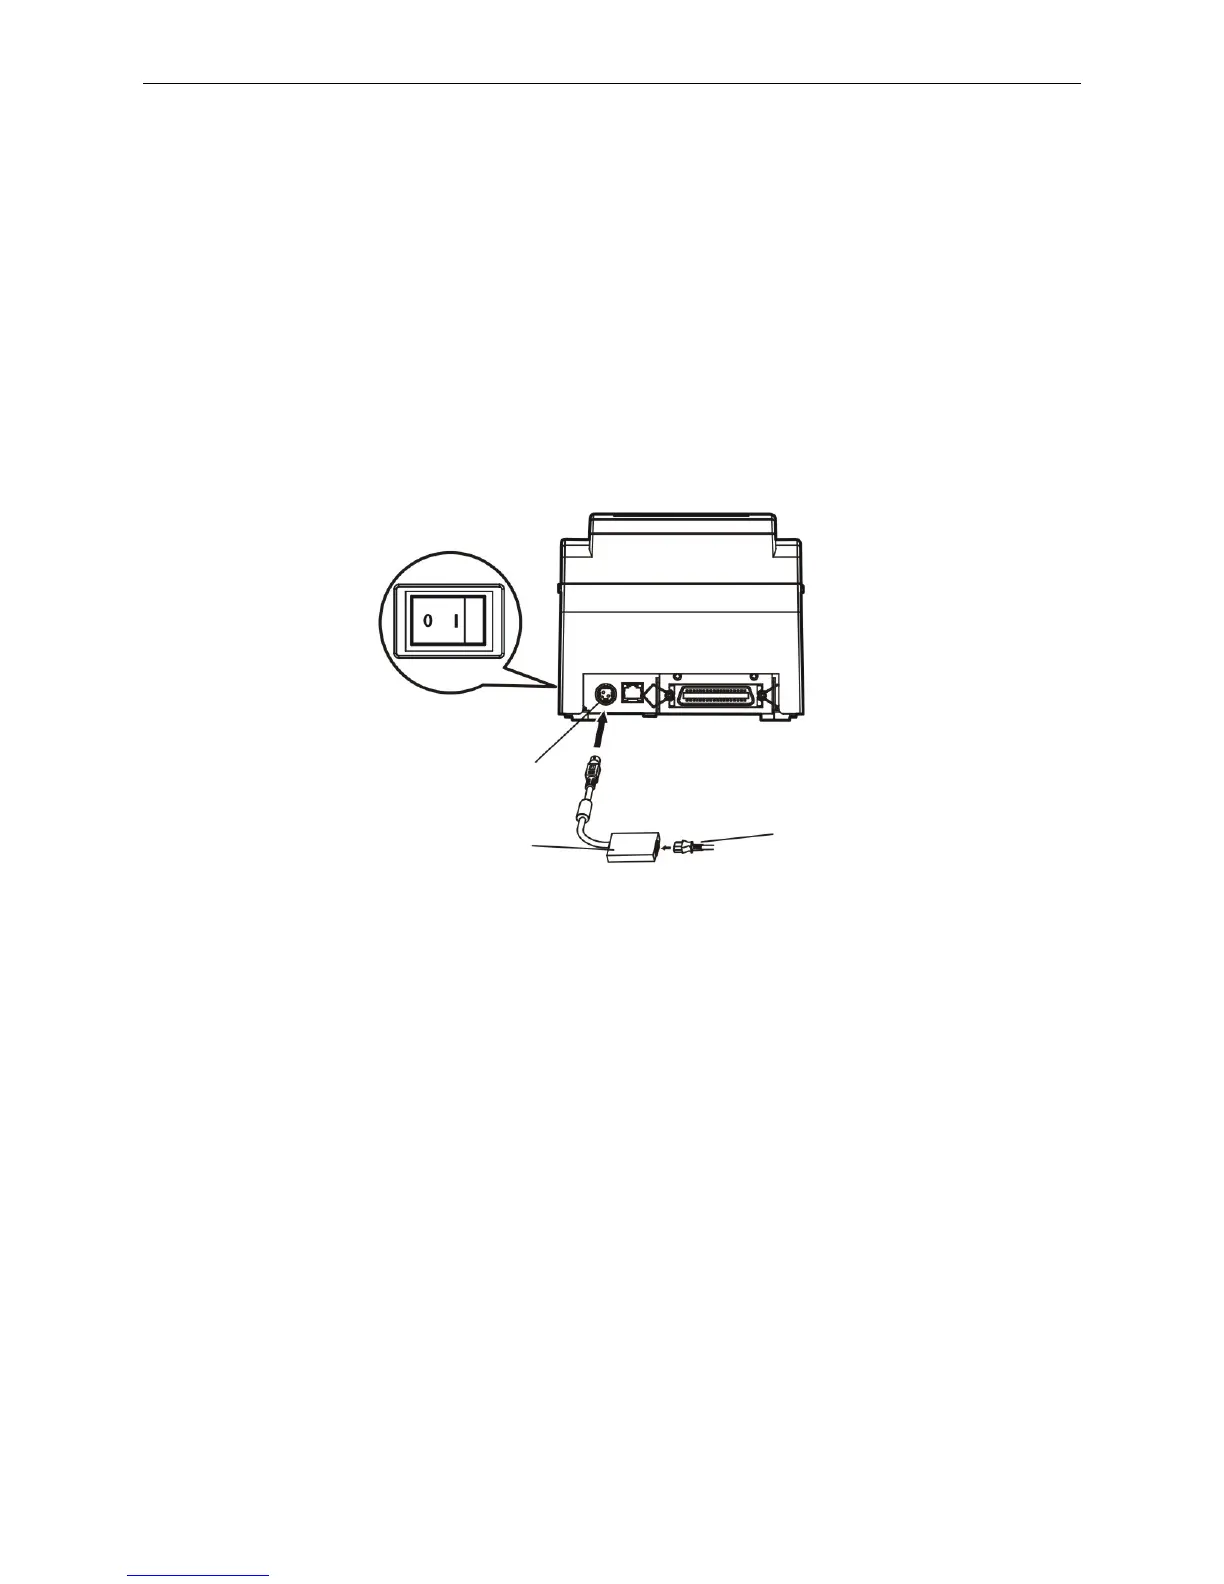
2.4 Connecting the Power Cord
1. Make sure the printer is turned off. (O mark on the power switch is pressed down).
2. Make sure the voltage of the electrical outlet matches that of the AC adapter.
3. Plug the AC adapter to printer's power supply inlet.
4. Plug one end of the power cord into the AC adapter, and then plug the other end of the power cord
into the grounded electrical outlet.
Warning: 1. If the voltage cannot match, please contact your dealer for assistance, and do not
plug in the power cord.
2. Please use the electrical outlet connecting the ground properly.
2.5 Installing the Ribbon Cartridge
1. Make sure the printer is turned off.
2. Please open the upper cover and front cover firstly, then turn up the auto-cutter assembly backwards,
and then, install the ribbon cartridge.
3. Turn the ribbon knob several times in the direction shown by the arrow to take up any slack in the
ribbon.
4. Insert the ribbon cartridge with the ribbon knob in the left and push the ribbon cartridge down until the
ribbon core is locked in place.
5. Turn the ribbon knob in the direction shown by the arrow again.
6. Turn the auto-cutter assembly down to the original position, and then close the upper cover and front
cover.
Figure 2-7 Connecting the power cord
Power Supply Inlet
AC Adapter
Power Cord