•
USING THE
PROGRAMMER
•
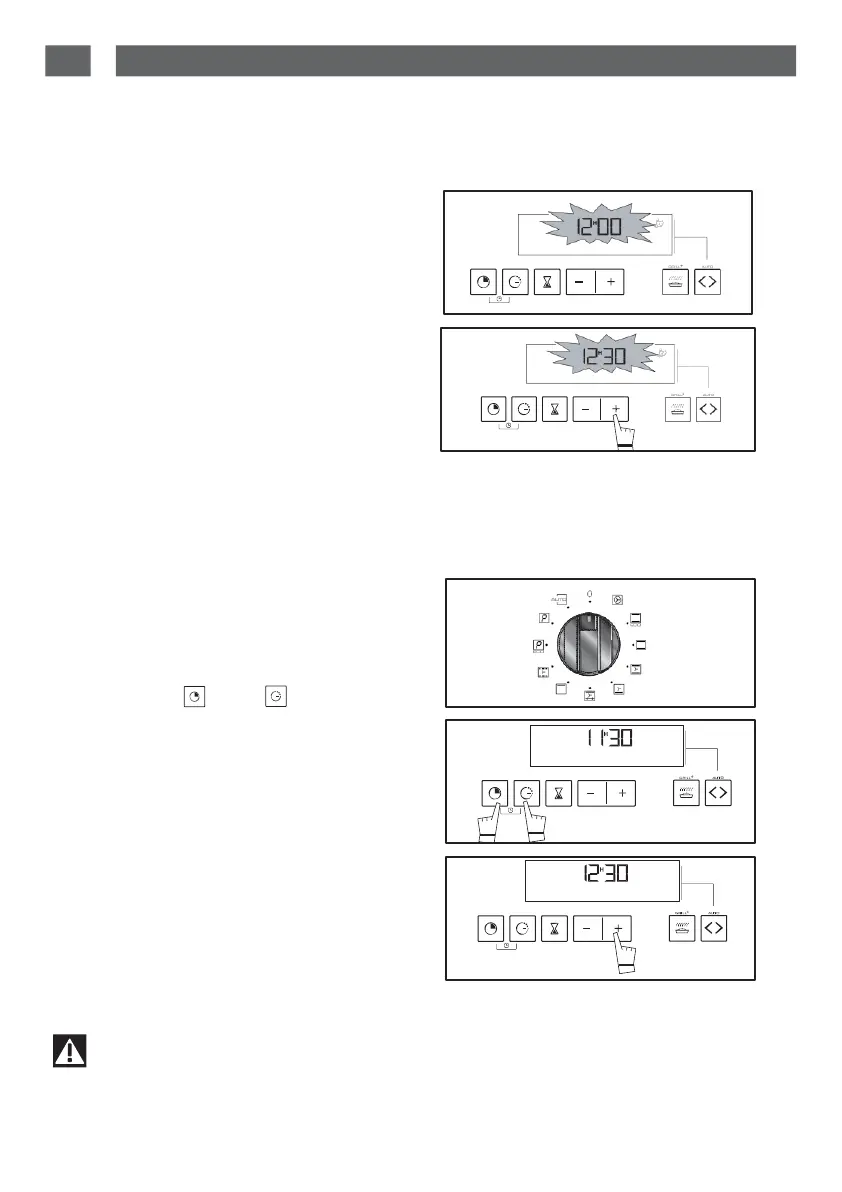
Setting the time.
- When
the power is on
The display flashes 12:00.
(fig.1)
Set the time by pressing the
+
or
-
buttons
(continued pressure on the button runs
through the
numbers quickly)
(fig.2).
Example:
12:
30
The adjusted time is
automatically
recorded
after a few seconds.
The display
stops flashing.
•
How
to
change
the time.
-
To set the clock to the correct time.
The function selector must be in position 0
(fig.
1).
Press buttons “ ” and at the same
time for a few seconds
(fig.2),
then release
them when the time of day begins to flash.
The sound of beeping shows that you can
set it now.
Adjust the time setting using the
+
or
-
buttons (fig.3).
The adjusted time is
automatically
recorded
after a few seconds.
fig.1
fig.2
fig.1
fig.2
fig.3
Important
If you do not confirm the selected time , it will be registered automatically after a few
seconds
have elapsed.