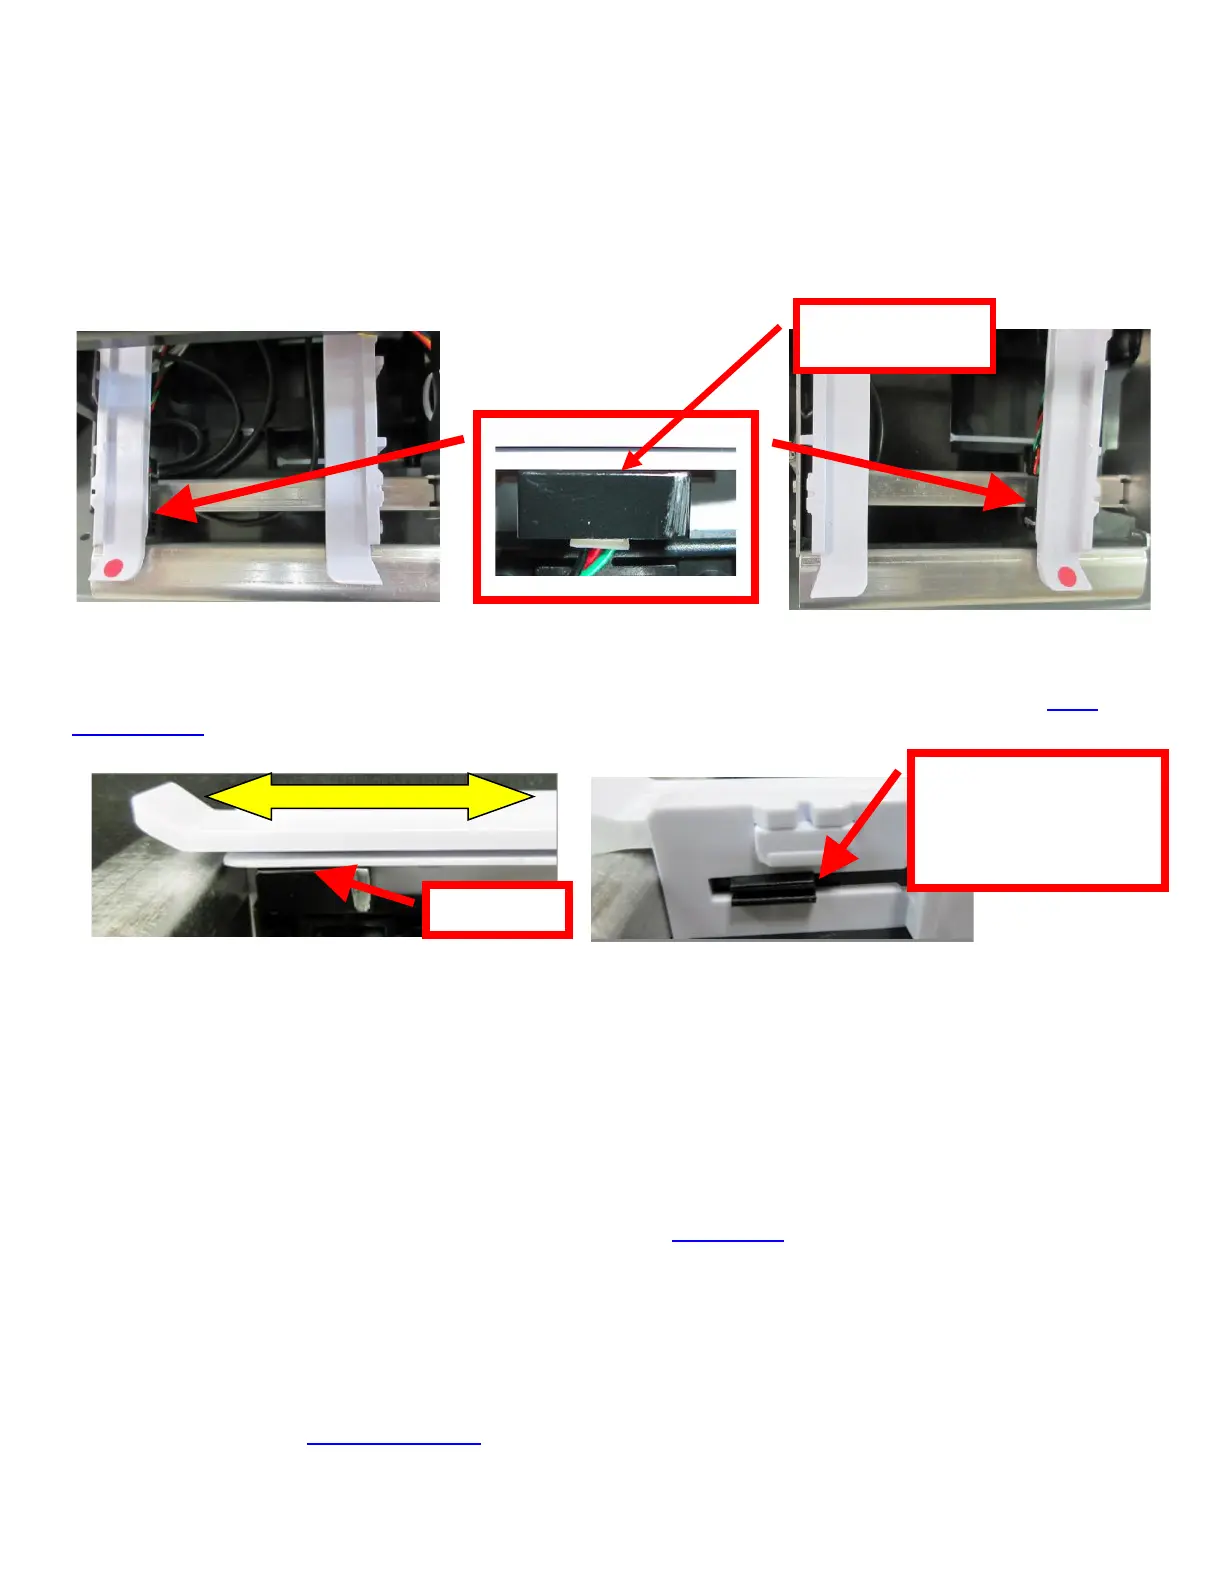
10.1.1 Black Mark Opto Sensor
There is an optical sensor (cut/ tear opto) mounted on white plastic rail that senses the black timing mark on
the ticket stock. This sensor controls the cut or tear position of the media. The sensor may be on either side
of the paper path depending on printer’s configuration. The sensor position is factory set and adjustment
should not be necessary.
Once a year the opto eye should be blown off with air. This interval will vary depending upon the
environment and the quality of the ticket stock.
ADJ4, ADJW and ADJ2 paper path RADJ4 & RADJW paper path
Note: Before making any opto adjustments make sure your ticket stock was manufactured to proper ticket
specifications.
To adjust the cut or tear position, physically adjust the opto mounting bracket forward or backwards to achieve
the desired cut or tear location. On a printer with auto cut the cut position should be a 1/16”-1/8” away from the
ticket perforation. On a Lemur without auto cut the ticket perforation should line up with the edge of the cabinet
or top plate.
You may need to remove the ticket stock in order to physically adjust the black timing mark sensor (opto).
Minor adjustments (no greater than 3/16”) to the cut or tear position may also be done via the control panel (if
applicable) by changing the INC/DEC CUT1/2 settings. (See Appendix A). For a 200dpi printer the INC value
should not exceed 38. For a 300dpi printer the INC value should not exceed 55. Going beyond these values
will cause reliability issues.
If you are not able to get the desired cut position, make sure your ticket stock was manufactured to proper
specifications.
Click here to return to > Table of Contents