13. Clean and oil the carrier shafts [W].
NOTE!
Some quench fluid may escape from between the rotating
seal holding bushes and carrier shafts as a result of the
normal lubricating function. This is not a malfunction.
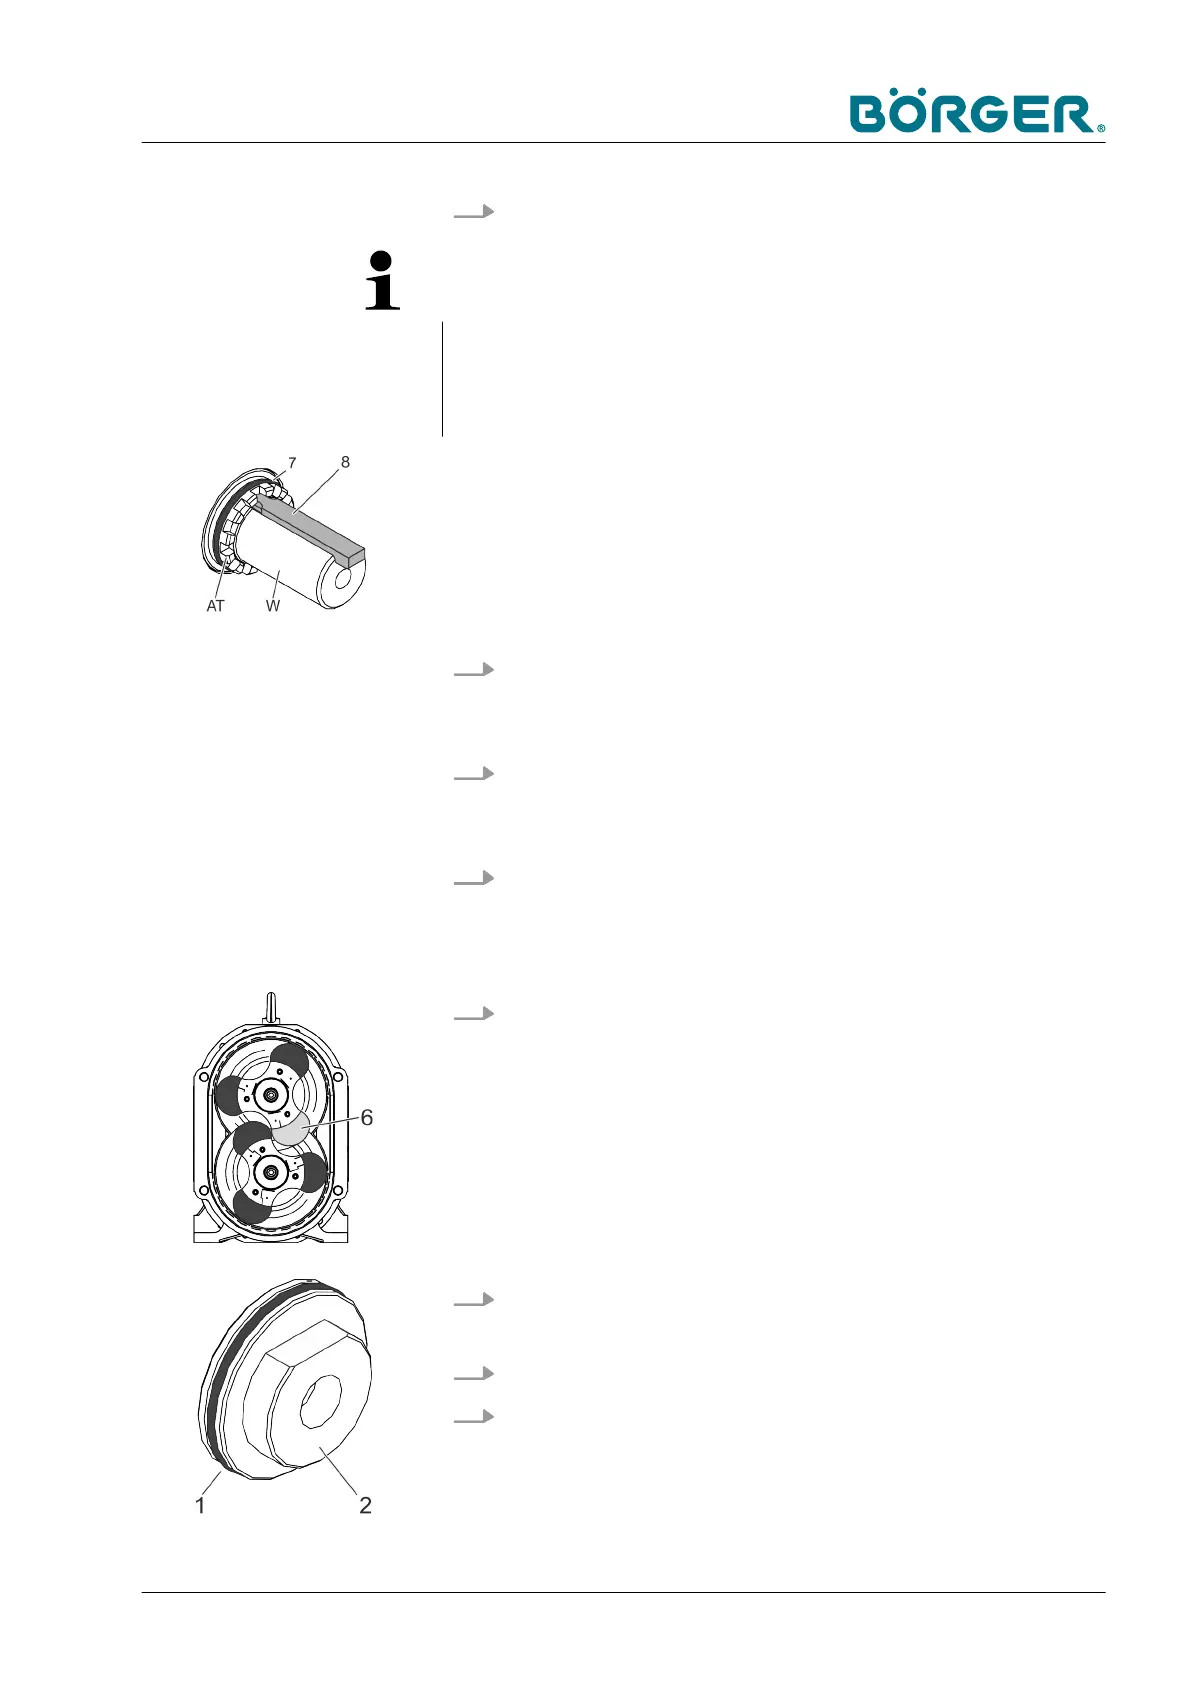
14. Check the O-rings (7) on the rotating seal holding bushes and
replace them when necessary
. (Börger GmbH recommends:
Always replace the O-rings as well in this situation.)
15. Check the condition and correct positioning of the parallel
keys (8) in the carrier shafts [W]
Ä
Chapter 6.3.4 “Replacing
the mechanical seal” on page 149.
16. Compare the quality symbol on the front of new rotors that
describes the material with the data sheet of your Börger
machine. Use only rotors made from suitable materials and of
the correct type.
17. Attach the rotors or rotor bodies one after the other.
If screw rotors are reattached without any changes after the
mechanical seals have been replaced, pay attention to the
position of the rotor body tip without the lobe tip (see figure
on left) so that both rotors can be attached easily without
damaging them.
18. Use new O-rings (4) and coat them depending on their resist-
ance, e.g. with oil or flushing agent.
19. Use new cover disks (3) if required.
20. In each case, push on the cover disk (3) with the O-ring (4)
correctly fitted into the groove so that the recess points
towards the parallel key
.
Maintenance and Repairs
BA-Classic FL_en-US, 03.05.2018 www.boerger.de / www.boerger.com 147
 Loading...