Permanent Lead Anchoring and Tunneling
Clinician Manual
97035873-01 37 of 75
10. For Permanent Trials:
If using the Innion 16 lead, proceed to “Lead Connection to Splitter” on page 26.
Otherwise, proceed to “Connecting the Lead Extension” on page 37.
11. For Permanent IPG Implantation, if extensions are used, proceed to the instructions for “Connecting the
Lead Extension” on page 37.
12. For Permanent IPG Implantation, if splitters are used, proceed to the instructions for “Lead Connection to
Splitter” on page 26.
13. For Permanent IPG Implantation, proceed to the instructions for “Connecting to the IPG” on page 43.
Note: The following Codman Disposable Catheter Passers may be used in place of the Boston Scientic
tunneling tool except for the Innion CX Lead:
REF 82-1515 (36 cm)
REF 82-1516 (55 cm)
REF 82-1517 (65 cm)
Note: When using a Codman Disposable Catheter Passer, tunnel from the IPG pocket to the midline incision
using the standard technique.
Connecting the Lead Extension
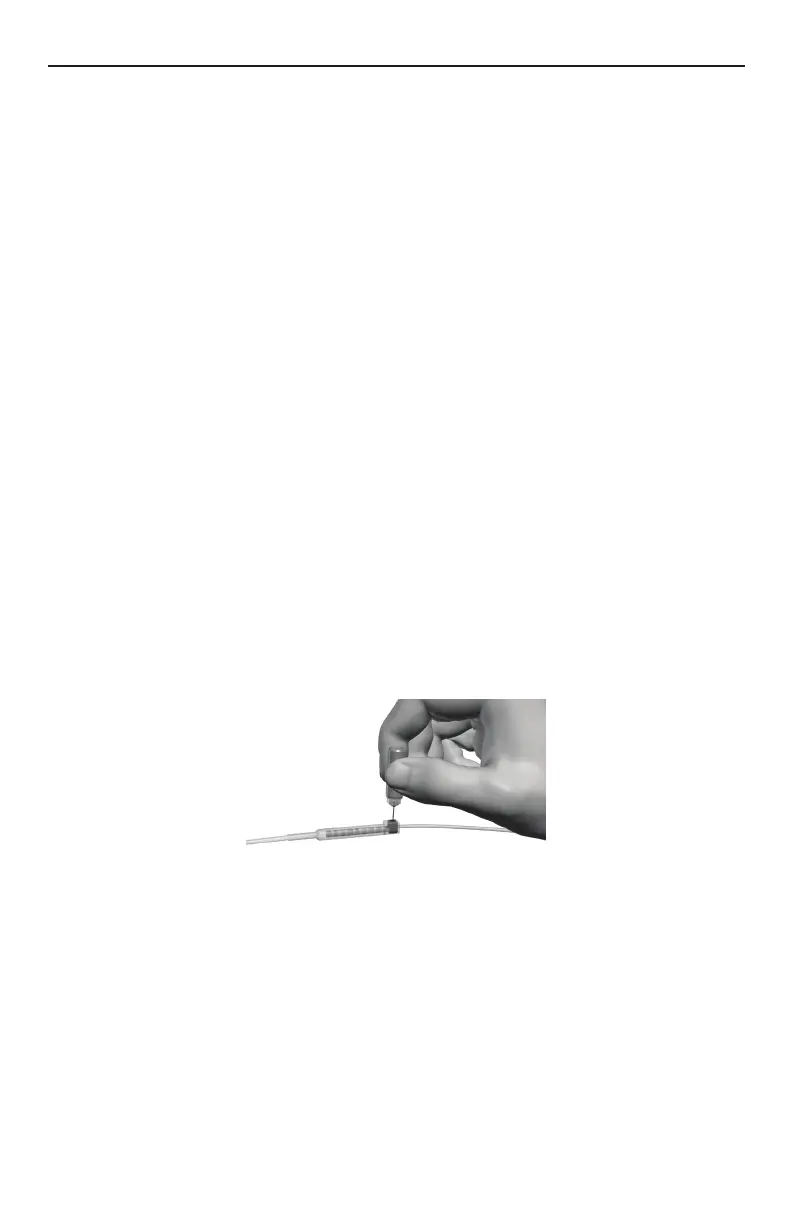
1. Wipe clean the proximal end of the lead, then insert the proximal end into the lead extension connector or
splitter until it stops and the retention ring (long ring) is under the setscrew.
Note: If there appears to be an obstruction when inserting the lead into the lead extension connector, use the
hex wrench to loosen (counterclockwise) the setscrew and/or gently rotate the lead to help advance
the proximal end.
2. Ensure that the lead is fully inserted before tightening the setscrew to prevent lead damage.
3. Using the hex wrench supplied, turn the extension connector setscrew clockwise until it clicks, indicating
lock.
Note: • Ensure that the hex wrench is fully seated in the setscrew before tightening.
• The hex wrench is torque-limited and cannot be overtightened.
4. Form an appropriately-sized pocket using blunt dissection on either side of midline for coiled excess lead
and extension connectors.