BPW-EA-AS 37772001dePage 16
English
4 Assembly
4.2 Assembling the valve hoses
Installation and repair guide!
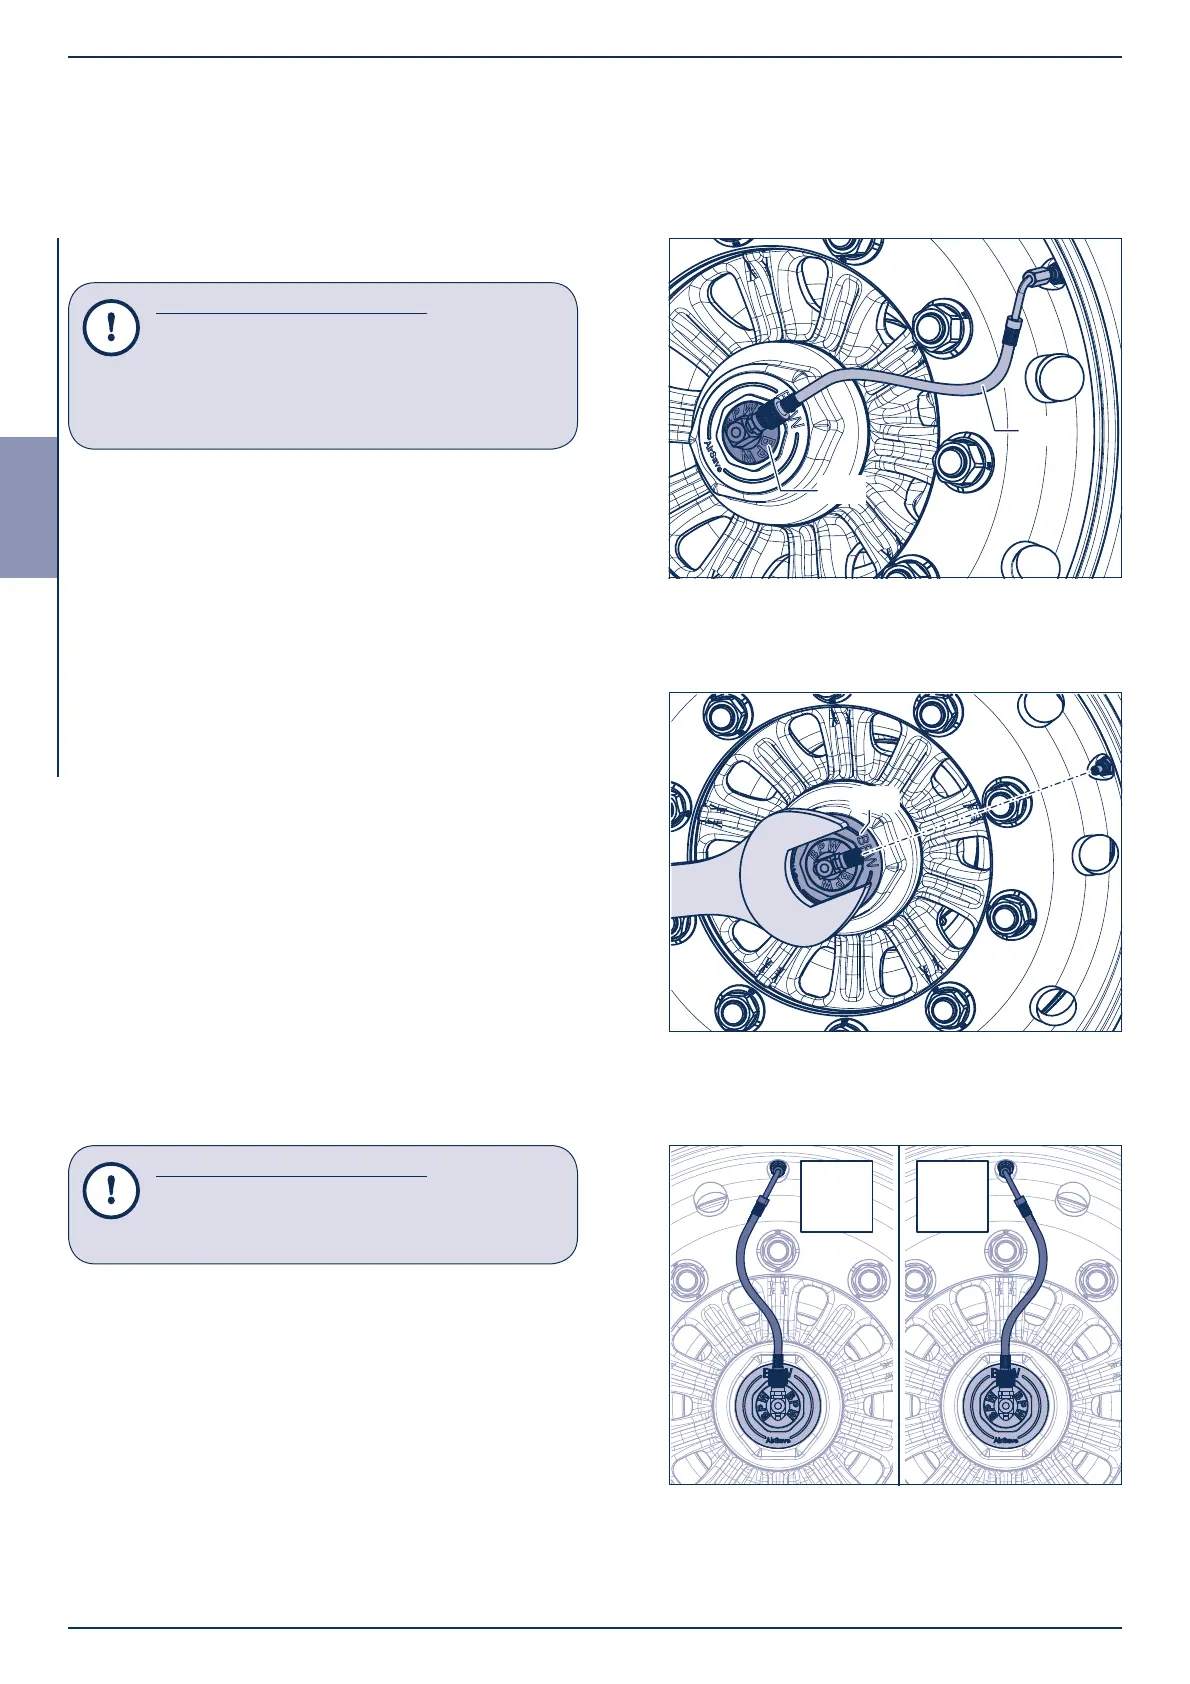
The valve hose must not be pointing in the
screw-o direction of the AirSave rotor,
see Figure 6.
4.2 Assembling the valve hoses
Installation and repair guide!
When laying the valve hoses, make sure
they do not become kinked.
Wheel nuts must not be covered!
Contact with wheel nuts or wheel studs
must be avoided to prevent chafe marks.
[1] Attach valve hose (825, 826 or 827, depending
on tyre) to the tyre valve, use a valve extension if
necessary.
[2] Hand-tighten the union nut (SW 11) on the valve
hose and then tighten a further half-turn using a
spanner.
[3] Check that the air can penetrate by pushing the
valve needle in the valve hose.
[4] Hand-tighten the valve hose on the AirSave rotor
(811 or 811a).
[5] Check valve hose for untightness.
[6] Turn the hub cap adapter (817) using a spanner
(SW 55) or spring pliers until the screwed joint of
the rotor can be connected to the valve hose (see
Figure 6).
Do not turn back the rotor!!
Figure 4
Figure 5
m
x
Figure 6