BPW-EA-AS 37772001de Page 23
English
Repairs to the stator and internal tube 6
D
D
E
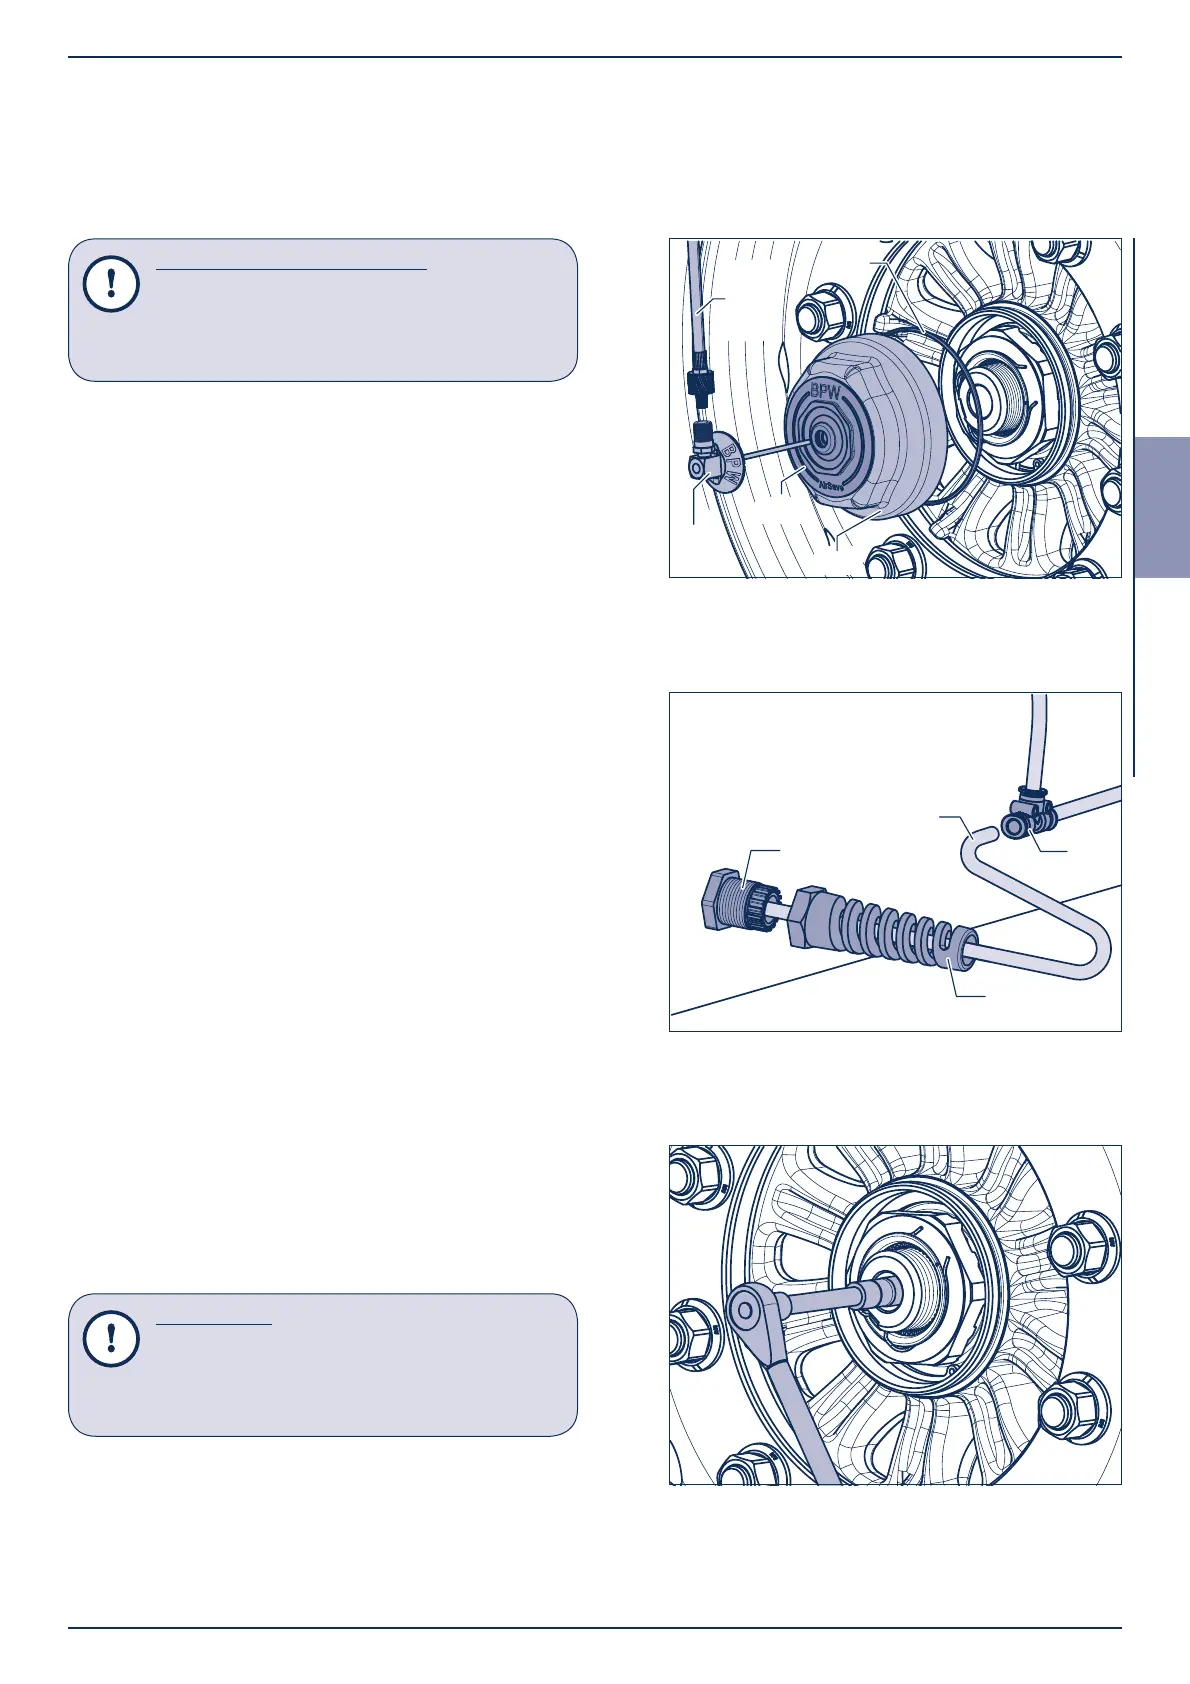
[8] Screw stator (832) from the axle stub using a box
spanner (SW 16).
[9] Detach stator from tube (832) and remove.
[10] The tube can now move freely in the axle beam
and can be replaced if required.
Repair note!
Assembly is in the reverse order.
Tightening torques:
Stator 40 Nm (35 - 45 Nm)
Spiral 5 Nm (hand tight)
[6] Detach the polyamide tube (832) on the respective
axle side from the AirSave T-piece (833).
[7] Screw spiral (831a, SW 24) from kink protection
(831b).
Installation and repair guide!
Before commencing work on the system
or on the wheel ends, always close the
shut-o valve and relieve air on the excess
pressure valve.
During disassembly / assembly, the wheel can
remain assembled on the wheel hub.
[1] Prevent the vehicle from rolling away.
[2] Loosen valve hoses (825, 826, 827 - depending on
version) from the rotor (811 or 811a).
[3] Screw rotor out of the AirSave hub cap adapter
(817) and pull out.
[4] Screw hub caps (819, SW 110) o the wheel hub.
[5] Remove the O-ring (459) from the wheel hub
groove. (The O-ring is not required for axles with
ECO Plus Unit).
Figure 21
Figure 22
Figure 23