140 Brocade FastIron X Series Chassis Hardware Installation Guide
53-1001723-02
Installing or replacing a power supply
6
To remove a DC power supply, perform the following tasks.
1. Disconnect the wires to your DC power source.
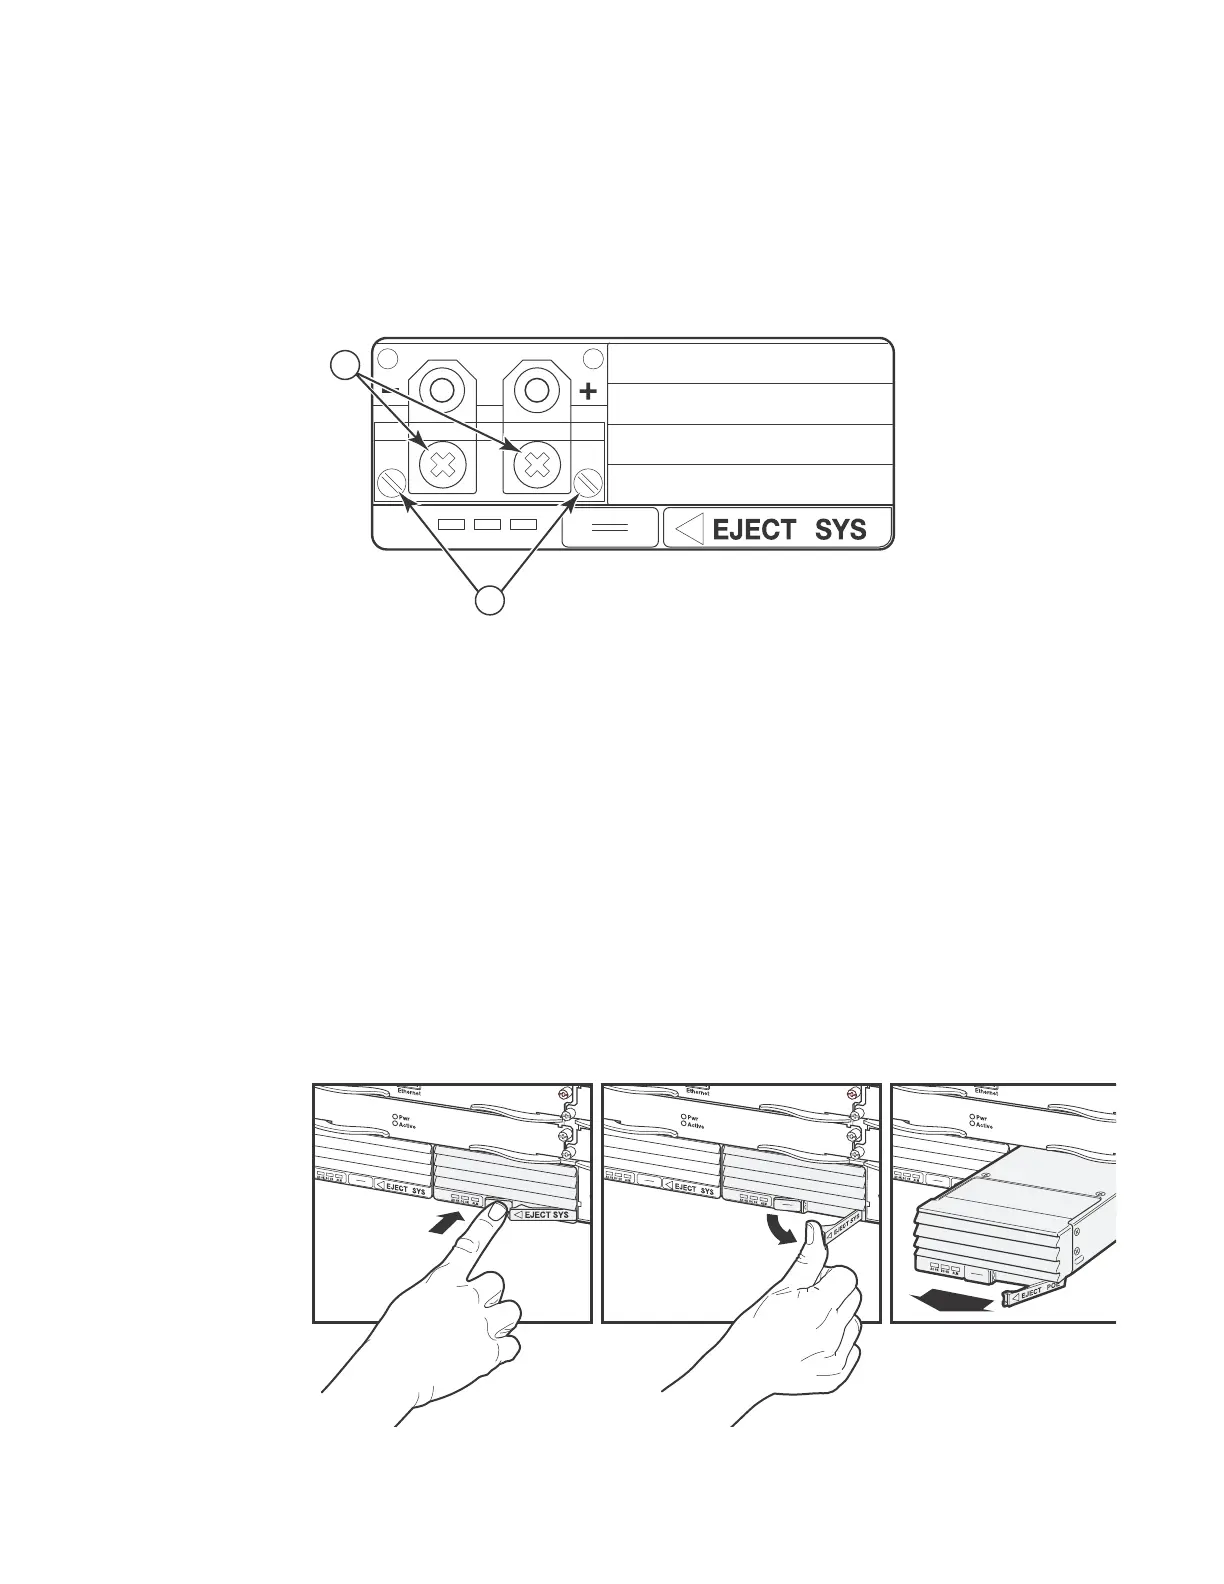
2. Use a flat-blade screwdriver to remove the two screws holding the transparent cover over the
power supply lugs. Refer to Figure 52.
FIGURE 52 DC power supply
3. Use a Phillips-head screwdriver to remove each of the power lugs.
4. Remove both wires from the power lugs.
5. Release the latch on the front of the power supply to unlock the power supply from its position
in the chassis:
• Locate the 1/2 in tab (latch release) on the bottom center of the front of the power supply
• Firmly press on the latch release
• The latch should spring open
• Gently push the latch to the right
1 Screws holding power lugs
2 Screws holding transparent cover
1. Push Latch Release In 2. Push Eject Latch to the Right 3. Pull Power Supply Out

 Loading...