3. INSTALLATION
BAS-311HN, BAS-326H
8
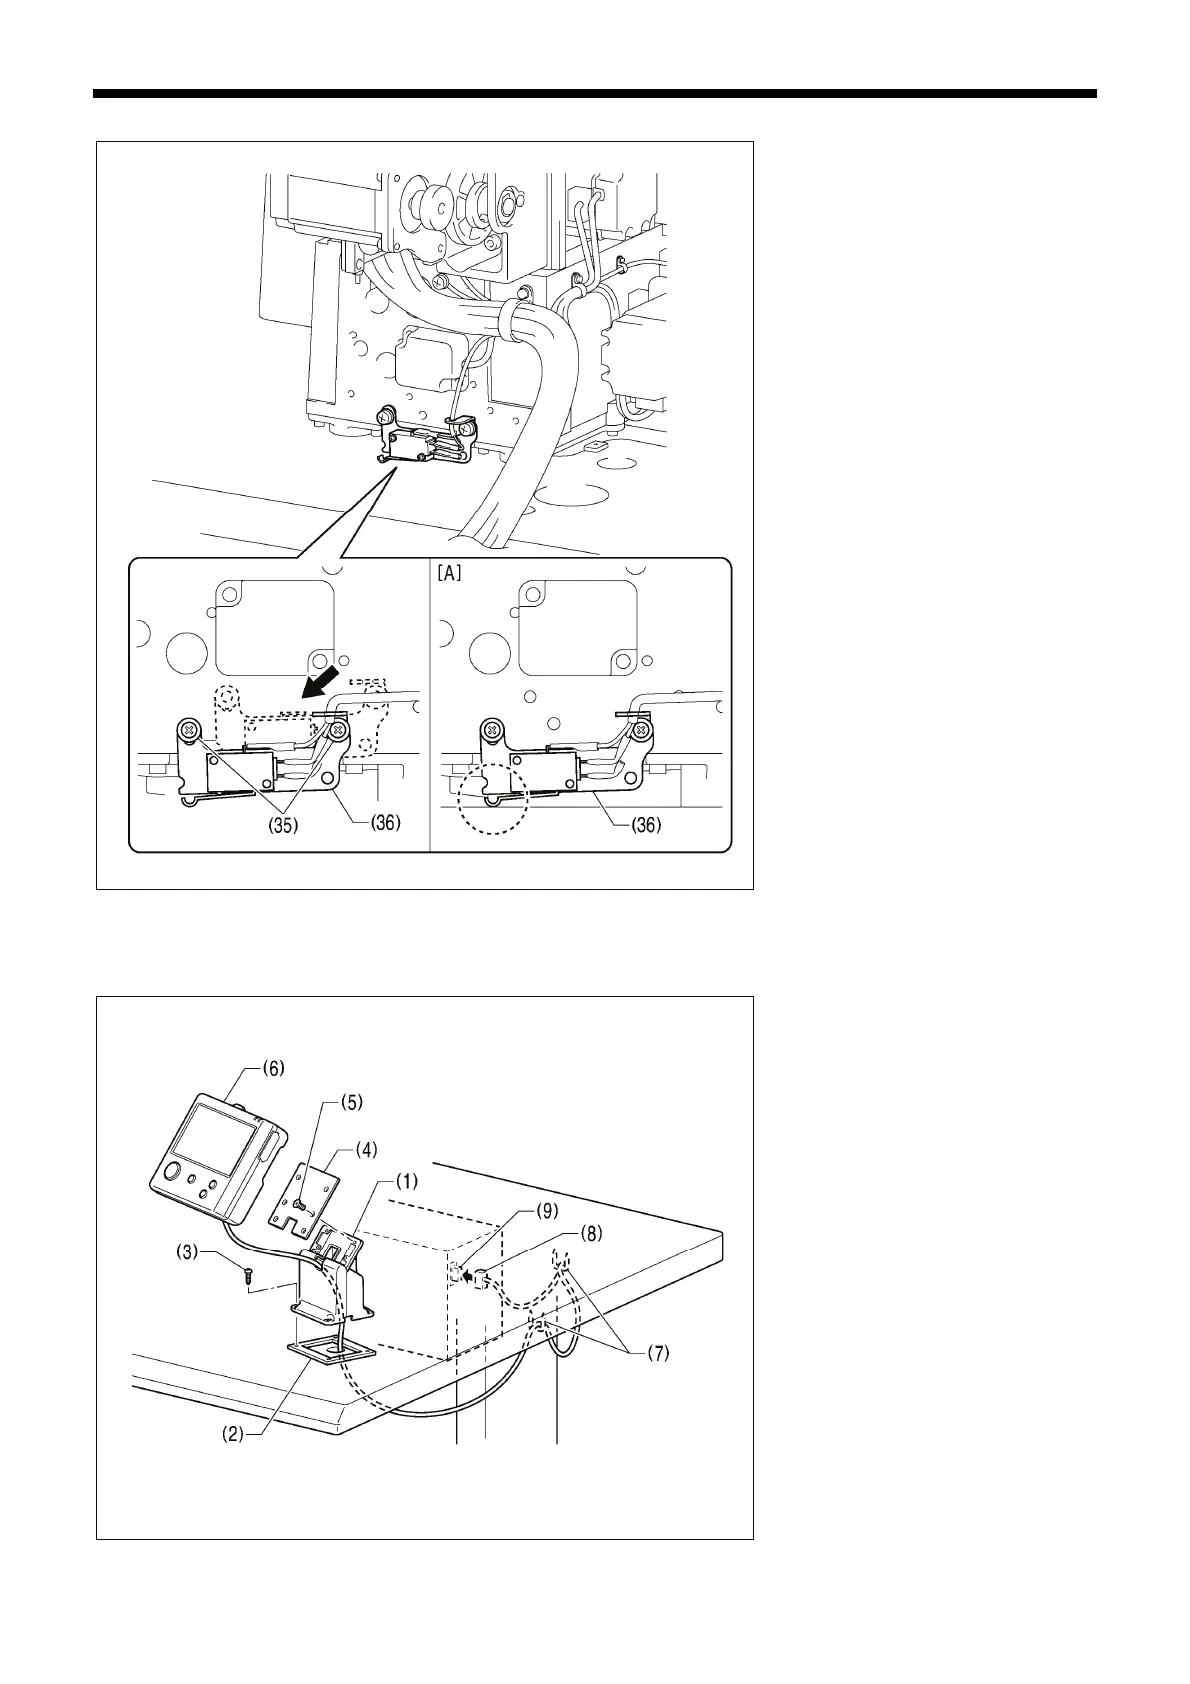
Gently return the machine head to its
original position.
1. Remove the two screws (35), and
then temporarily remove the machine
head switch assembly (36).
2. Use the two screws (35) which were
removed to install the machine head
switch assembly (36) in the position
shown in the illustration.
3. Check that the machine head switch
as turned on as shown in figure [A].
* If the machine head switch is not
turned on, adjust the installation
position while referring to “3-16.
Checking the machine head switch”.
3-5. Installing the LCD panel
(1) Cradle
(2) Rubber cushion
(3) Wood screws [4 pcs.]
(4) Setting plate
(5) Flat screws [4 pcs.]
(6) LCD panel
(7) Staples [2 pcs.]
• Pass the cord of the LCD panel (8)
through the table hole, and then insert
it into the (PANEL) connector (9) on
the side of the control box.
• Tighten the four wood screws (3) so
that the thickness of the rubber
cushion (2) is 5 mm.
3536B
3554B
 Loading...