2 - 9
Main parts
Main unit
Disassembly
8
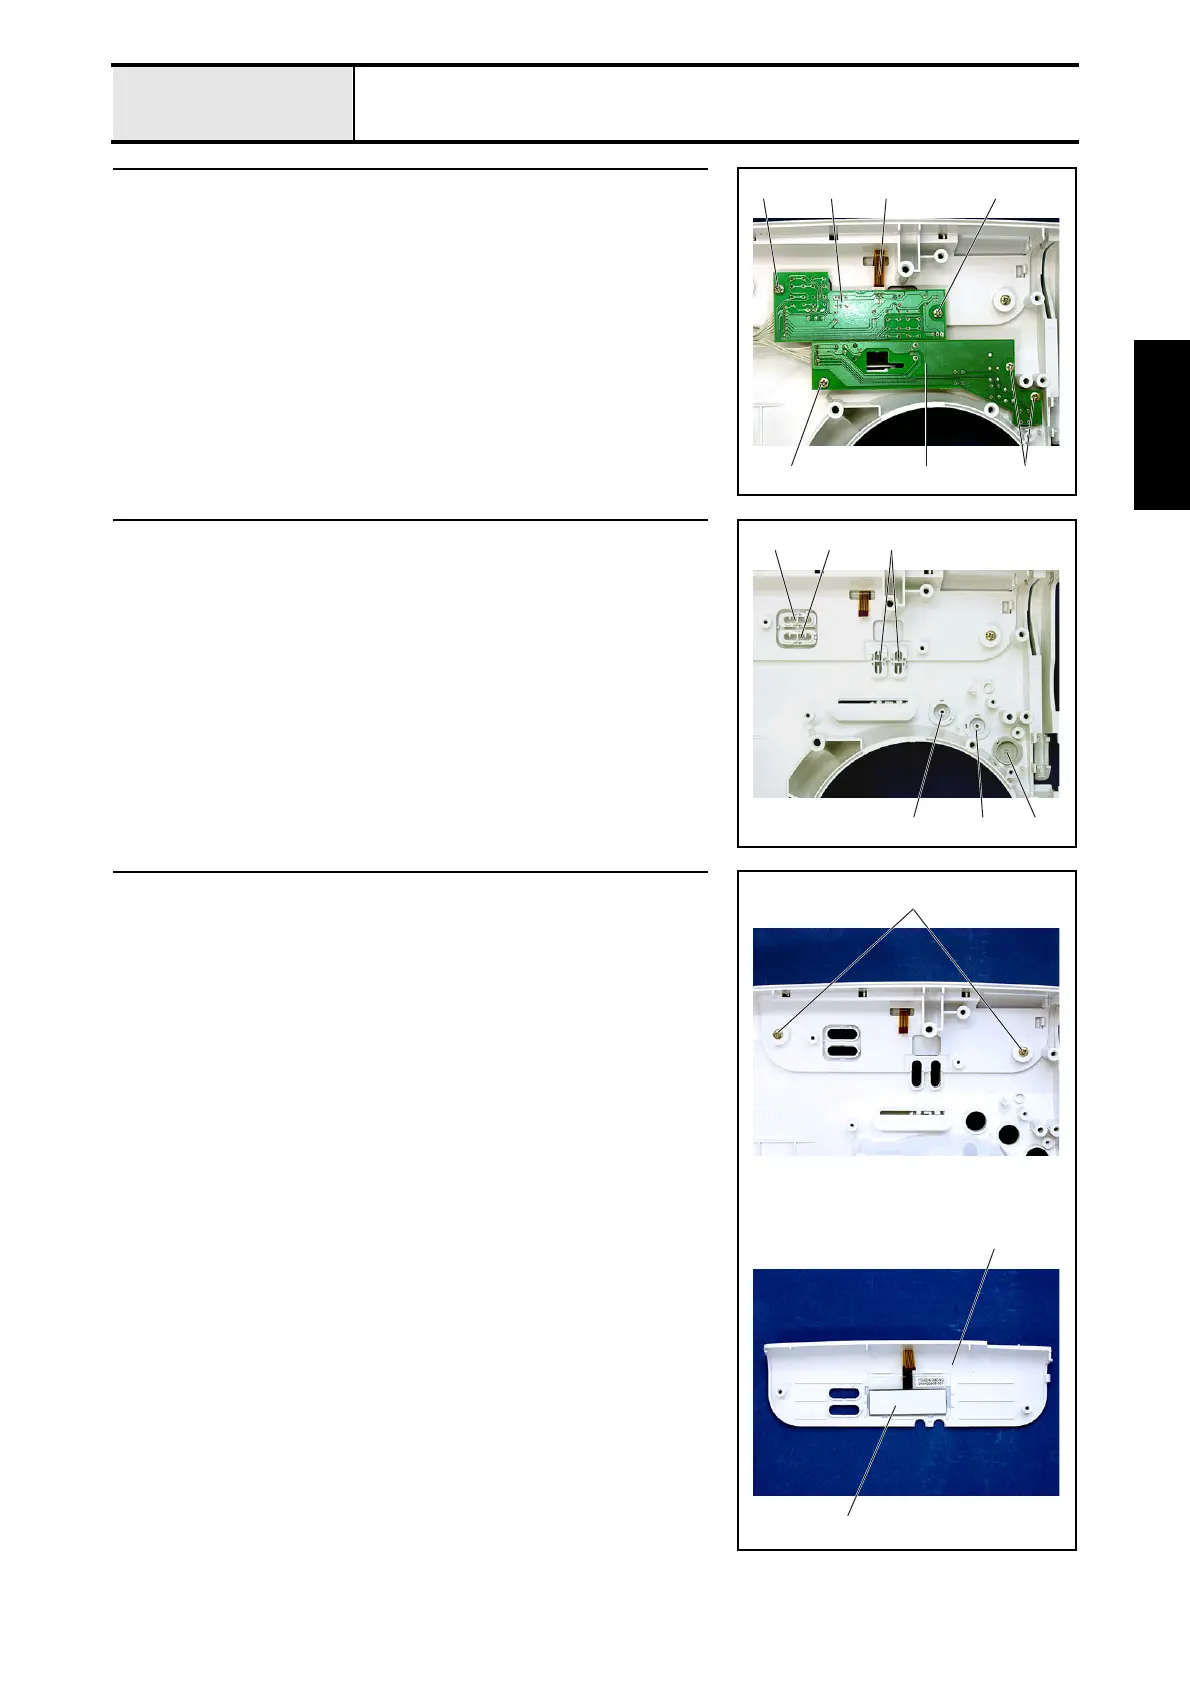
Operation PCB assembly and SSVR PCB assembly removal
1. Remove the 2 screws 1, and then remove the operation PCB assembly 1.
2. Disconnect the LCD cable 2 from the operation PCB assembly 1.
3. Remove the 3 screws 2, and then remove the SSVR PCB assembly 3.
*Key point
• Remove the bands (2 locations) securing the cords of the
operation PCB assembly 1 and the SSVR PCB assembly 3.
1
22
1
3
12
9 Button removal
1. Remove the 2 selecting buttons 1.
2. Remove manual button A 2 and manual button B 3.
3. Remove the SS button 4, the backstitching button 5, and the NP button
6.
23 1
654
10 Front panel and LCD removal
1. Remove the 2 screws 1.
2. Remove the front panel 1 and the LCD 2.
1
1
2