3-59
Confidential
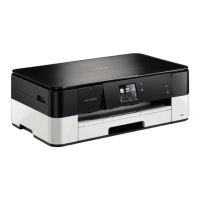
(5) Release the three latches and two hooks of the Control panel base, and remove the
Front center cover.
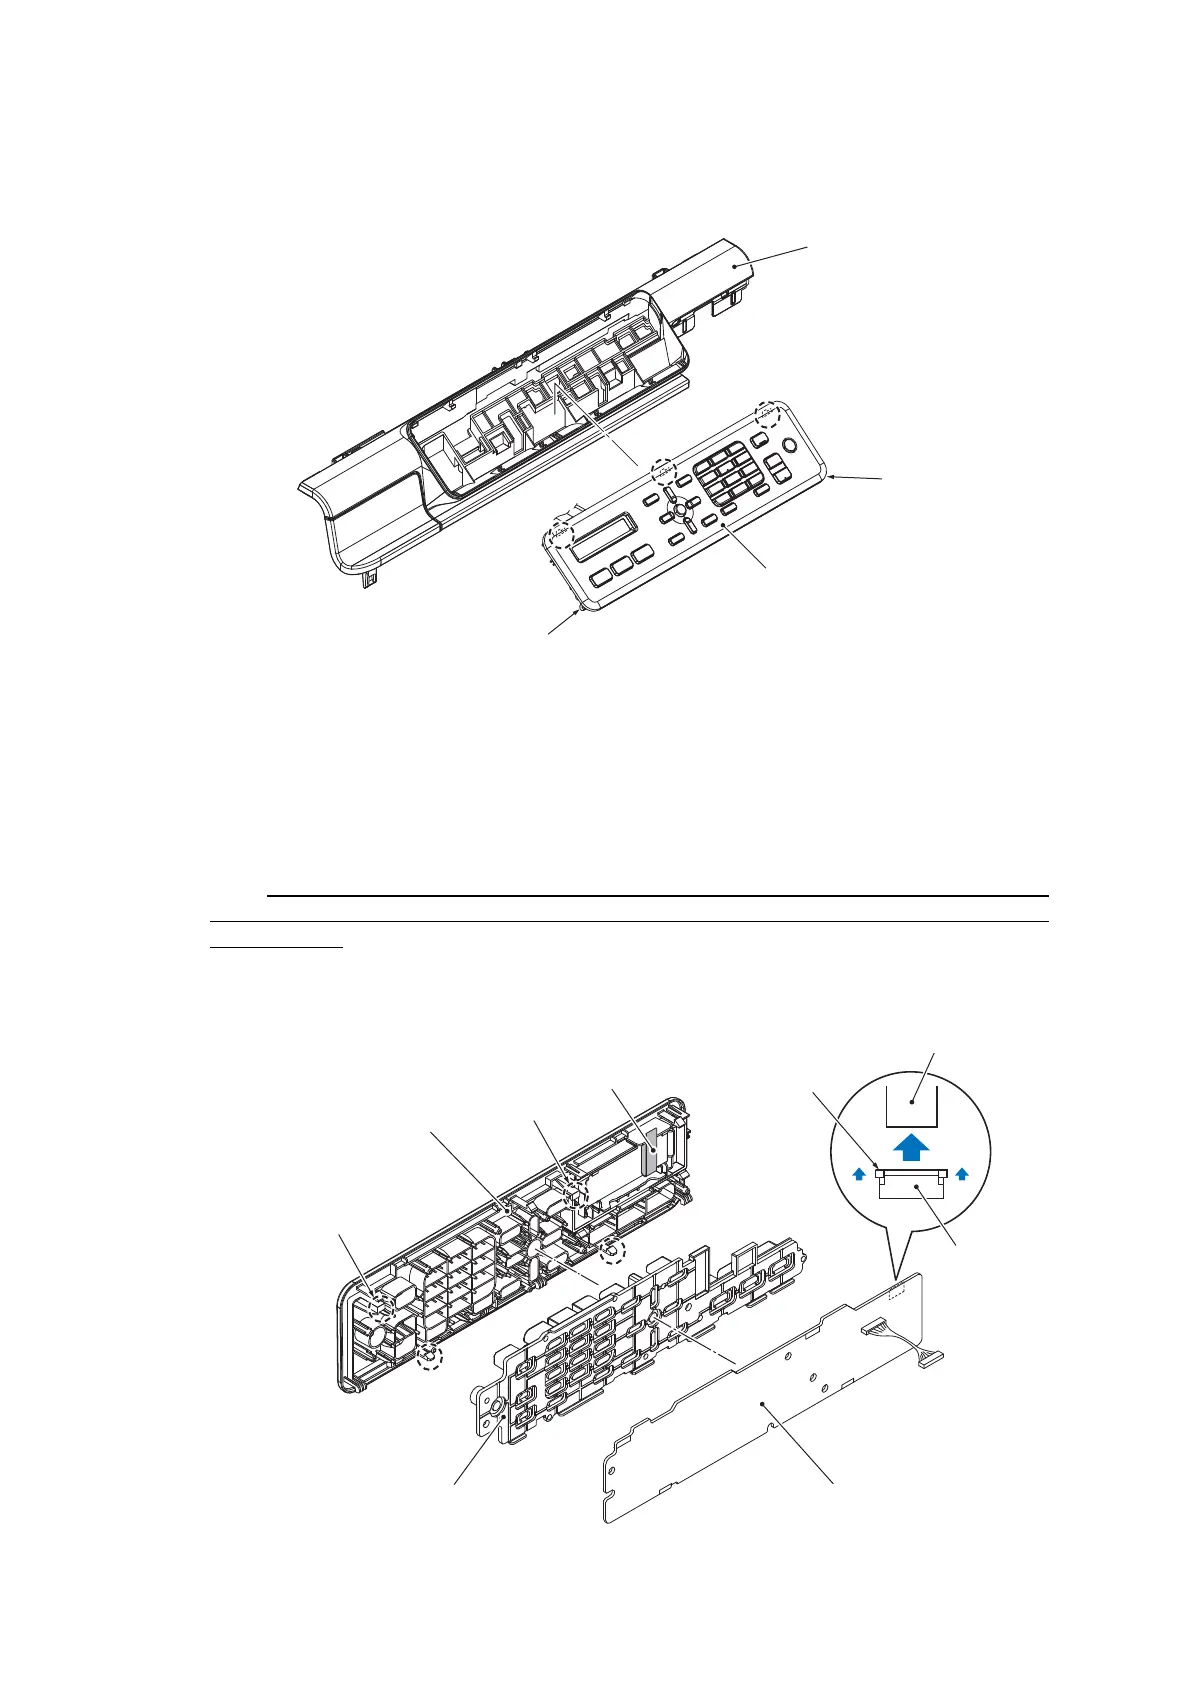
(6) Release the two latches and two hooks of the Printed panel cover, and remove the
Panel PCB ASSY.
Note The Panel PCB ASSY is connected to the Printed panel cover by harnesses. Do not
attempt to pull it away from the Control panel.
(7) Unlock the LCD flat cable connector, and disconnect it.
Note After disconnecting the LCD flat cable, check if the cable is not damaged at its end or
short-circuited. Insert the LCD flat cable straightly. After it is inserted, confirm that the cable
is not skewed.
(8) Remove the Rubber key from the Printed panel cover.
(3_040L)
Control panel base
Latch
Front center cover
Hook
Hook
Latch
Latch
(3_041L)
Printed panel cover
Hook
Panel PCB ASSY
Remove by
pulling the lock
LCD flat cable
LCD flat cable
Hook
Latch
Latch
Rubber key
Connector

 Loading...