3-66
Confidential
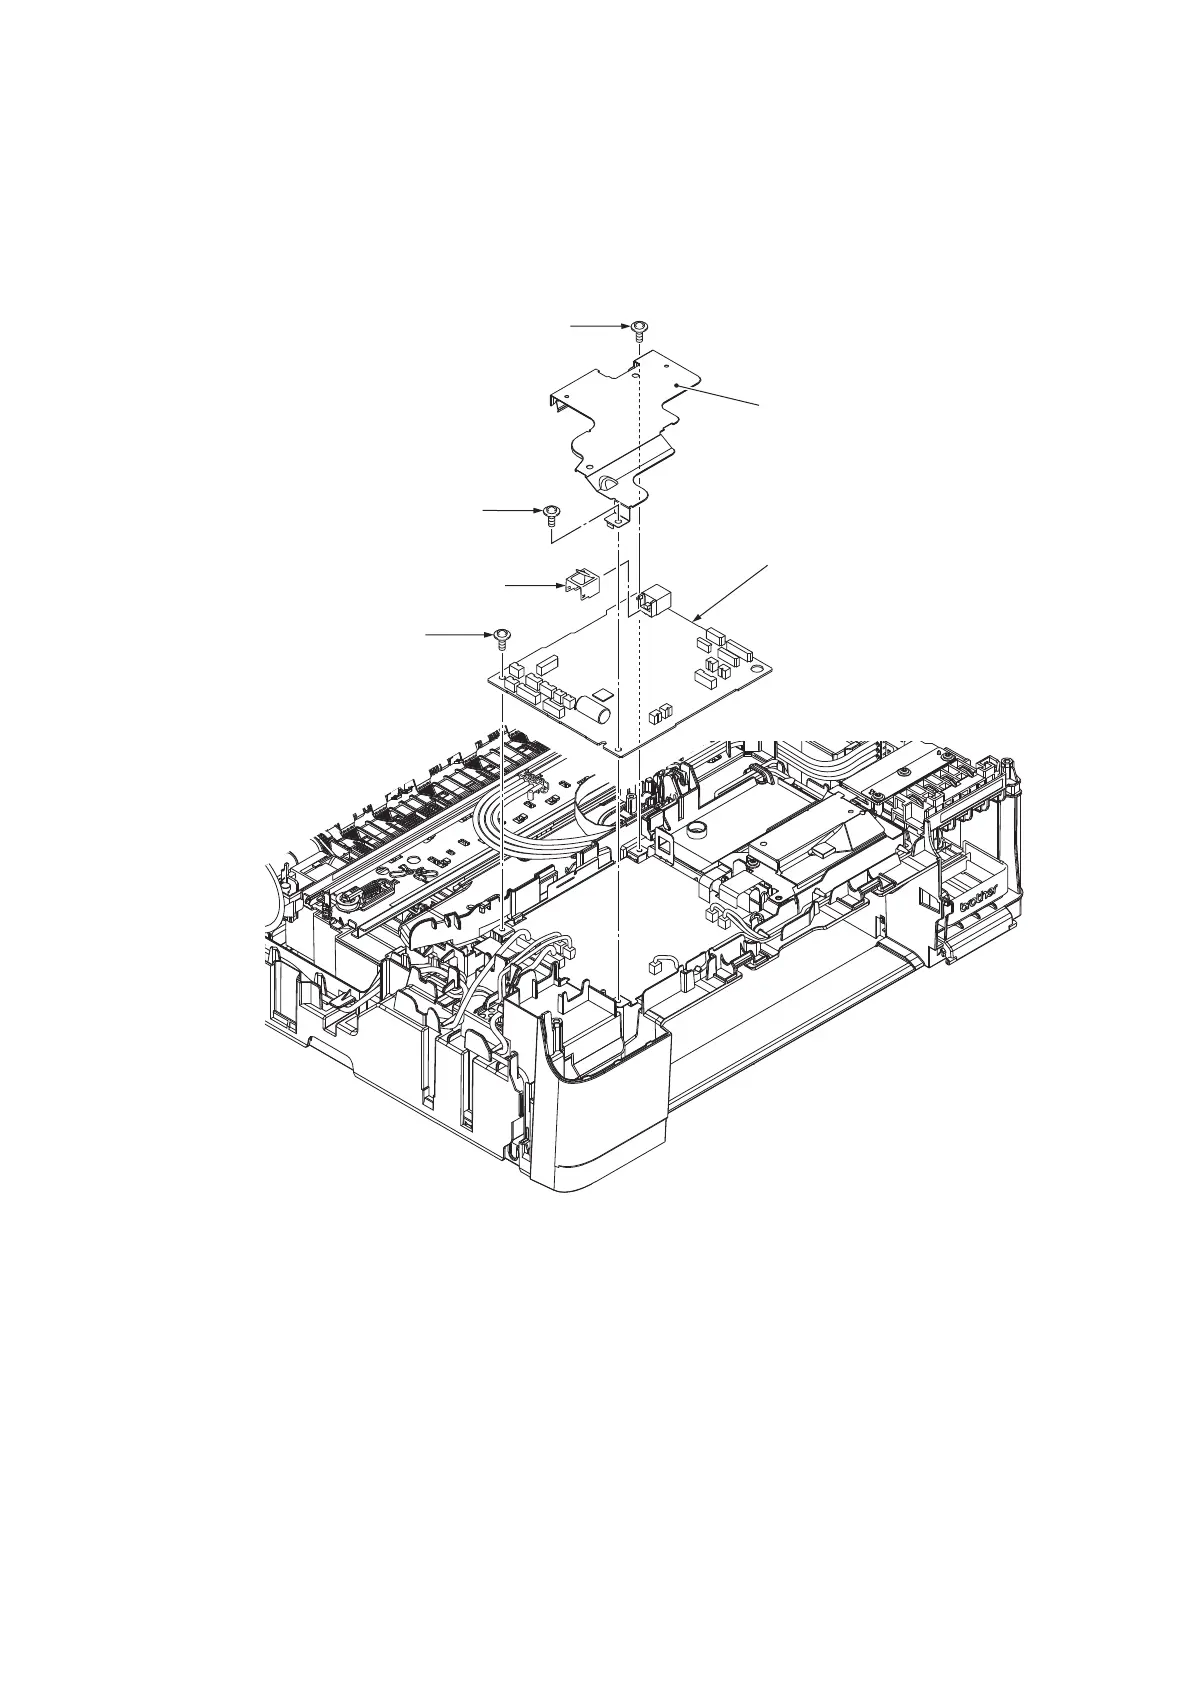
(2) Remove the two screws of the TAPTITE CUP S M3x6 and remove the Main PCB
shield.
(3) Remove the screw of the TAPTITE CUP S M3x6 and remove the Main PCB ASSY.
(4) Remove the USB ground plate.
Assembling Note When the Main PCB ASSY is replaced, make adjustments by following
Chapter 4 "1 IF YOU REPLACE THE MAIN PCB ASSY".
(3_047L)
TAPTITE CUP S
M3x6
USB ground plate
Main PCB ASSY
Main PCB shield
TAPTITE CUP S M3x6
TAPTITE CUP S M3x6

 Loading...