Home > Print > Print Photos Directly from a USB Flash Drive > Print Photos from a USB Flash Drive on the
Brother Machine > Print Photos with Auto Cropping
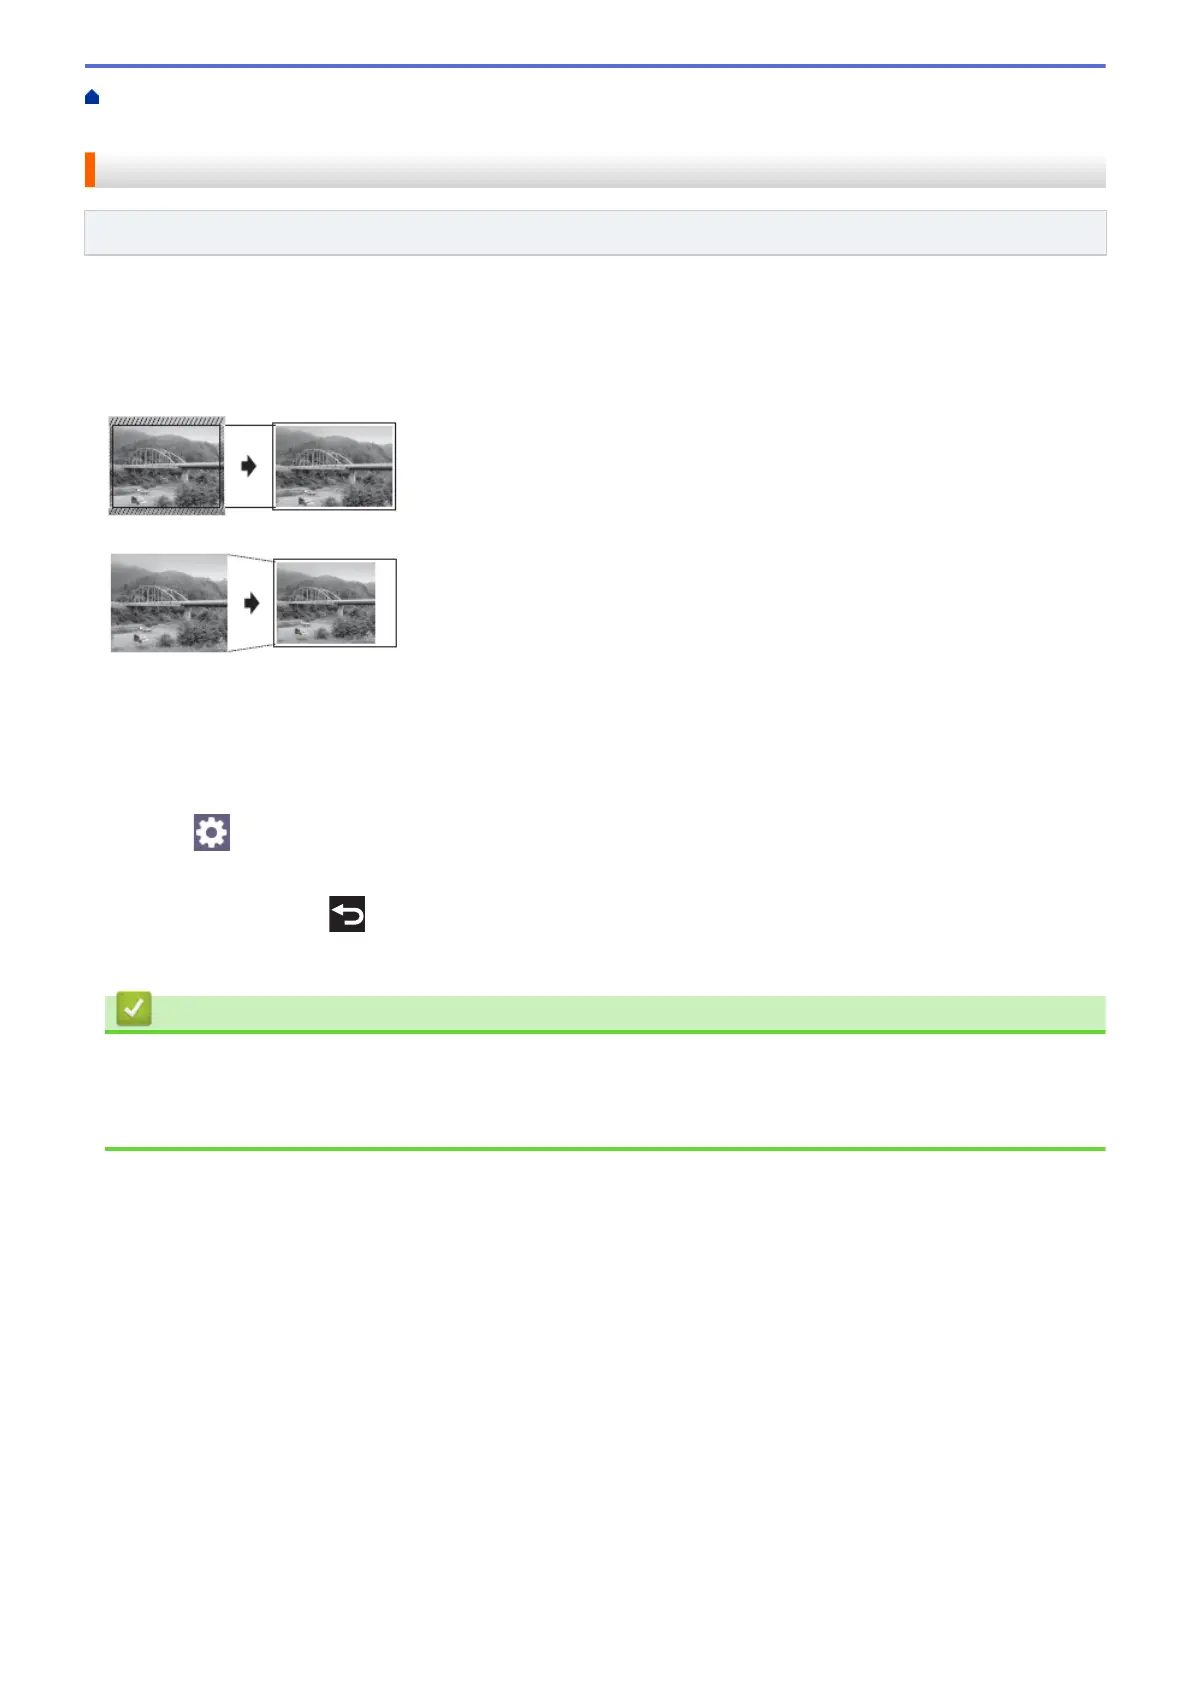
Print Photos with Auto Cropping
Related Models: MFC-J4440DW/MFC-J4540DW
If your photo is too long or too wide to fit within the layout space, part of the image will be cropped.
• The factory setting is On. To print the entire image, change this setting to Off.
• If you set the [Cropping] setting to Off, set the [Borderless] setting to Off, also.
Cropping: On
Cropping: Off
1. Insert a USB flash drive in the USB slot.
2. Press [JPEG Print] > [Select Files].
3. Press d or c to display each photo. When the photo you want appears, press it, and then press [OK].
4. Press [OK].
5. Press
[Print Settings] > [Cropping].
6. Press [On] (or [Off]).
7. When finished, press or [OK].
8. Press [Start].
Related Information
• Print Photos from a USB Flash Drive on the Brother Machine
Related Topics:
• Other Problems
94
 Loading...