Gemini Series Electroporator User’s Manual
toll free 800.272.2775 • 508.893.8999 • www.btxonline.com
14
The shipping carton in which your BTX Gemini Twin Waveform
Electroporation System is packed has been specifically designed
to provide maximum protection to the instrument during
transportation and normal handling conditions. Upon receipt, the
carton should be examined for any external damage resulting from
shipment.
Open the carton and carefully remove the BTX Gemini Twin
Waveform Electroporator and inspect the unit for any apparent
damage. Save the carton and packing materials for future
transportation and shipping requirements.
Packing Data
Check the packing slip to ensure that all items ordered and listed
are included in the shipment. Inform BTX immediately if any parts
are missing or damaged.
Power Source
As received, the instrument is ready for use with either 100-240 V
AC, 50/60 HZ.
The power requirements are 350 watts. In the USA, the power
cord has a standard three prong plug.
Installation
Once you have determined that the components of the system
have not sustained any obvious damage in shipment, proceed with
the installation. The location of the BTX Gemini Twin Waveform
Electroporator should be a dry, level, sturdy surface free from
extremes in ambient temperature, dust or chemical exposures.
Unpack the safety dome, cuvette rack and disposable cuvette
chambers.
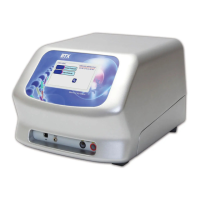
Connect the safety dome, or in the case of the BTX Gemini
X2 system, specialty electrodes or HT plate handler, into the
connectors at the bottom right-hand side of front panel.
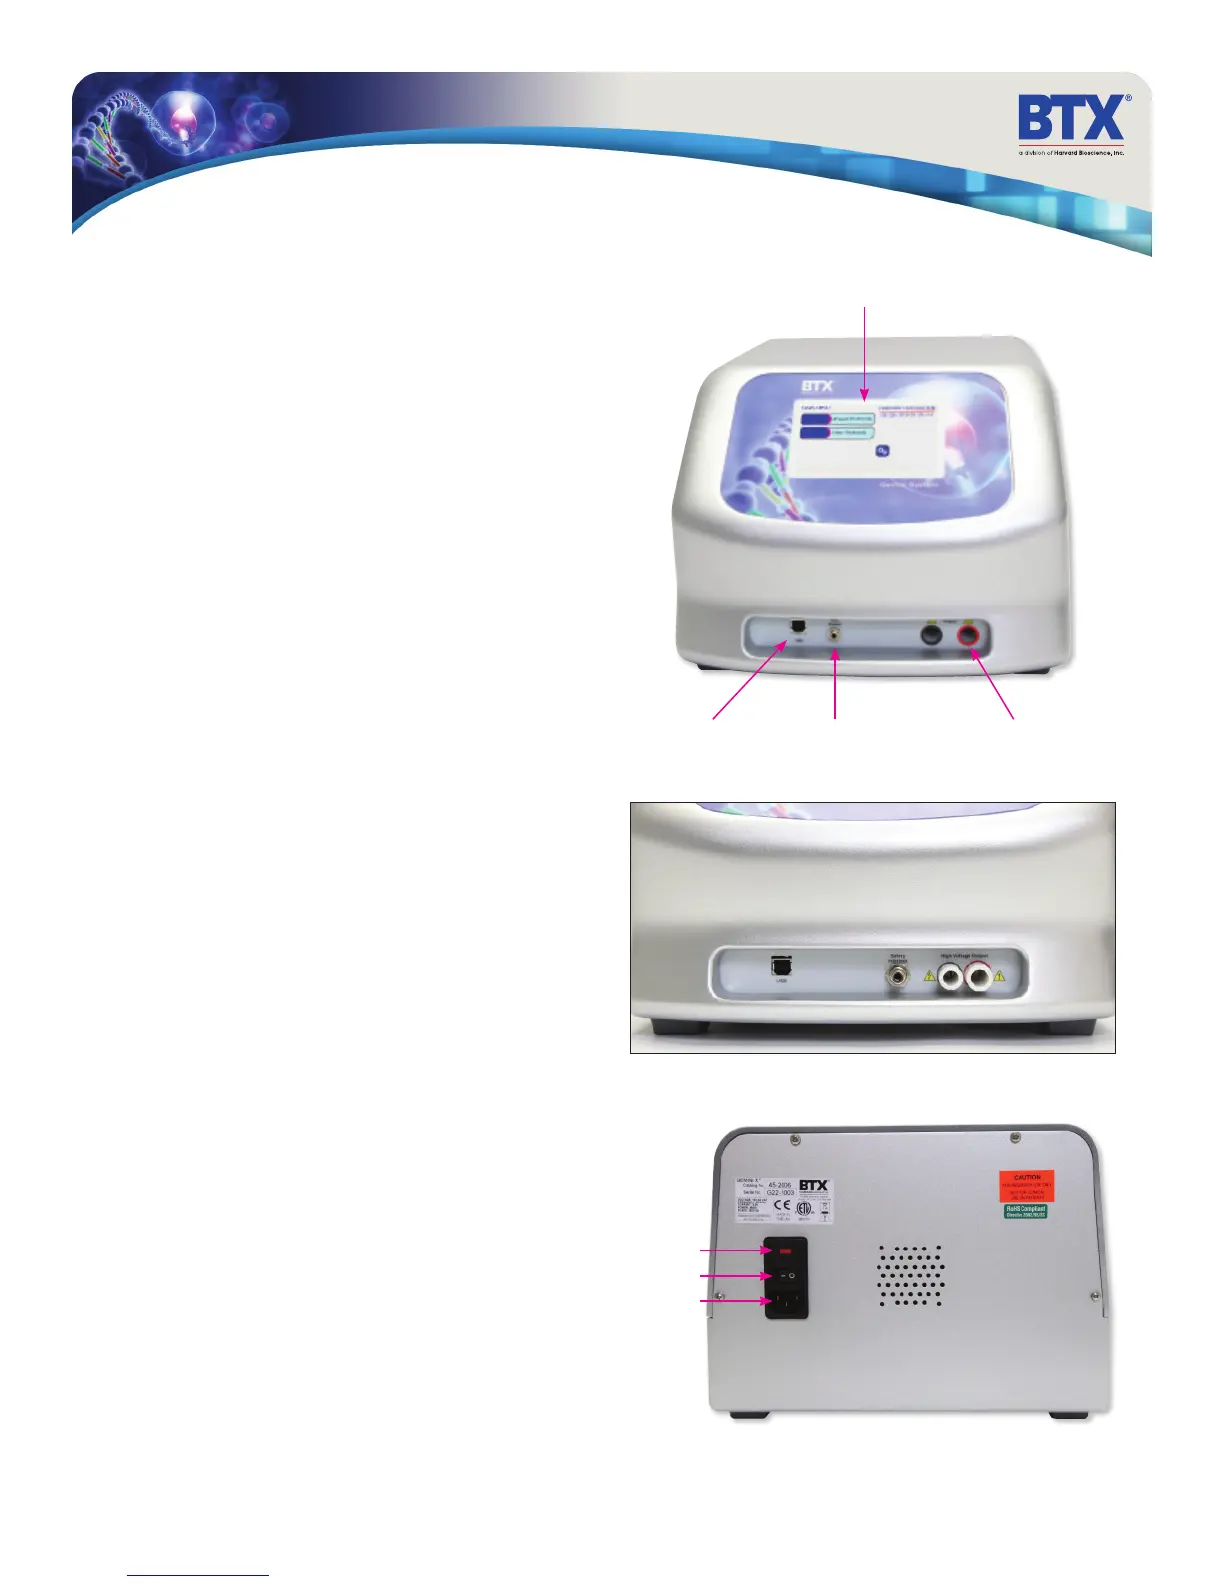
Connect the mains/power cord to into the back panel at the
bottom left.
Power up the system by pushing the rocker switch located on the
back panel at the bottom left. The display will flash the BTX logo.
Once the software initializes, the Main Menu screen will appear.
You are now ready to begin your work.
Unpacking the System
Main Power Switch
Fuse Holder
Universal Power Input
USB Serial Input Footswitch Input
(switch sold separately)
High Voltage Output
Gemini SC
Touchscreen Display