27
7 Maintenance
9
10
11
5
8
7
8
7
5
6
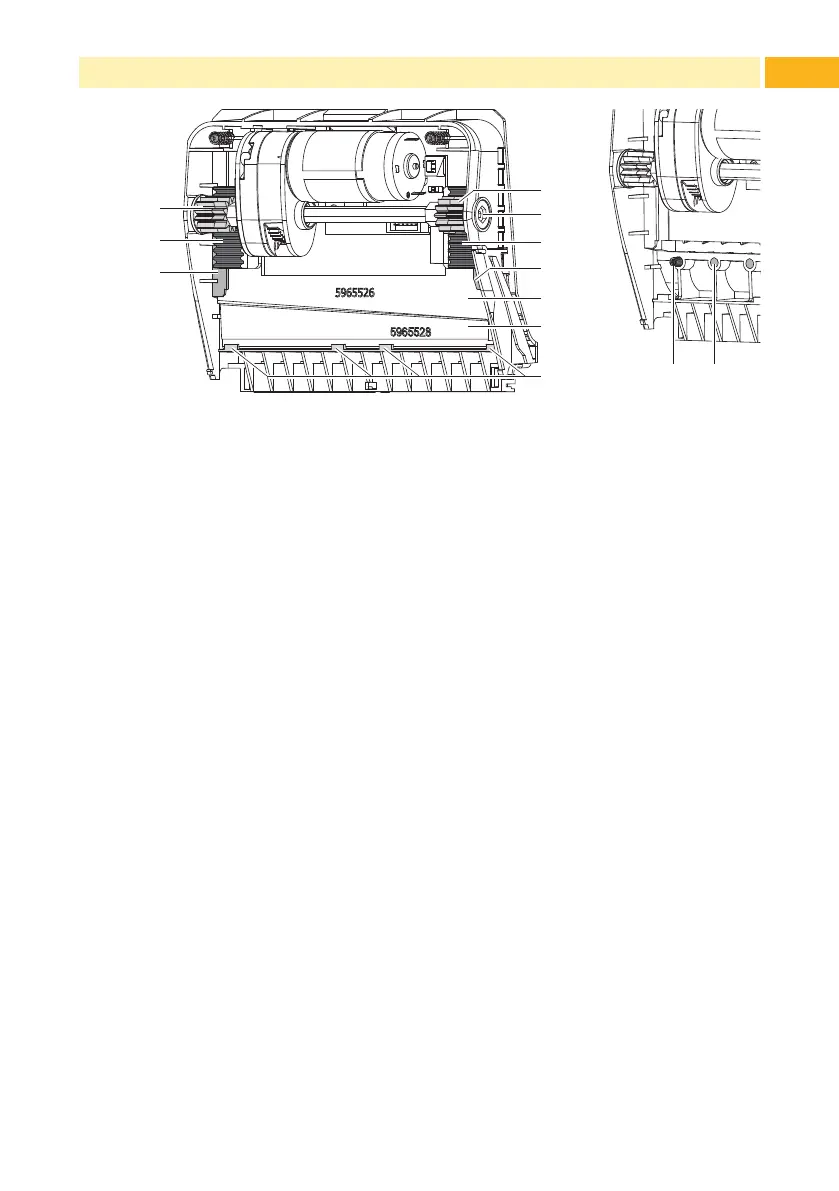
Fig. 20 Replace Blades
1312
Fig. 21 Springs
4. If the blades are very dirty with residues of adhesive or if they are worn,
change blades:
Turn shaft (6) clockwise using a torx wrench TX10 until the gear racks
(7) cannot engage anymore.
Pull upper blade (9) out of the guides (8).
Take out lower blade (10).
Remove deposits on the blades with label remover and a soft cloth.
If necessary, replace blades.
Push lower blade down into the guides (11).
If necessary, put springs (12) back into spring retainers (13).
To re-mount the upper blade push lower blade down on the cover and
push upper blade into the guide until the gear racks (7) can engage
with the gear wheels (5).
Turn shaft (6) counterclockwise using a torx wrench TX10 until the
blade reaches the upper limit.
5. Fit blade unit (3) according to Fig. 19 into the axes (2) and fold it towards
the cover (4) until it snaps in.
6. Fold cutter/perforation cutter up to the print unit.