30 30
8 Accessories
8.2 Installing the Present Sensor
Note!
A label liner thickness of 0.006 mm ± 10% and a weight of 65 g/m2 ± 6% are recommended.
The Present Sensor will take labels up to a max. width of 118 mm.
When using the Present Sensor, set the stop position (printer command ^E) to 13.
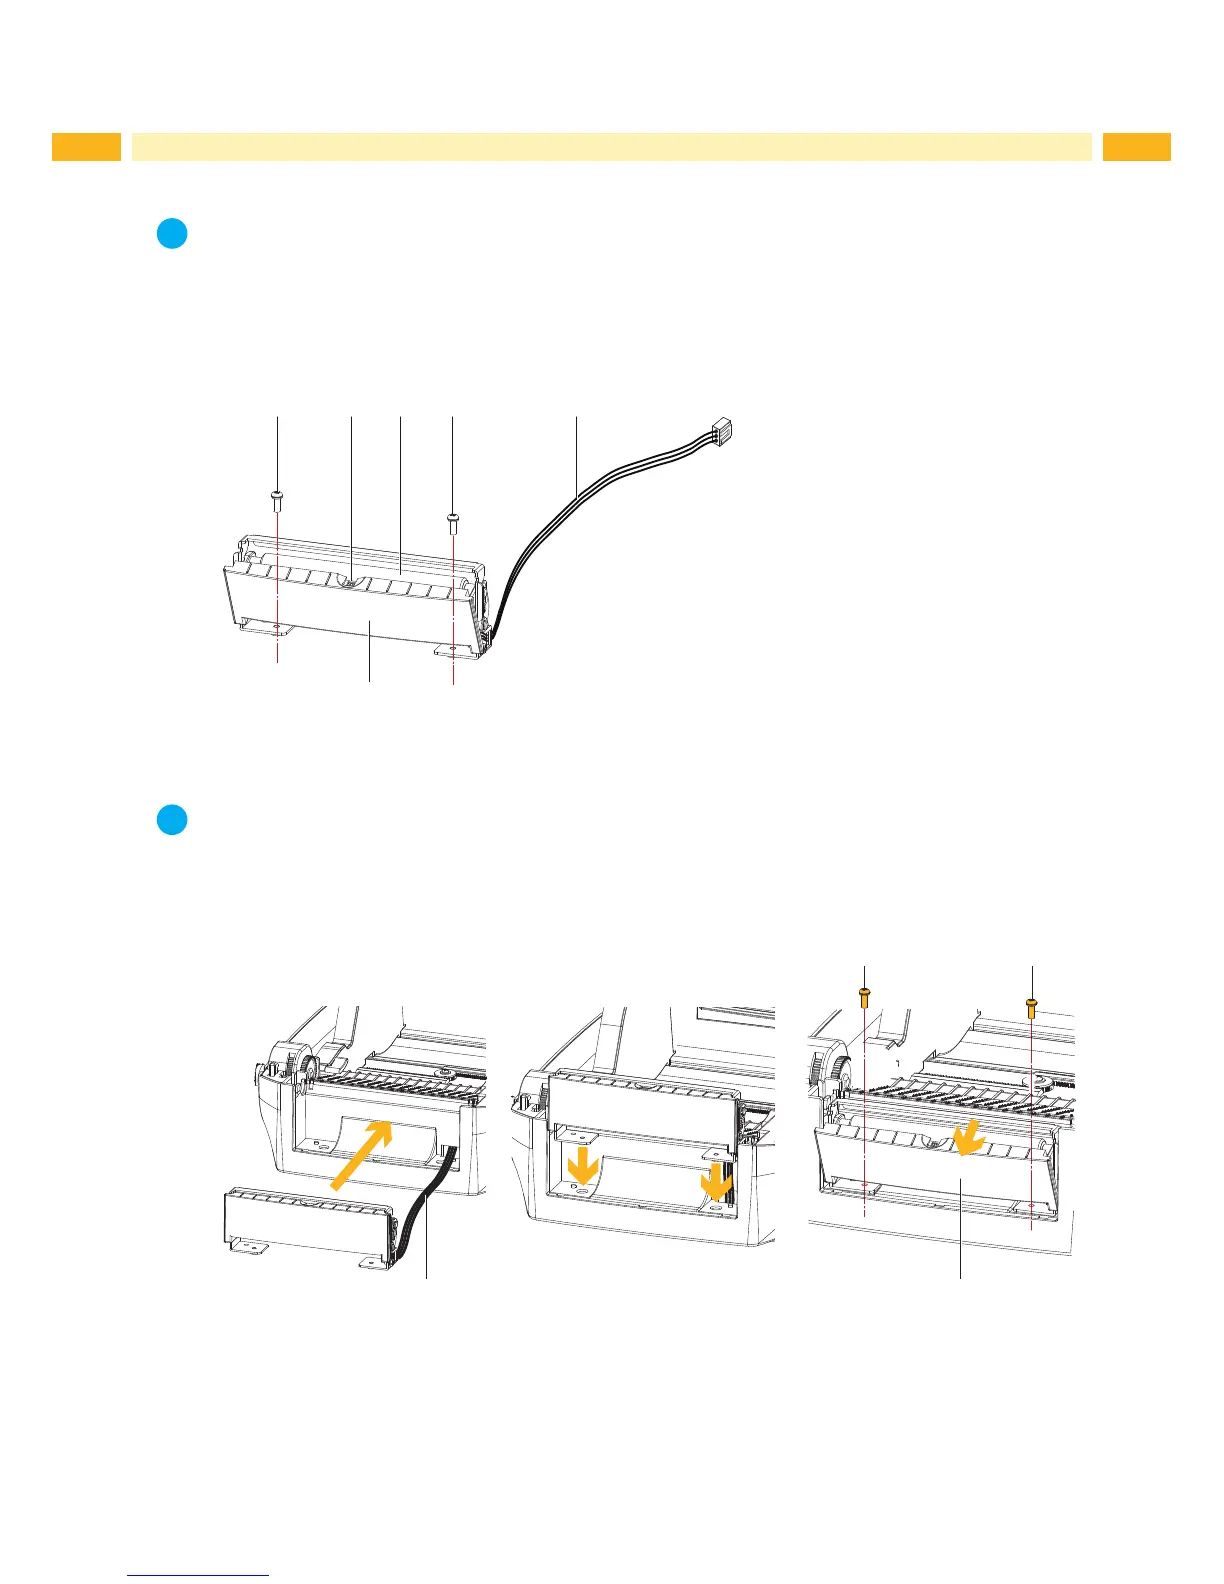
The Overview of the Label Dispenser
5 1 2 5 3
4
1 Paper sensor
2 Paper feed roller
3 Connection cable of Present Sensor
4 Cover
5 Screws (Set of 2)
Fig. 25 Overview of the Label Dispenser
Preparation Steps
Note!
Please see the Section 8.1 on page 28 Preparation Steps to complete the preparation steps before
installing the Present Sensor
Installing the Present Sensor
5 5
3 4
Fig. 26 Installing the Present Sensor
1. Pass the connection cable (3) through the slot of the printer.
2. Place Present Sensor to align both holes of screw at the printer.
3. Open the cover (4).
4. Tighten the screws (5).