Note!
Do not use to cut adhesive labels! Glue residue will be left on the cutter blade and impair its functioning.
You can cut paper with a max. width of 116 mm. Labels should be at least 30 mm high.
We advise against using inside wound label stock.
With the cutter installed, set the stop position to 30, and the E value to 30.
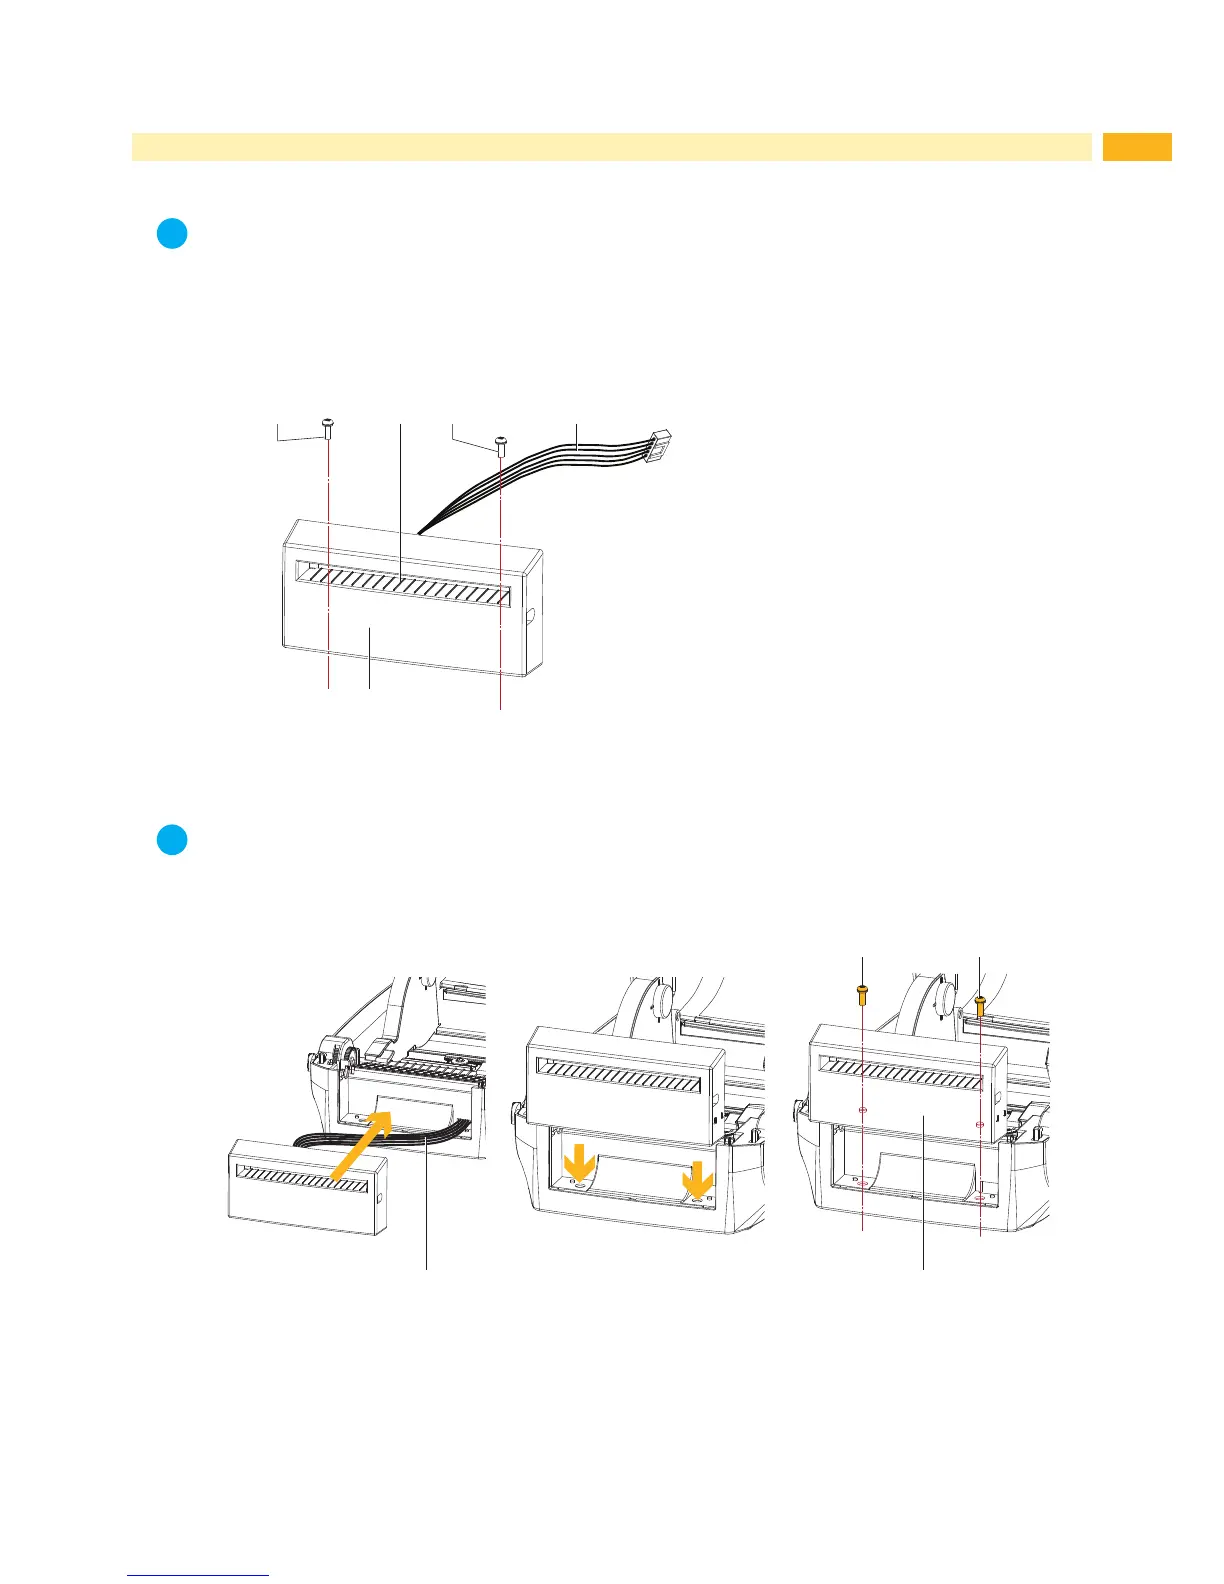
The Overview of the Cutter
4 2 4 3
1
1 Cover
2 Feed-out slot
3 Connection cable of the Cutter
4 Screws (Set of 2)
Fig. 35 Overview of the Cutter
Preparation Steps
Note!
Please see the Section 8.1 on page 28 Preparation Steps to complete the preparation steps before
installing the Cutter.
Installing the Cutter
4 4
3 1
Fig. 36 Installing the Cutter
1. Pass the connection cable (3) through the slot of the printer.
2. Place the Cutter (1) to align both holes of screw at the printer.
3. Tighten the screws (4).