#9 Viper_SC_Manual_001-5008-000_Rev12e.docx | Page 15
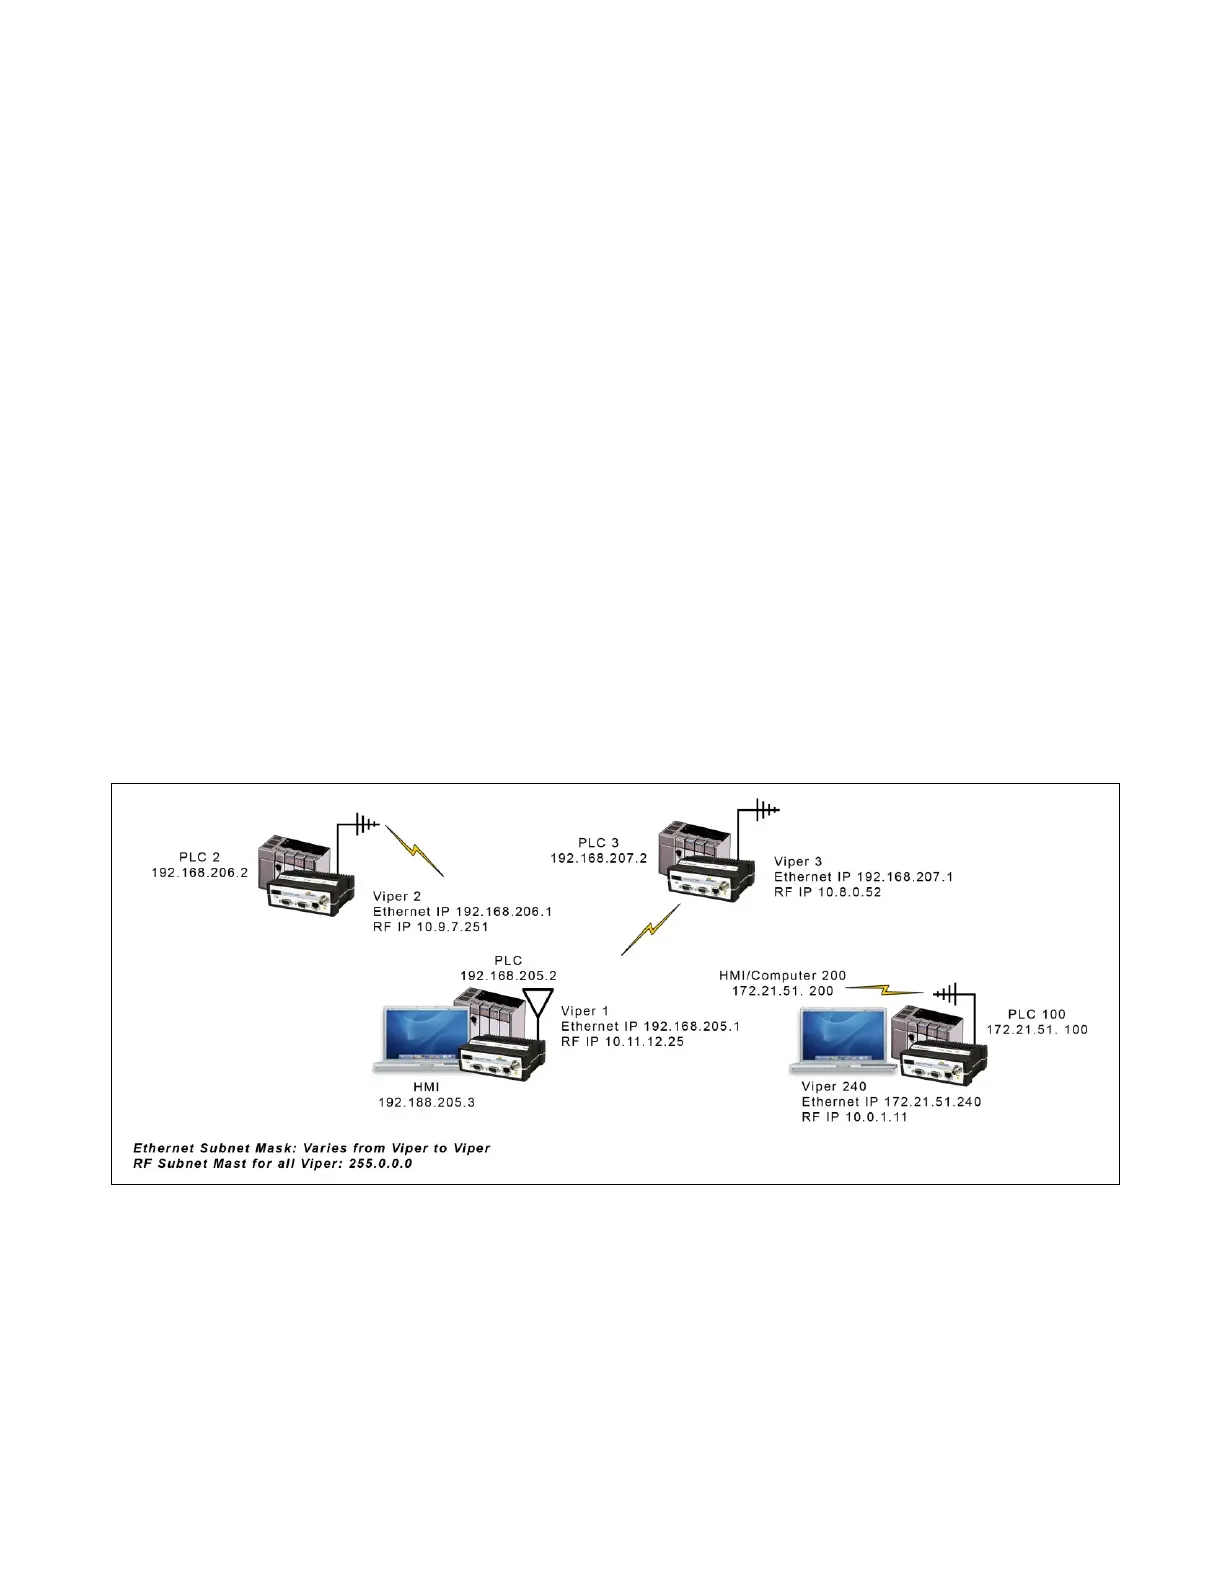
Note 2: All the Viper Ethernet IP addresses are on different networks.
Note 3: Computers, PLCs, RTUs, or other Ethernet capable devices can be connected up to each Viper’s local Ethernet
interface. That device must be set with an IP address on the same network as the Ethernet interface of the Viper it is
connected with.
Ethernet Subnet Mask: Varies from Viper to Viper.
RF Subnet Mask for all units: 255.0.0.0
Viper 1: Ethernet IP Address: 192.168.205.1/24 RF IP Address: 10.11.12.25/8
PLC 1: 192.168.205.2/24
Computer/HMI 1: 192.168.205.3/24
Viper 2: Ethernet IP Address: 192.168.206.1/24 RF IP Address: 10.9.7.251 / 8
PLC #2: 192.168.206.2 / 24
Viper #3 Eth IP Address: 192.168.207.1/24 RF IP Address: 10.8.0.52 / 8
PLC #3: 192.168.207.2/24
Computer #3: 192.168.207.3/24
Viper #4 Eth IP Address: 172.21.51.105/16
RF IP Address: 10.0.1.11/8
PLC #4: 172.21.51.106/16
Figure 8 – Router Mode Example 1
Router Mode Example 2:
Each Viper has an Ethernet IP address on a unique network.
In this example, each network connected to the Viper’s local Ethernet port has 14 valid IP addresses that may used for the
Viper, PLCs, RTUs, computers, or other Ethernet equipment that may be connected.
 Loading...