#9 Viper_SC_Manual_001-5008-000_Rev12e.docx | Page 21
10 watt supply for Tx @ 1W
40 watt supply for Tx @ 5W, or
60 watt supply for Tx @ 10 W
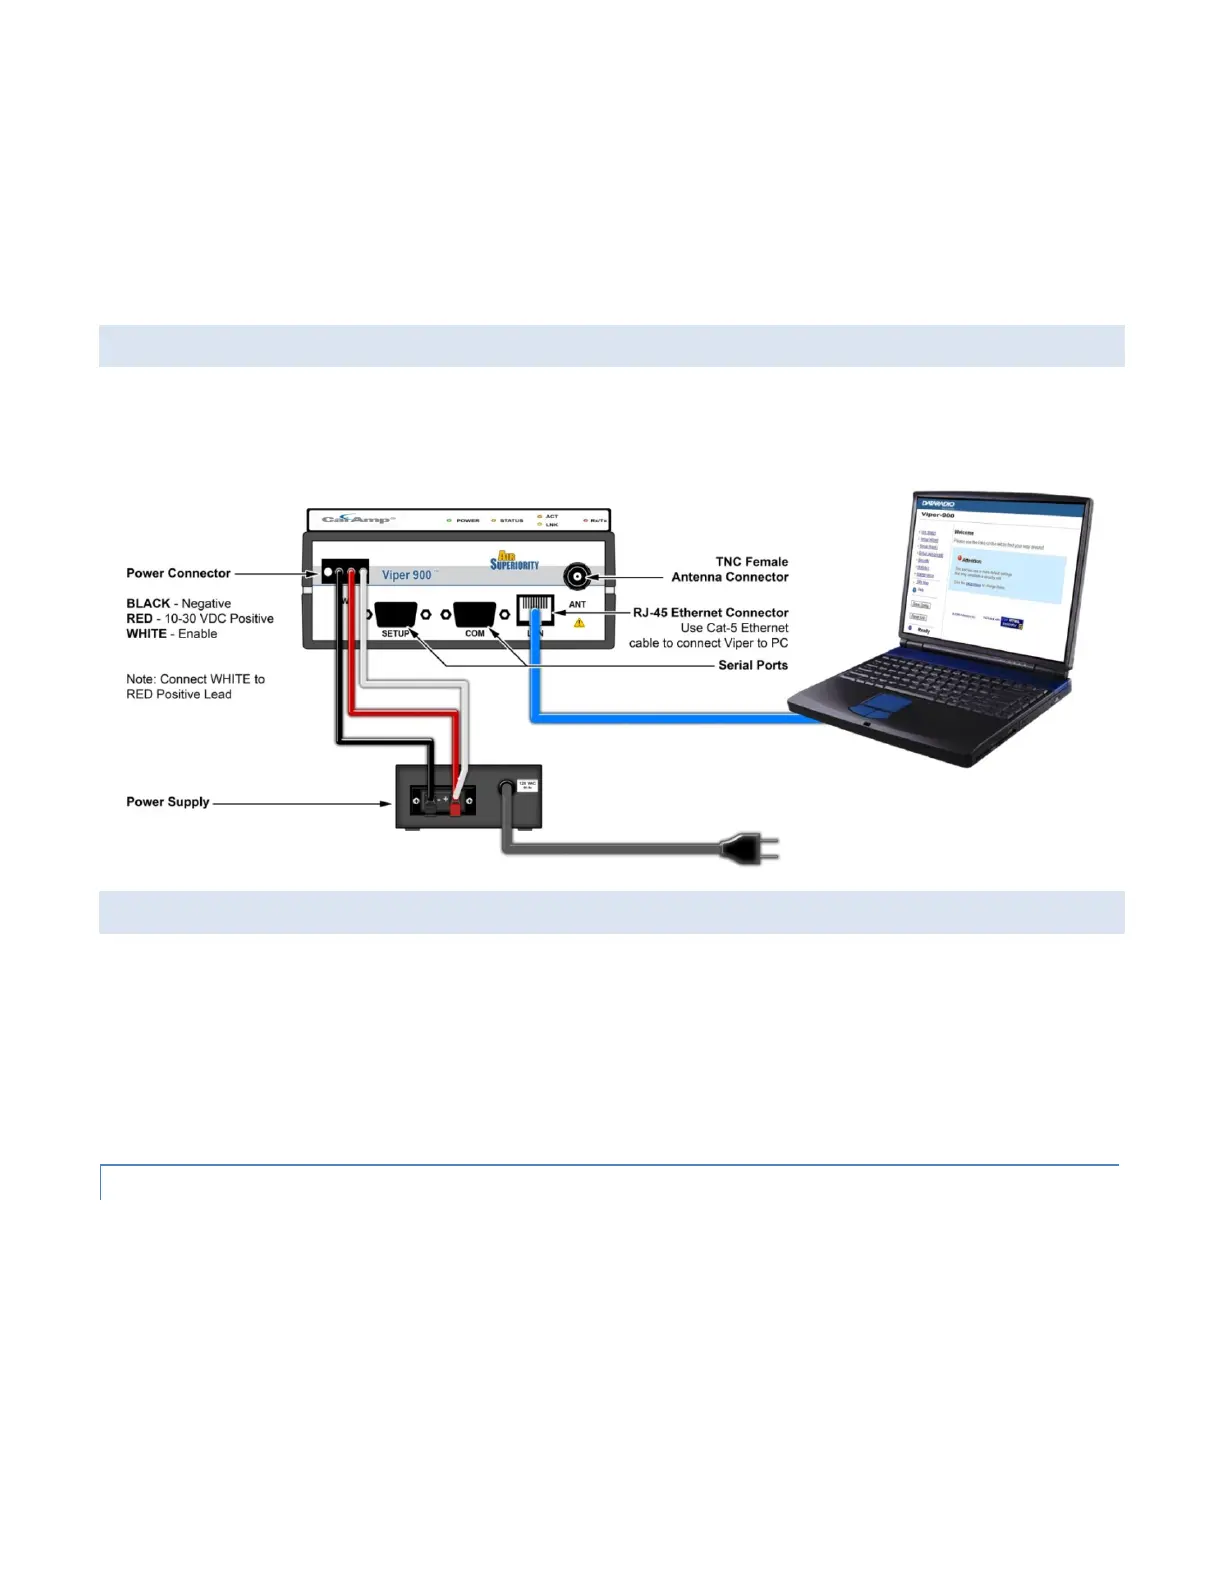
Viper Demo Kits contain a power connector with screw-terminals. Observe proper polarity when connecting the cables to
the Power Supply. The white wire must be connected to red wire.
3.4 CONNECT VIPER SC TO PROGRAMMING PC
Connect a PC’s Ethernet port to the LAN port using a CAT 5 Ethernet cable. Wait for the LINK LED to glow green.
3.5 CONFIGURE YOUR VIPER
Viper must be configured using the Setup Wizard. This quick start will use the Setup Wizard to configure your Viper for
bridge mode operation.
For other configuration options:
Refer to Section 4.3 for Basic Setup
Refer to Section 4.4 for Advanced Setup.
3.5.1 INITIAL INSTALLATION LOGIN
On your Internet browser address line, type the factory-default IP address: 192.168.205.1. Press Enter to open the Network
Password screen.
For initial installation, enter a User Name and the default password.
User Name: 1 to 15 characters
Default Password: ADMINISTRATOR. Password is case sensitive.
Click OK. The web interface WELCOME screen opens.
 Loading...