#9 Viper_SC_Manual_001-5008-000_Rev12e.docx | Page 33
4.3.2 IP SETTINGS
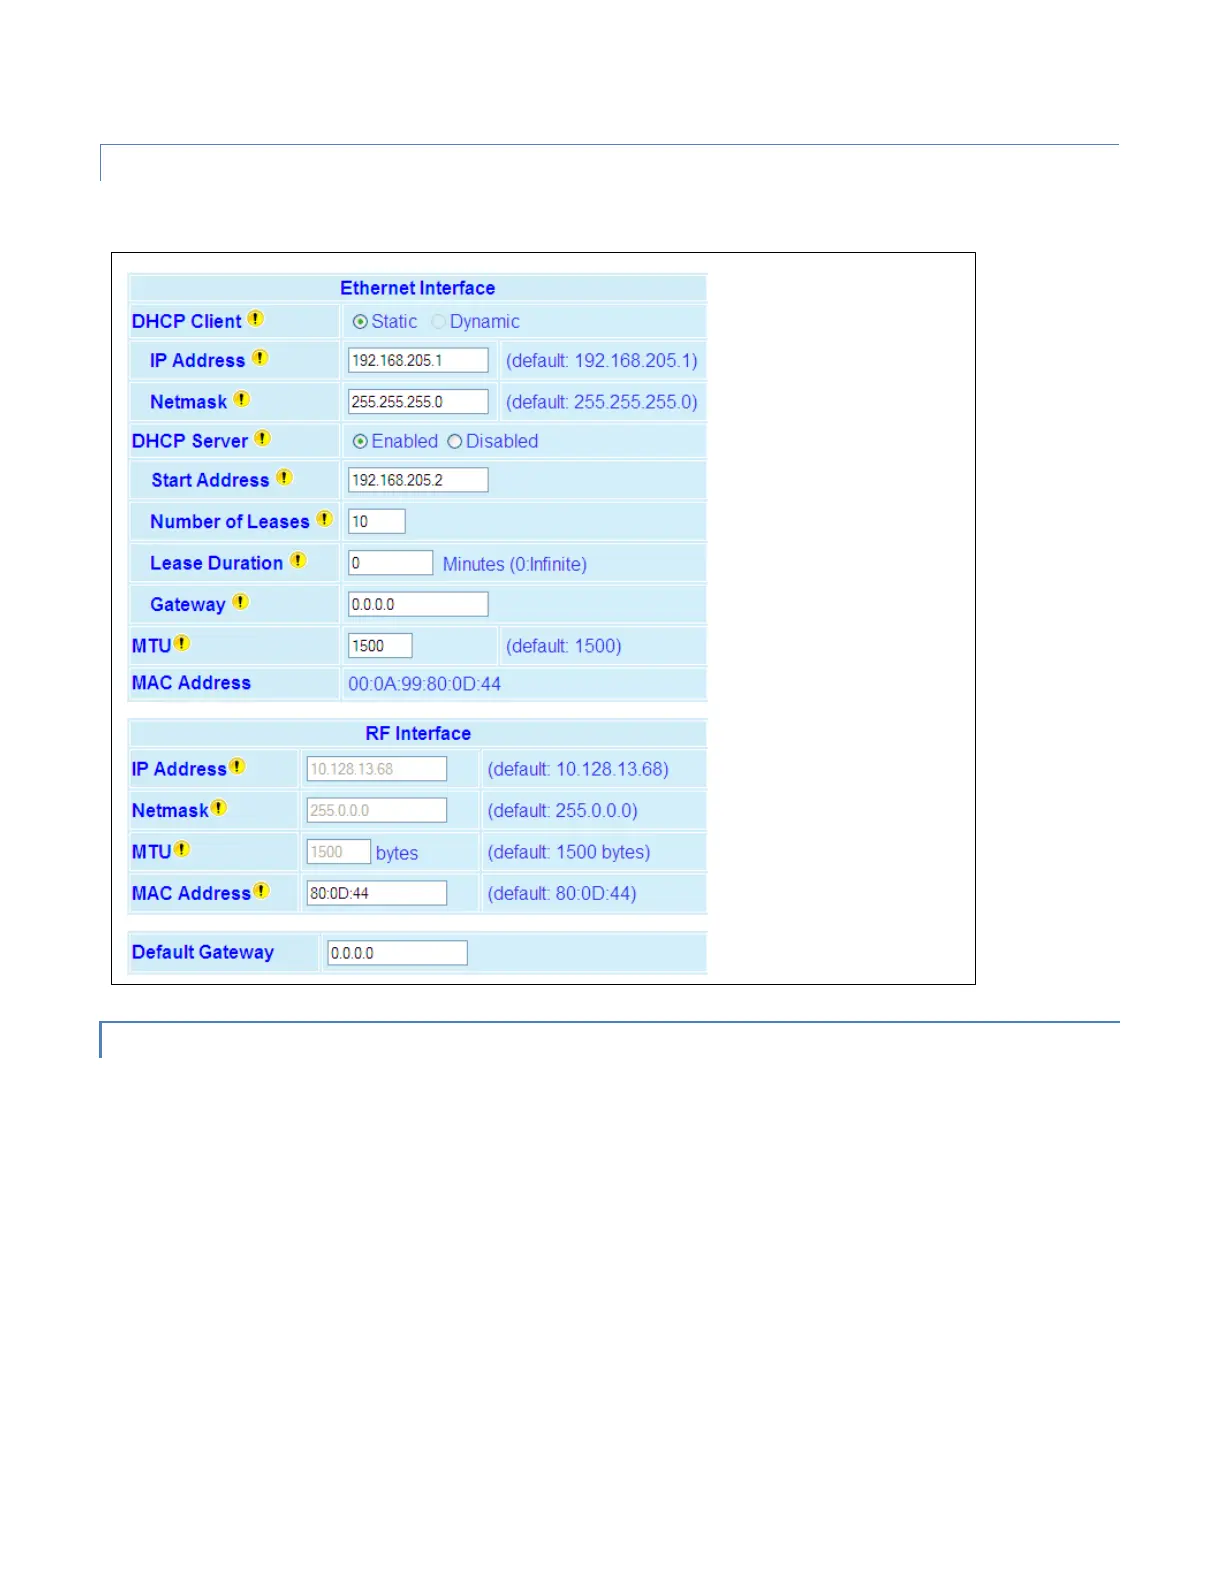
Figure 22 – Setup(Basic)IP Settings
4.3.2.1 ETHERNET INTERFACE
― DHCP Client. Select Static/Dynamic. Default = Static. Select Static to enable user entry of IP address of the unit. Select
Dynamic to set the unit to be a DHCP client, which will allow the unit to accept an IP address from an external DHCP
server. Activating this option will reset the IP address of the unit. If your network supports the DHCP Server capability,
make sure the IP address assigned by the DHCP server will be accessible to you. If your network does not support DHCP
server capability, the unit will be reset to the default (192.168.205.1) IP address.
― IP Address. Default = 192.168.205.1). Set a valid unique IP address and Netmask. (Default = 255.255.255.0). for each
Viper in the network. In Bridge mode, all the Viper SCs must be configured for the same IP subnet; in Router mode,
each Viper SC must be configured for a unique subnet.
― DHCP (Dynamic Host Configuration Protocol) Server. Select Enabled/Disabled. Default = Enabled. DHCP provides a
framework for passing configuration information. E.g.: Assigns IP address to Hosts (i.e. PC/RTU) on a TCP/IP network.
Requires Start Address, Number of Leases, Lease Duration (in minutes, where 0=Infinite), and Gateway.
 Loading...