Adjusting the Feed Amount Automatica
lly
If printed images are affected by banding in different colors, adjust the amount that paper
is fed. There are two modes for adjusting the amount paper is fed, Standard Adj. and
Advanced A dj.Advanced Adj. offe
rs a wider range of adjustment than Standard Adj.
If using Standard Adj. does not elim inate streaks, or if streaks are quite noticeable, try
Advanced Adj.
Follow the steps below for standard automatic adjustment of the feed amou nt.
When usin g highly transparent media for which automatic adjustment is not supported, you
must adjust the feed amount manually. (→"Adjusting the Feed Amount Manu a lly," User
Manual)
Note
•
To adjust the measurement scale and ensure accuracy (so that lines in CAD draw ings are
printed a t exactly the right len gth , for example), specify th e amount of paper stretching
or shrinkage when adjusting the feed amount. (→"Adjusting the M easurement S cale for
Better Accuracy," User Manual)
Follow the steps below to a djust the feed amou nt automatically.
1
Prepare one unused sheet A4/Letter-sized or larger when Standard Adj. is selected
or two when Advanced Adj. is selected (or one when using a sheet A2-sized or
larger).
When using a roll, load a roll 10 inches (254 mm) or wider.
Note
•
Always make sure the loaded paper matches the media type setting. Adjustment
cannot be completed correctly unless the setting value matches the loaded paper.
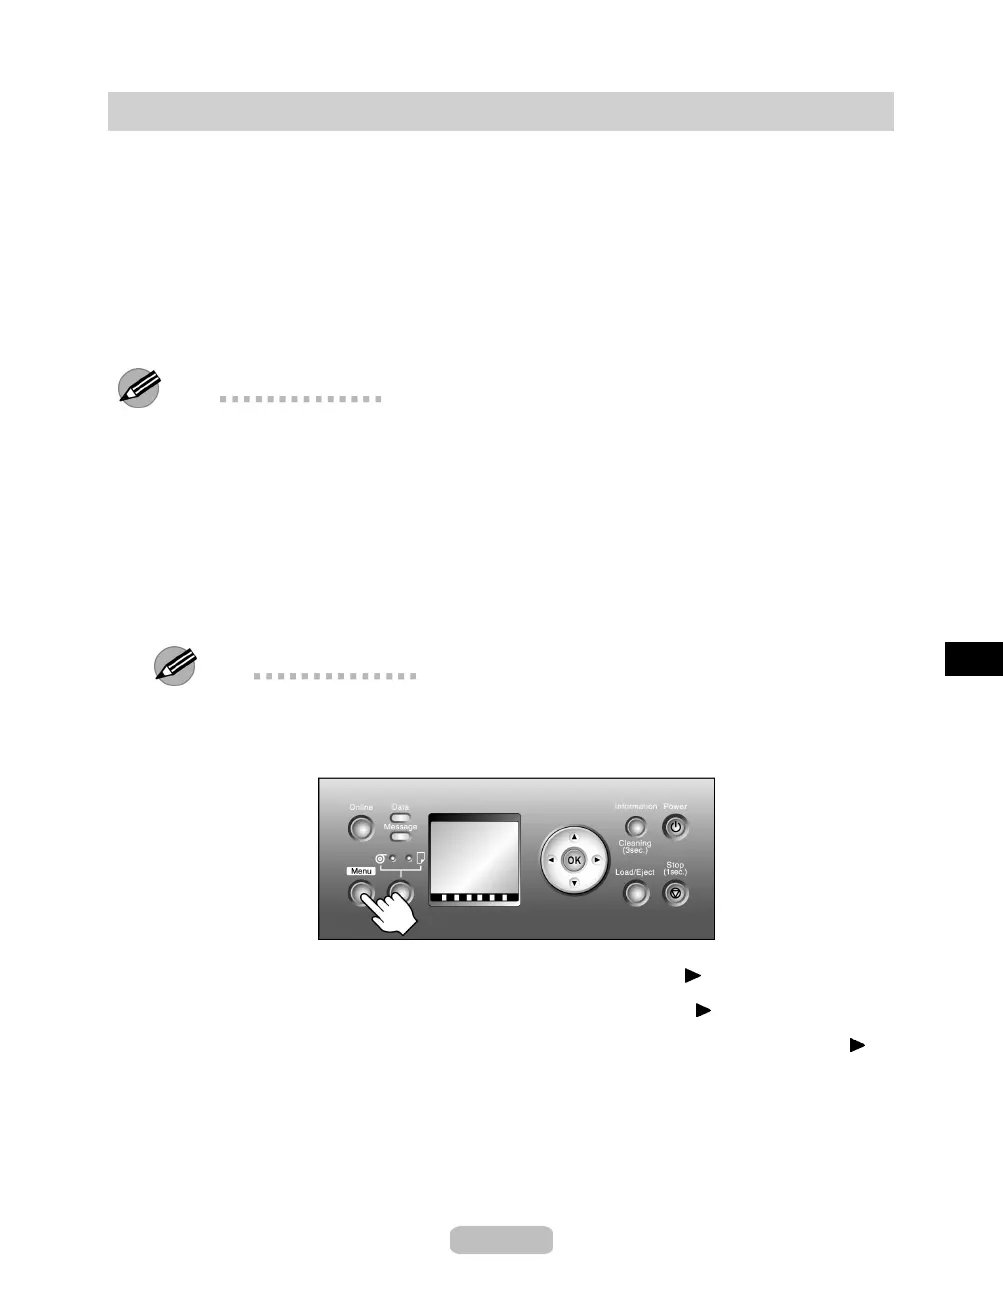
2
Press the Menu buttontodisplayMAIN MENU.
3
Press ▲ or ▼ to select Adjust Printer, and then press the button.
4
Press ▲ or ▼ to select Auto Band Adj., and then press the button.
5
Press ▲ or ▼ to select Standard Adj. or Advanced Adj., and then press the
button.
6
Press ▲ or ▼ to select Ye s , and then press the OK button.
A test pattern is printed for band adjustment.
After reading the pattern, the printer automatically adjusts the feed amount and
returns to online mode.
47